Building a working Robot controlled by a C#, an iPhone, and Monkey.Robotics
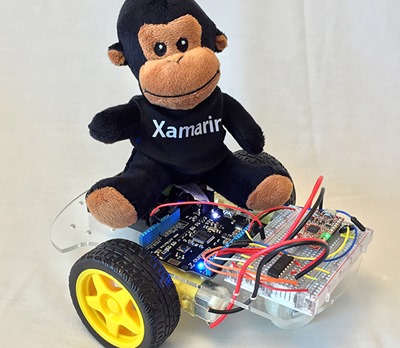
 This year at Xamarin's Evolve there was a Robot Building area that introduced a new beta platform called Monkey.Robotics (GitHub). There is a disclaimer on the GitHub: "Monkey.Robotics is still a beta/work in progress and is not officially supported by Xamarin" but I can say that I was able to successfully build this robot with my 6 year old and we've had a blast driving it around the house! He was thrilled to solder (but not too much) and setup all the wires on the breadboard.
This robot is a great showcase for the larger Monkey.Robotics stack PLUS a great way to learn how to use Xamarin tools AND the .NET Micro Framework. And the end you'll have not just a robot with code running on a Netduino, but also have deployed C# code using Xamarin onto (in my case) an iPhone.
The resulting stuff you get to build and use are:
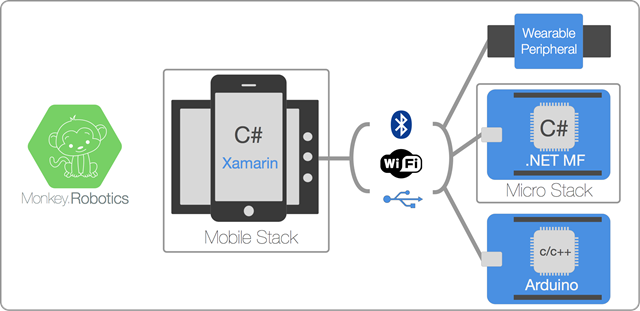
- iPhone/Android app using Xamarin.Forms and controls or a gyroscope talking over your phone's Bluetooth radio to some code running on an...
- Netduino running the open source .NET Micro Framework. This Netduino will receive communications via a Bluetooth radio on a chip. This BT LE board is connected to the GPIO (general purpose input output) pins on the Netduino. The board then controls...
- Motors and wheels on a nice base, powered by 4 AA batteries.
The authors are some of my favorite people, including Bryan Costanich, Frank Krueger, Craig Dunn, David Karlas, and Oleg Rakhmatulin.
There's a deceptively large amount of code here and it's whole job is to hide the yucky parts of a project that connects mobile devices to wearables, sensors, peripherals, and low-level communication. They include a cross-platform API for talking with BLE (Bluetooth Low-Energy) devices, as well as the beginnings of a similar API over Wifi. Even more important is a higher level messaging framework sitting on top of these lower=level APIs. The net result is that talking Bluetooth between your phone and a device isn't very hard.
On the device side (in my case with .NET Micro Framework) they make things more compose-able with "blocks and scopes" style abstractions, allowing one to fairly easily connect output pins (LEDs, motors) to input pins (buttons, sensors).
Here is one of their basic examples. This makes an LED blink when a button is pressed.
public class Program
{
    static H.Cpu.Pin buttonHardware = Pins.ONBOARD_BTN;
    static H.Cpu.Pin ledHardware = Pins.ONBOARD_LED;

    public static void Main()
    {
        var button = new DigitalInputPin (buttonHardware);
        var led = new DigitalOutputPin (ledHardware);

        button.Output.ConnectTo (led.Input);

        // keep the program alive
        while (true) {
            System.Threading.Thread.Sleep (1000);
        }
    }
}
I went through the very excellent Project Walkthrough on building a Robot. Note that all this is on GitHub so if you have any issues, you can fix them and submit a pull request. I'm sure the project would appreciate it!

Here's what you need to buy/or have (I took from their GitHub site) if you want to build this same robot.
- bot Chassis w/Motors - Just about any 2 wheeled robot chassis with motors and gears will work, but we like these. They're only $11 and they work well. Spark Fun also makes a similar robot chassis for $15, but the battery holder is difficult to access, otherwise, it's also very nice.
- Netduino 2 - From Secret Labs, the Netduino is a programmable micro controller that runs the .NET Micro Framework.
- BLE Mini - From Redbear Labs. Used to communicate with the robot from Xamarin.iOS and Xamarin.Android.
- 400 Point Breadboard - The breadboard is where our electronics will all get connected. It has holes in it to put chips, sensors, wires, etc., into.
- Breadboard Wiring Kit - Any wiring kit will work, but we especially like these. You may also want to get some male-to-male flexible jumper wires.
- Dual H-Bridge Chip - Used to power the motors, H-bridges are simple chips that allow you to control motors with external power, so you don't burn out your Netduino trying to drive them with that. :) You can also build an H-bridge with some simple components, but buying a chip is easier and will likely cost about the same.
- iOS or Android Device w/BLE Support - If using an iOS device, you'll need an iPhone 4 or later. If using an Android Device, you'll want to make sure that it has BLE support and is running at least Android v4.3.
Make sure you have you development and build environment setup, and then follow the guides below to get this thing up and running!
- Step 1 - Assemble the Robot Chassis
- Step 2 - Wire up the Robot
- Step 3 - Deploy the Robot Code
- Step 4 - Drive the Robot!
Basically you'll need Xamarin Studio or Visual Studio with Xamarin Tools. You'll also need the .NET Micro Framework bits, which are free for Visual Studio 2013, as well as the Netduino 4.3.1 SDK. There's a thread over at the Netduino Forums if you have trouble getting your device ready. I had no issues at all.
The Robot code is in a larger solution called Robotroller that's pretty nicely factored. You've got the Core functionality for the phone and the Core for the Robot.
The Phone code makes great use of databinding. The Car code is a little messy (it's beta and looks like Tests that turned into a working Robot! ) but it worked out of the box! It's surprisingly simple, in fact, due to the next abstraction layer provided by Monkey.Robotics.
How cool is this. That's basically it. Love it.
public class TestRCCar
{
    public static void Run ()
    {
        // initialize the serial port for COM1 (using D0 & D1)
        // initialize the serial port for COM3 (using D7 & D8)
        var serialPort = new SerialPort (SerialPorts.COM3, 57600, Parity.None, 8, StopBits.One);
        serialPort.Open ();
        var server = new ControlServer (serialPort);

        // Just some diagnostic stuff
        var uptimeVar = server.RegisterVariable ("Uptime (s)", 0);

        var lv = false;
        var led = new Microsoft.SPOT.Hardware.OutputPort (Pins.ONBOARD_LED, lv);

        // Make the robot
        var leftMotor = HBridgeMotor.CreateForNetduino (PWMChannels.PWM_PIN_D3, Pins.GPIO_PIN_D1, Pins.GPIO_PIN_D2);
        var rightMotor = HBridgeMotor.CreateForNetduino (PWMChannels.PWM_PIN_D6, Pins.GPIO_PIN_D4, Pins.GPIO_PIN_D5);

        var robot = new TwoWheeledRobot (leftMotor, rightMotor);

        // Expose some variables to control it
        robot.SpeedInput.ConnectTo (server, writeable: true, name: "Speed");
        robot.DirectionInput.ConnectTo (server, writeable: true, name: "Turn");

        leftMotor.SpeedInput.ConnectTo (server);
        rightMotor.SpeedInput.ConnectTo (server);

        // Show diagnostics
        for (var i = 0; true; i++) {
            uptimeVar.Value = i;

            led.Write (lv);
            lv = !lv;
            Thread.Sleep (1000);
        }
    }
}
Here's a video (don't play it too loud, my kids are yelling in the background) of me controlling the robot using my iPhone. Note I'm using the gyroscope control so I twist my hand to steer.
All in all, I'm enjoying Monkey.Robotics and I hope it takes off with more projects, more ideas, more things to build. If you've got interest or expertise in this area, go star their project and get involved! There's a LOT of stuff going on over there, so explore all the docs and diagrams.
Sponsor: Big thanks to my friends at Octopus Deploy. They are the deployment secret that everyone is talking about. Using NuGet and powerful conventions, Octopus Deploy makes it easy to automate releases of ASP.NET applications and Windows Services. Say goodbye to remote desktop and start automating today!
About Scott
Scott Hanselman is a former professor, former Chief Architect in finance, now speaker, consultant, father, diabetic, and Microsoft employee. He is a failed stand-up comic, a cornrower, and a book author.
About Newsletter
Thanks Scott!!
I now want my own money robot, I'll have to get to it!
I wish MSFT/Xamarin could strike a deal to include it in Ultimate.
Still love .Net on my netduino though.
I live in VS all day and love it...no integration at the $25 mark is a deal breaker for me.
For reference, the robot board is from GHI Electronics. The code in Safari is being served by the robot and client-side Javascript runs the whole thing.
My boy has a Windows phone, he likes this kind of stuff, but I'd like a clue before I surprise him with stuff he cannot use!
I have been meaning to do a robotics project with my 13 year old and this seems like an easy and fun path to get going.
I just ordered the parts. I think we will have a lot of fun with this project.
Thanks And appreciate your post.
regards,
Atul
Was written in Python and C++ (Sigh Netduino had not been invented yet)
Oh the bliss of Embedded Systems programming and robotics - you almost instantly feel connected to it as if it was your own kid. You can feel it being ALIVE! The feeling's always of *WOW*
Comments are closed.
