The Importance of the LED Moment - I DID THAT
Last March my friend Saron and I created MarchIsForMakers.com and spent the whole month creating and learning with hardware.
It's March again! We're going to spend the whole month of March adding to http://www.marchisformakers.com.
If you want to support our project, make sure you tell teachers, schools, family and friends about us, and tweet with the hashtag #marchisformakers.
Here's some of the highlights of this fantastic project from March of 2015. You can get ALL the content on our site, so bookmark and visit often.
- Podcast: Coding Printers with Kate Donahue
- Blog: Everything You Ever Wanted to Know About Arduino and Raspberry Pi with Julian Feliciano
- Podcast: Learning Robots with Dr. Ayanna Howard of Zyrobotics with Dr. Ayanna Howard
- YouTube: 3D Printing For Beginners with Saron and Scott
- Podcast: Intro To Raspberry Pi with Matt Richardson
- Podcast: Enclosures for your DIY hardware projects with Bertrand Le Roy
- Blog: Arduino 101 - Blood Sugar, an LCD, and an Intel Edison with Scott Hanselman
- Podcast: 3D Printing with Printrbot with Brook Drumm
- YouTube: Raspberry Pi 101 - LIVE Hangout with Saron and Scott
Getting Started
You may have heard of Raspberry Pis and Arduinos, and perhaps considered doing a little tinkering, either with the children in your life or on your own? Where do you start?
What's "Hello World" in the world of hardware? It's making an LED light up!
I optimize my workflow for lots of tiny victories.
There's a moment when your tinkering. Getting that first program to compile or that first light to light up. Saron and I call it the LED Moment. When you are teaching a kid (a 100 year old kid or a little kid) how to successfully control an LED they'll light up..."I DID THAT." I pushed a button or ran a program or just plug it into a battery. There's a moment when a person see they can take control of the physical word, harness electricity, combine hardware and software and TURN A FREAKING LIGHT ON. That's the moment we are going for. Let's do it.
Arduino and an LED
Check out the article on CodeNewbies about Raspberry Pis and Arduinos by Julian. Arduinos are inexpensive and open source microcontrollers that are VERY affordable. I've got 4 or 5 around the house!
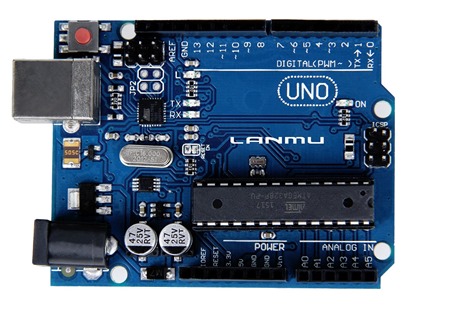
You'll want an Arduino UNO to start with. They are about $20 on Amazon but they don't include a USB cable (perhaps you have one) or an optional power supply. If you're planning on tinkering you might consider getting a "Super Starter Kit" or a Starter Kit WITH the Arduino that has all sorts of fun stuff like buttons and cables and fans and resistors.
For our little LED project you'll just want:
- The Arduino Uno
- an LED
- a 220 Ohm Resistor
Ask around, you may have friends with these in their junk drawers so don't spend money unnecessarily.
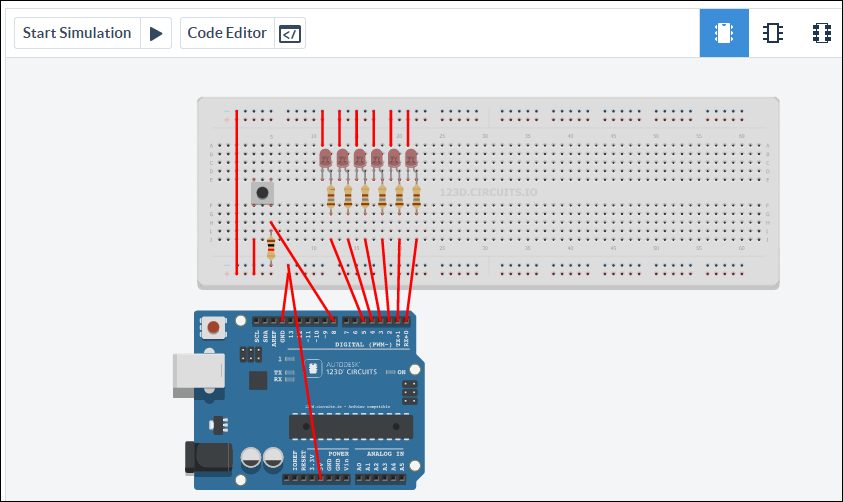
Don't have an Arduino or can't get one? Fear not, you can simulate one in your browser for free! Check out http://123d.circuits.io/
Ok, if you have a physical Arduino, go download the free Arduino Software for WIndows, Mac or Linux.
Different Boards
There are a number of different flavors of Arduino boards. Lots, in fact! Since it's an open source hardware spec anyone can make one and add their own special sauce. Here is just a few of the dozens of boards.
- Arduino Uno - Arguably the most popular introductory model. It connects via USB and looks like a standard COM port to your computer. No wi-fi, no ethernet, although you can get an "Arduino Shield" add-on board that snaps on top to extend it to do most anything.
- Arduino Yun - A fancy Arduino with a micro-SD slot, Wi-Fi, Ethernet, and more. It even supports an OpenWRT Linux called Linino.
- Intel's Arduino 101 Kit - This board is an Arduino from Intel that adds Bluetooth Low Energy AND a 6 axis Accelerometer.
I have an Intel board with me today, so I need to tell the Arduino Software about it by downloading an "Arduino Core." You'll want to tell the software which board YOU are using.
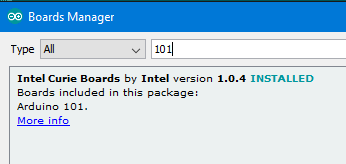
I go Tools | Boards | Board Manager and search for "Intel" and install it. This tells the Arduino Software what it needs to know for my board to act right.

Plug the board in using a USB cable and make sure that you've selected the right board and the right port in your Arduino software.
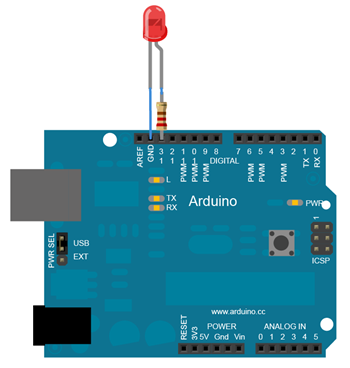
I'm going to take my LED and put the short leg - that's the negative leg - into Arduino's GND, or Ground. Then I take the long or positive leg of the LED and connect it to the resistor, then put the resistor into the Arduino's pin 13. We are going to control that pin with software we write!

We are going to pulse the LED by turning pin 13 HIGH, waiting a second, then going low. Like this, within the Arduino Software:
void setup() {
  pinMode(13, OUTPUT);
}

void loop() {
  digitalWrite(13, HIGH);   // turn LED on (HIGH voltage)
  delay(1000);              // wait a second
  digitalWrite(13, LOW);    // turn LED off by making voltage LOW
  delay(1000);              // wait a second
}
Press Upload and my little Arduino Sketch is sent to my board and starts running! And here it is!
Again, every board is different. In my case, my Intel Arduino 101 board also has that gyroscope/accelerometer built in. I'll try playing with that soon!
What are you going to make this Month?
About Scott
Scott Hanselman is a former professor, former Chief Architect in finance, now speaker, consultant, father, diabetic, and Microsoft employee. He is a failed stand-up comic, a cornrower, and a book author.
About Newsletter
See this article on SE: http://arduino.stackexchange.com/questions/11824/difference-between-arduino-cc-and-arduino-org or http://makezine.com/2015/03/19/massimo-banzi-fighting-for-arduino/
Also, just look at the price for STM32 Nucleo boards - very attractive for bigger projects.
It's a weird and powerful experience -- going from the software world to control and monitoring of the physical world.
void setup() { Serial.begin(9600); }
void loop() { Serial.println(someSensorValue); };
of topic,
this is so cool, but where do you find time to embrace all of that?
It IS still the Hello World of embedded development though! Sure is a lot easier to get started - and with vastly better tools - today than it was 40 years ago!
I found getting an LED to turn on as exciting as the first time I drew lines on the screen in all 8 colours :)
My background is in programming business software and I always thought electronics would be tricky out of ignorance really. It turns out though that most things work together easily with common protocols and voltages and there are a lot of examples to get you started.
Once the LED glows you get hooked on it. Then start wiring up motors, sensors and other things. Its like programming a computer but interacting with the real world instead of just a screen.
This month so far I've finally finished an antenna ground system for the office/radio shack complete with lightning arrestor. (9 ground rods and 100' of #4 wire.) Also programming radios for local VHF/UHF repeaters, simplex and other services.
I'm planning an ADS-B data receiver using the Raspberry Pi and an RTL-SDR USB receiver. Means building another antenna, maybe a preamp and a little coding. https://flightaware.com/adsb/piaware/build
Plus building a go-kit for HF amateur radio operation. Maybe a remote dog shusher.
On the other hand im planning and partly already built a carrera-track control system (them little carerra cars^^) containing all parts like round-tracking, a big multi-7-segment-lcd display with housing for output and a controlbox with a small display and knobs to control max-speed of every track (to slow down the fullspeed looking away kinda guys) and turn on different play modes like 5-round-race or best-lap in 3 minutes.
Which one is u r favorite and recommended?
If you look at ATTiny85, ATTiny2313 or similar chip they can often be used as an alternative. These are largely compatible with Arduino code and can even be programmed from one. We are talking $1-2 price range for these chips and if you can achieve sleep mode in your loop you can power it for years on a coin cell.
Comments are closed.


It's fun