Building your own Arcade Cabinet for Geeks - Part 1 - The Cabinet
This is the first part of a multi-part series I'm going to do about assembling an Arcade Cabinet for my house. This series has two disclaimers:
Software Disclaimer 1: There's all sorts of legal issues around emulating arcade games. This series of posts has nothing to do with that. I do own some original arcade boards, but if you want to emulate arcade games with MAME (Multiple Arcade Machine Emulator), you can search the 'tubes. What I'm doing here is putting a computer in a pretty box.
Hardware Disclaimer 2: Many folks that build arcade cabinets have a purist view of how these things should be done. They will prefer original Arcade CRT monitors and more expensive, higher quality parts. I am more of a pragmatist. I also have no idea what I'm doing, so I've also got ignorance on my side.
The Point
I have always wanted an Arcade at home. I spent hours wasting nickels, then quarters, then nickels again, at the local arcade. Who wouldn't want one in their house? Well, our spouses, but that's another post.
First step, build or buy? How to start the "Hanselcade?"
The Goal
I decided a few things early on from talking to folks (and you should decide for yourself, also):
- I wasn't going to build my own cabinet from scratch. I have no wood-working skills, and I was concerned it wouldn't feel "stock" - like a real cabinet. It would look like a wood box with joysticks taped to it, like some that I've seen.
- I am cheap. One can spend thousands and purchase a complete super-custom cabinet, but that's a little over the top for me.
- I wasn't going to build the greatest/largest/most versatile cabinet. I like the look of a single-purpose normal size cabinet, so I decided against any controls other than joysticks. No trackball, spinners, etc.
- I may want to put an XBox, PS2/3, or other things in the cabinet also. Again, my goal was "a computer in an arcade box" that can play not just arcade games, but also Doom, or whatever. You can buy boards that have some large number of games already installed as well.
The Cabinet
You can build your own Arcade Cabinet using Cabinet Plans and your own wood. There's a lot of free plans and pay plan on the web. Personally, I find most of these plans to be to large and too tall. You have to ask yourself if you want a 2-player or 4 player system. Most of the 4-player ones are VERY large. Additionally, the control panels for those can be extremely wide, especially if you are making a panel that includes not just joysticks, but also trackballs and spinners. You can also buy the kit and assemble it later.
Instead, I decided, along with my friend/helper on this project John Batdorf to start with a REAL antique (wow, I'm old) arcade cabinet, and strip it down. I would compare this decision to refurbishing an antique car, rather than building a kit car.
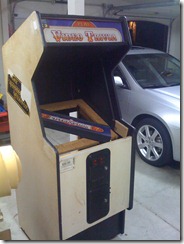
I spent a few weeks searching Craigslist for terms like "MAME" and "Arcade" and found a local guy who had a very old "Video Trivia" game I'd never heard of. Most importantly it didn't work. Always buy ones that don't work and you'll get them cheaper.
Cost: US$100
Cost So Far: US$100
It wasn't much to look at, but it was physically solid. It came with an old CRT, but I accidentally broke it (it hissed air at me) and recycled it. I wasn't planning on using a CRT anyway, as they are not only high-voltage, but also unspeakably heavy.
Aside: This is where I differ from many. While some like the CRT look and authentic feel, I think a high-res LCD is more versatile and soon there will be real-time filters that, if you like, will make your crisp LCD look like an old CRT.
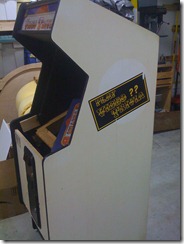
 Notice the control panel sitting diagonally in that picture .This is one of the reasons I picked this cabinet. The Video Trivia game had only 5 buttons. No joysticks. As such, the control panel was almost all hole-free steel. In fact, this control panel is as solid as any piece of metal I've ever seen. I planned on using this panel to host my joysticks.
The cabinet also had lot of wires inside that I could piggy back other things on like getting the coin doors working, lights, etc. It was structurally sound, had no bugs living it it, and I could visualize it painted and finished.
Sounds silly, but being able to take an antique and visualize it completed is a big part of picking the right one.
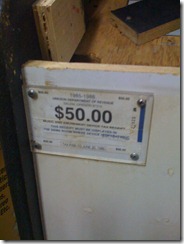
The image at right is of the Oregon State "Music and Amusement Device Tax Receipt." Basically a license to have these. It's from 1985. I don't need a license now, but I like the nostalgic feel of this, so I'm going to keep it.
The Power
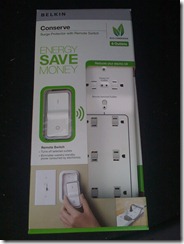 I have seen lots of cabinets online created by people who actually know and understand electricity. They come up with a lot of cool and clever ways to mount switches in new places in the cabinet. Since we're putting a computer in there, there will be a power need for a few things.
My electrical skills are limited to amps, volts, ohms, positive and negative. Using these superpowers and a dude from Home Depot, I found this little gem.
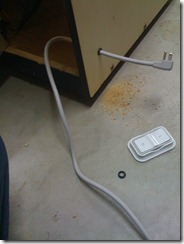
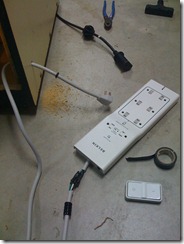
It's a "Belkin Conserve" Energy Strip. In English, it's a power strip with a remote. Bam!
Cost: US$30Cost So Far: US$130
This was perfect. I drilled a 3/8" hole in the cabinet and snipped the cable in two (while unplugged, ahem.) I put the cable through the hole and spliced the cable back together with some wire connector/splicer dealies I got at Radio Shack for a buck.
Cost: US$1
Cost So Far: US$131
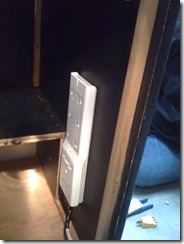
Then using the wall mount on the Belkin, I mounted the power strip on the inside of the cabinet.
The remote control uses a single battery and comes with a holster with sticky tape. That'll go on the top of the cabinet. This was the cheapest and most creative (and clever, I thought) way to make this a "single power button" cabinet.
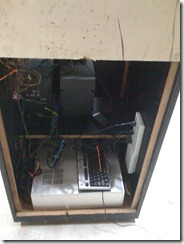
Then I temporarily shoved everything in there to see if it would fit. Probably should have done that first. ;)
Next Up: Mounting the Monitor
- Cabinet and Power
- Monitor and Mounting
- Control Panel
- Sound and Lights
- Paint and Art
- Computer Hardware and Software
- Success and Conclusion
About Scott
Scott Hanselman is a former professor, former Chief Architect in finance, now speaker, consultant, father, diabetic, and Microsoft employee. He is a failed stand-up comic, a cornrower, and a book author.
About Newsletter
Can't agree more that the 1985 Tax permit adds an unspeakably authentic quality to it. This is going to rock!
The actual cabinet is like 7/8" LDF (Low Density Fiberboard) it's HEAVY. And strong. And there's TONS of room inside the thing.
Cabinet:
A coworker used to write software for the ATARI Jaguar (lulz). He had an old Ateroids Deluxe Cabinet he was willing to part with. I gutted it during a lunch break at work. Another coworker (and frequent reader) helped me lug the cabinet it into my mom's minivan.
Control Panel:
Easily the most important part of the arcade. Never mind the monitor, or the speed of the computer. the control panel makes / breaks the whole system. I think I went through 12 revisions on cardboard cutouts before I could comfortably fit two players side by side. I printed my blue prints from PDF and took them to work so I could get input from different people with different hand sizes.
Software:
I run Maximus Arcade software. It works pretty well, and I like paying people for software so they can take my money and buy more hair gel.
Additions:
I also turned it into a ghetto NAS - 4 TBs!
Stu - Pics? Links?
Thanks anyway
Comments are closed.

One question though, how did you dealt with the issue of heating? Won't having a lot of computer in there (and specially that heat producing beast also known as xbox) generate enough heat to bend or damage the box?
Congrats, and keep the updates coming!