CSI: Re-enabling Remote Desktop with PowerShell after you've blocked it with your own firewall rule
Got a great email from reader Seán McDonnell.
The Big Problem:
I set up an Azure virtual machine running Windows Server 2012.
I accidentally disabled the Remote Desktop Windows firewall rule (while I was remotely connected). The connection dropped as you would expect.
I have been pulling my hair out ever since trying to re-enable this rule.
Doh. Ouch. I didn't ask how this happened, but you know, one gets to clicking and typing and you can feel the mistake about to happen as your hand drops towards the keyboard, but by then it's too late. Gravity has screwed you.
I suggested that Seán use Remote Powershell to get in and add the enabling Firewall Rule for RDC. Remote PowerShell is like "SSH" in *nix. You get a remote terminal and can pretty much do whatever you want from there.
TL;DR version of Seán's experience.
- Make sure PowerShell is enabled in the Endpoints section of the Azure portal.
- Get the server's certificate (PowerShell needs this for remote commands). You can get the server certificate by going to your domains' URL:
https://yourdomain.cloudapp.net:12345(where :12345 is the port that PowerShell uses). - Export the SSL certificate of the site as a .CER file and install it on your local machine.
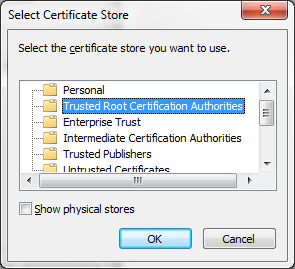
- Save it to the "Trusted Root Certification Authorities" store on your machine.
- Open PowerShell with administrative privileges on your local machine and type:
Enter-PSSession -ComputerName yourdomain.cloudapp.net -Port 5986 -Credential YourUserName -UseSSL - A login popup will appear, enter your VM's login credentials here.
- You will now be able to execute commands against the Azure VM. In Seán's case, he ran
netsh advfirewall firewall set rule group="remote desktop" new enable=Yes
and exited the PowerShell session and was able to remotely connect to my machine.
Long Detailed Version with Screenshots
Long version with screenshots:
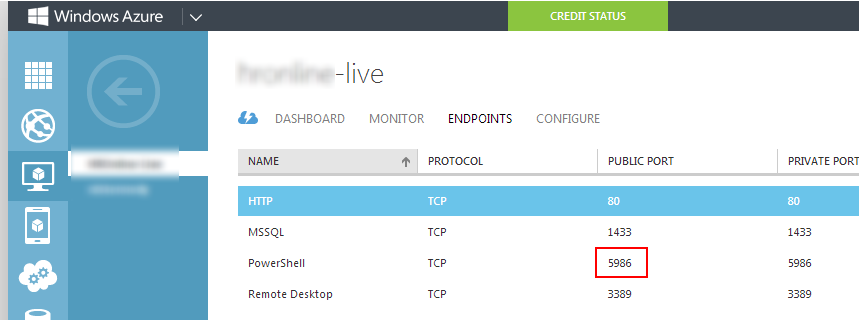
Make sure PowerShell is publically accessible in the 'endpoints' section of the Azure portal.
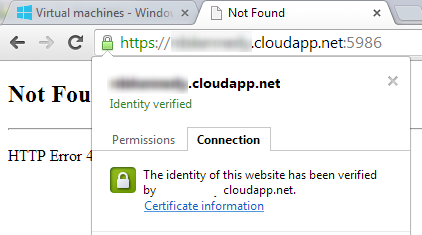
Get the server's certificate (PowerShell needs this for establishing a remote session). You can get the server certificate by going to your domains' URL: https://yourdomain.cloudapp.net:5986 (where :5986 is the port that PowerShell uses).
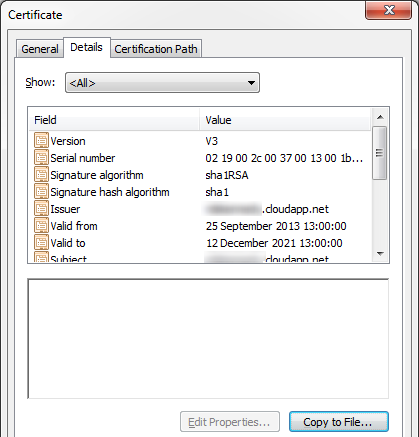
Go to the Details tab and click Copy to File...
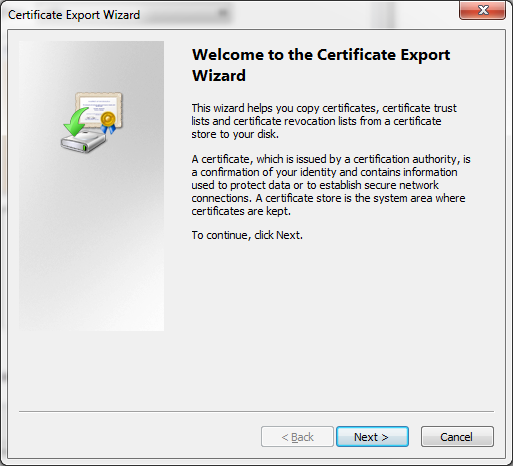
Leave the first option selected and save the file to a local drive.
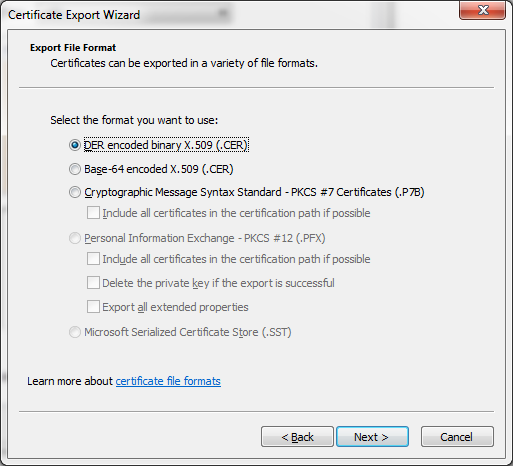
Once the file is generated and saved locally, install the certificate by double clicking on the certificate-name.cer file.
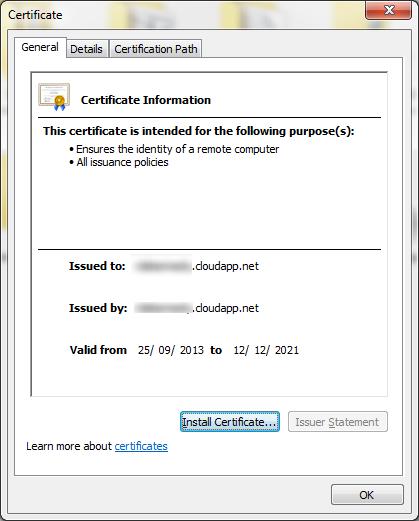
Install the certificate in the following store:
Open up PowerShell with administrative privileges and execute the following command (replacing the domain name and username with your own one):

A logon credential popup should appear where you will need to enter your VM's username and password:
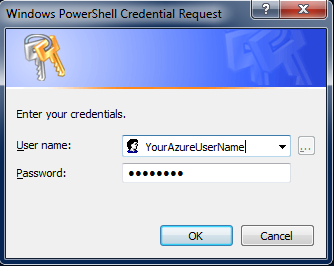
If successful, it should be pretty obvious that you have successfully initiated a remote session with the VM.
Enter-PSSession -ComputerName yourdomain.cloudapp.net -Port 5986 -Credential YourUserName -UseSSL
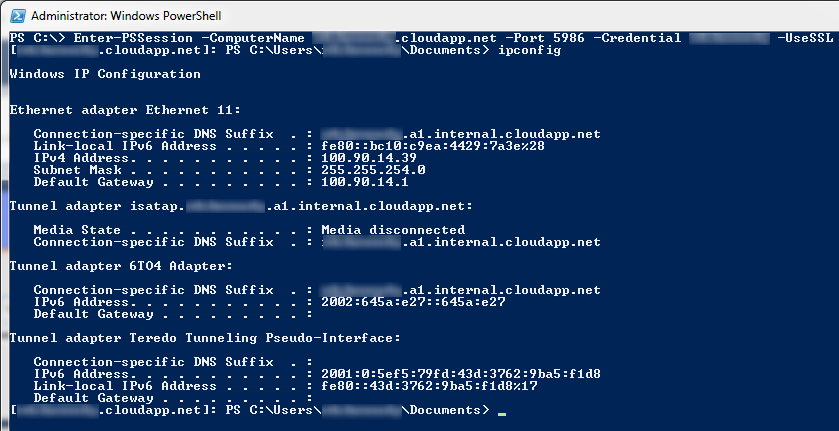
To open re-enable the firewall rule you issue the command:
netsh advfirewall firewall set rule group="remote desktop" new enable=Yes

The final step was to quit the PowerShell session and RDC to the VM. Success!
I hope this write-up helps other people as well. Thanks Seán for a great question and for sharing the screenshot of your experience!
Sponsor: Thanks to Red Gate for sponsoring the feed this week! Check out a simpler way to deploy with Red Gate’s Deployment Manager. It can deploy your .NET apps, services, and databases in a single, repeatable process. Get your free Starter edition now.
About Scott
Scott Hanselman is a former professor, former Chief Architect in finance, now speaker, consultant, father, diabetic, and Microsoft employee. He is a failed stand-up comic, a cornrower, and a book author.
About Newsletter
Now, what would have been different in this process if the VM didn't have Remote PowerShell enabled? In that situation, would this still be possible?
Thanks.
1. Stop the instance
2. Detach the EBS volume for the C: drive
3. Attach the EBS volume to a different EC2 instance
4. RDP into THAT instance and add the drive in Disk Manager
5. Remote mount the registry hive
6. Fiddle around turning off the Windows firewall, enabling RDP.
7. Detach hive
8. Detach drive in Windows
9. Detach EBS in EC2
10. Reattach EBS to original EC2 instance
11. Start EC2 instance, RDP in, fix everything more permanently
Ugh...
Comments are closed.
