Scott Hanselman

Upgrading the DakBoard Family Calendar with Raspberry Pi Zero W and Read Only filesystem
November 23, 2018 Comment on this post [10] Posted in Hardware | Open Source
Sponsored By

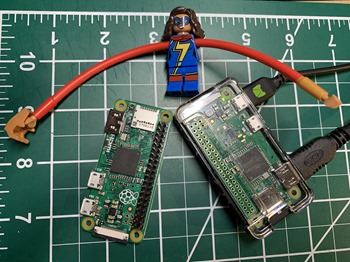
Raspberry Pi Zeros are SMALLEarlier this week I built a Family Calendar using a used flat screen monitor and a Raspberry Pi 3 I had lying around and documented it in my post How to build a Wall Mounted Family Calendar and Dashboard with a Raspberry Pi and cheap monitor.

Eric Brown added two great comments (the comments on my blog are always better than the content!) He said:

  • You can save power & money by using an Pi Zero W instead.
  • This is likely overkill, but I took the time to get the Pi Zero to mount the SD card read-only and do all the writes to a RAM disk.

Eric said "RPis are surprisingly sensitive to power glitches, and will often corrupt the SD card" and that "after mounting the SD read-only, my DakBoard has been running stably for months; before doing that, it corrupted the SD card within 6 weeks."

While I haven't had any issues with my Raspberry Pis, this seemed like a fun "version 2" of the calendar to make with the kids. Worst case scenario? Now I have LCD family calendars!

You'll recall I commented about how important the Spouse Acceptance Factor is whenever introducing new technology into the house.

It has to just work. If my Spouse doesn't like the idea or find its not reliable, the SAF (Spouse Acceptance Factor) will be low and they'll want to get rid of it. All it takes is one "why isn't this working" and I'm dead in the water.

I checked Amazon and found a number of Raspberry Pi Zero W (W is for Wireless, important!) Kits for around US$20. You can see in the picture above how SMALL a Raspberry Pi Zero W is (with LEGO Miss Marvel for scale).

Get the HDMI cables as flush an sanitary as possible

If you have the cables, power supplies, and don't need the headers and extra stuff, I've seen them as low as $10. It's very important to note that a Raspberry Pi Zero W does support HDMI but it has a MINI-HDMI female connector. You'll need a mini-HDMI to HDMI adapter or a mini-HDMI to HDMI short cable.

Here's another aside. Did you know there are a LOT of different HDMI connector orientations? Sure, you could just loop a big old 6 foot HDMI cable back there, but where's the fun in that? There are micro HDMI D1,D2,D3 that describe 90 degree and 270 degree rotations of the male. If you want to be really flush, consider a cable (for example like a C2 to A2) that is usually used in drones. This would allow you to mount the Pi Zero W flush against the back of the monitor - or even better, inside the monitor or a wooden picture frame!

Dakboard

Get the Raspberry Pi Zero W on your wireless and avoid the trouble of keyboards and mice!

Pi Zero Ws are so small that they don't have a regular USB connector. There is one for power and one that is "USB OTG." If you want to connect a mouse and keyboard directly to the Zero you'll need this USB OTG Micro to Type A Cable and/or a powered USB hub.

OR!

Save money and prep your Raspberry Pi Micro SD Card with SSH turned on by default and your Wireless Network enabled by default! Then you can set it up remotely as a DakBoard/MagicMirror Family Calendar.

  • Download the Image for Raspbian Stretch. You'll want the desktop version (not Lite) because this IS a visual project, not a headless one!
  • I recommend Etcher for burning images to SD Cards. It's free.
  • Raspberry Pi Zero W and a 1A+ micro USB power supply
  • Cheap micro SD Card. They should include an adapter to plug it into your main computer to prepare.
    • Create an empty file called "ssh" on the prepared Micro SD Card before you put the card in the Raspberry Pi
    • Make a file called wpa_supplicant.conf with Linux line feeds (LF, not the default Windows CR/LF) with content like this (and your own country code)
country=us
update_config=1
ctrl_interface=/var/run/wpa_supplicant

network={
scan_ssid=1
ssid="YourNetworkSSID"
psk="NETWORKPASSWORD!"
}

This will cause the Pi to get on the network on boot up which should allow you to SSH over to it directly, thereby avoiding any trouble with keyboards and mice and the Pi Zero W.

If you DO end up wanted to connect the keyboard and mouse, you'll want a keyboard/mouse setup that is all in one with just one USB adapter or you'll need a Powered USB Hub. This should be temporary as you get the Pi prepared.

Make the Raspberry Pi Zero W readonly - after it's been configured with DakBoard

Once I had the Pi Zero W all prepared I went around the net looking for tutorials to make it readonly. You're basically causing Linux to mount the SD Card readonly and then do all writes to a RAM Disk that will ultimately be tossed whenever you (rarely) reboot. Get it perfect before you go readonly as it's a small hassle to switch back. Or you can pull the card out and mount it on your other computer then return it. Still, not awesome.

Eric from the comments pointed me to a Raspberry Pi Jesse tutorial, but I tried it and it didn't work for me, likely because I'm on Raspbian Stretch, a newer version. There's a LOT of choices and ways to do this but the best tutorial I found was on the page for Domoticz, a n open source Home Automation system which looks, as an aside, awesome and something I need to check out in the future!

For now, I followed these instructions on Setting up overlayFS on Raspberry PI (the "overlay" being the file system you'll write to but it's a fake, the writes are going to one folder and the two foldkers (one read-write and one read-only are overlaid over each other). This allowed me to make a Raspberry Pi Raspbian Stretch system Readonly on my Pi Zero W.

I followed the instructions exactly, only skipping the parts like "Modify domoticz service" that didn't apply. When I run "mount" I can see the main file system is read-only and the others are overlaid and read-write.

pi@dakboard2:~ $ mount
/dev/mmcblk0p7 on / type ext4 (ro,noatime,data=ordered)
snip!
ramdisk on /var_rw type tmpfs (rw,relatime)
ramdisk on /home_rw type tmpfs (rw,relatime)
overlay on /home type overlay (rw,relatime,lowerdir=/home_org,upperdir=/home_rw/upper,workdir=/home_rw/work)
overlay on /var type overlay (rw,relatime,lowerdir=/var_org,upperdir=/var_rw/upper,workdir=/var_rw/work)
So far so good! This will make a smaller and lower power Family Calendar that will hopefully be more reliable as well! Thanks Eric from the comments!


Sponsor: Preview the latest JetBrains Rider with its Assembly Explorer, Git Submodules, SQL language injections, integrated performance profiler and more advanced Unity support.

About Scott

Scott Hanselman is a former professor, former Chief Architect in finance, now speaker, consultant, father, diabetic, and Microsoft employee. He is a failed stand-up comic, a cornrower, and a book author.

facebook bluesky subscribe
About   Newsletter
Hosting By
Hosted on Linux using .NET in an Azure App Service

How to build a Wall Mounted Family Calendar and Dashboard with a Raspberry Pi and cheap monitor

November 21, 2018 Comment on this post [8] Posted in Hardware | Open Source
Sponsored By

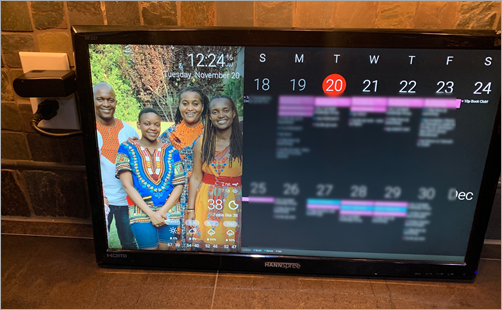
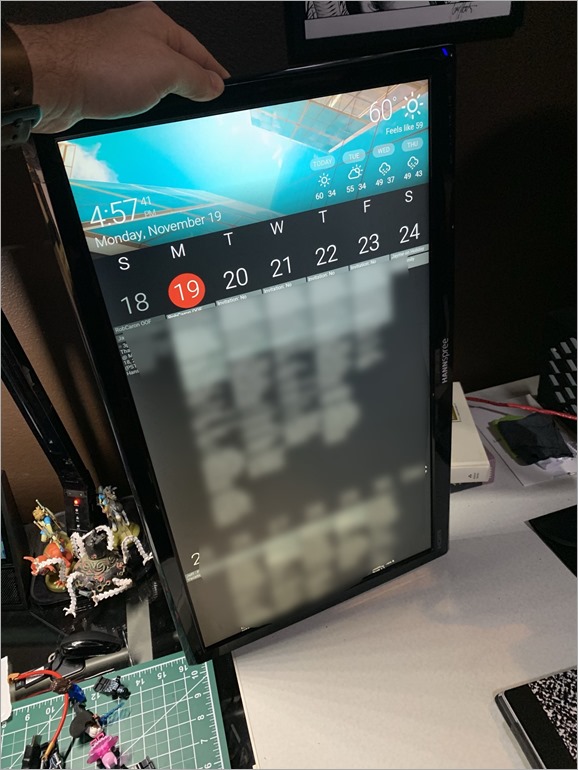
Glanceable DashboardI love dashboards. I love Raspberry Pis (tiny $35 computers the size of a set of playing cards). And I'm cheap frugal. I found a 24" old LCD at Goodwill (a local thrift shop) and bought it but it's been sitting unused in my garage.

Then I stumbled on DakBoard. The idea is simple - A wifi connected wall display for your photos, calendar, news, weather and to-do.

The implementation is simple genius. It's a browser that starts up full screen (kiosk mode) and just sits there and updates occasionally. DakBoard provides the private webpage and tools to make that happen. You can certainly build this yourself with any number of open source tools. I chose DakBoard because it was simple, beautiful, and I was able to get the whole thing done in less than an hour. I'm sure I'll spend many hours tweaking it through. There's also the very popular MagicMIrror platform, so lots of choice and power in this space!

What are some considerations?

  • You may want to turn it off on a scheduled to save power and the screen
    • cronjob - turn it off on a schedule
    • sensor - turn it on when something (your alarm, nest, thermostat motion detector attached to GPIO, etc) detects your presence)
  • It has to act like an appliance. If you are messing with it to keep it alive, it's not an appliance, it's another computer to manage.
  • It has to just work. If my Spouse doesn't like the idea or find its not reliable, the SAF (Spouse Acceptance Factor) will be low and they'll want to get rid of it. All it takes is one "why isn't this working" and I'm dead in the water.
  • Finally - What do you want to show?

Someone asked me - "What would I want to put on my dashboard other than a calendar? I don't see why this is useful."

What would you put on a Glance-eable Display?

Family Calendar(s), movie times, temperature, news, my blood sugar, disk free on my NAS, TV schedule, family photos, commute traffic, album releases, homework due soon, family events, trips, flight status, music playing now, literally anything you want as a glance-able display. 

Glanceable Dashboard

Philosophy

You'll want to ask yourself, is this just an iPad on the wall? I'd propose not. In fact, I'd say this is a Wall Mounted Glanceable Display - a personal dashboard - not an interactive thing. I want the family and kids to just stop by, note important information and move on.

It's also worth pointing out the a horizontal monitor on the wall looks like, well, a monitor on the wall. But somehow when it's Portrait it's dramatic. It's not something we are (yet) used to seeing. I may try this out in a few ways, or even make a few of these displays!

How to Build a Raspberry Pi-based Family Calendar

UPDATE - I wrote how to do this with a Raspberry Pi Zero W (smaller and cheaper) and a readonly filesystem (advanced)

It's pretty easy! I used the DakBoard Blog but I had most of the stuff already.

  • Get a $35 Raspberry Pi 3. The 3 is fast and includes Wifi so you don't need an extra adapter.
  • I like a 2.5A powersupply but some folks say you can run the Raspberry Pi off the monitor's USB power - IF that power can put out at least 1A. 500mA will likely cause instability. It depends on if you want to try to get the whole thing down to one power cable.
  • Cheap Micro SD Card - 8 gigs is fine, but get whatever works for you. This doesn't need to be awesome.
  • A 1 foot HDMI cable. You're gonna mount the Raspberry Pi to the back of the monitor and hide it so you want the cable to be as small as possible.
  • And finally - a 24" ish (smaller is fine) LCD (IPS is nice) monitor with smallish bezels and HDMI inputs that go out to the side (NOT directly out the back) as you want this flush on the wall.
    • Think about how you'll mount it. You can take the back off the monitor and use hanging wire OR use a flush VESA mount.

Install Raspbian on the Raspberry Pi. I use Noobs to bootstrap my install as it's super fast and easy. Go through the standard setup. Make sure you've set up:

  • Wifi login
  • Timezone
  • Boot to Desktop automatically
  • install chromium via "sudo apt-get install -y rpi-chromium-mods"

Then you make sure that Chromium starts up full screen, the mouse is hidden, and we're looking at the dashboard! It's super important you don't have to touch it. It's an appliance, right?

sudo nano ~/.config/lxsession/LXDE-pi/autostart
@xset s off
@xset -dpms
@xset s noblank
@chromium-browser --noerrdialogs --incognito --kiosk http://dakboard.com/app/?p=YOUR_PRIVATE_URL

Then you can set up a cronjob if you want to turn the Pi's screen on and off on a schedule. Using rpi-hdmi.sh you can make a crontab -e that looks like this:

# Turn HDMI Off (22:00/10:00pm)
0 22 * * * /home/pi/rpi-hdmi.sh off

# Turn HDMI On (7:00/7:00am)
0 7 * * * /home/pi/rpi-hdmi.sh on 

My family uses Google Calendar (GSuite) to manage hanselman.com, but I use Outlook at work. I also have a lot of business/work crap in my calendar that the family doesn't need to see. So I have two problems here, filtering, and appointment movement between Work and Home.

My wife and kids use Google Calendar and it's their authoritative source. My work calendar is MY authoritative source, so I want to sync Outlook->Google but ONLY including Personal/Podcasts/Travel categories. I categorize in Outlook at work, and then those appointments that are appropriate for the family calendar get moved over. Then the Family Calendar dashboard includes color coordinated items for Mom, Dad, Kid1, Kid2. The kids include homework that's due as appointments.

I use the Outlook Google Calendar Sync open source project to do this calendar movement for me. It does require Outlook and is a client solution so if you have a better idea let me know.

GOTCHA: I have been using Google Calendar for YEARS. I have also been using sync tools like this for years. As such, I was noticing that sometimes DakBoard would timeout asking for my Google Calendar's ICS file. It would take minutes. So I requested it myself and it was 26 megs. It's clear that Google calendar doesn't care deeply about iCal and that's disappointing. This could easily be solved if they'd support some kind of OData like URL-based query for fromdate=, todate=. In this case, the DakBoard was getting 26 megs over and over to just show a few weeks of appointments. I literally had appointments from 2005 in the calendar. I decided that since I'd declared Outlook my authoritative source for my calendar that I'd take an archive (one time snapshot) of my iCal and then delete all my calendar items from Google Calendar and re-sync, one way, from the authoritative source, going back 1 year. I'm likely a rare case but it's worth noting in case you bump into this.

All in all, this can easily be done in a short few hours if you have a Pi and a monitor. The time will be spent making it "sanitary." Making the cables perfect, hanging it on the wall, hiding the cables, then tweaking the screen to be perfect.

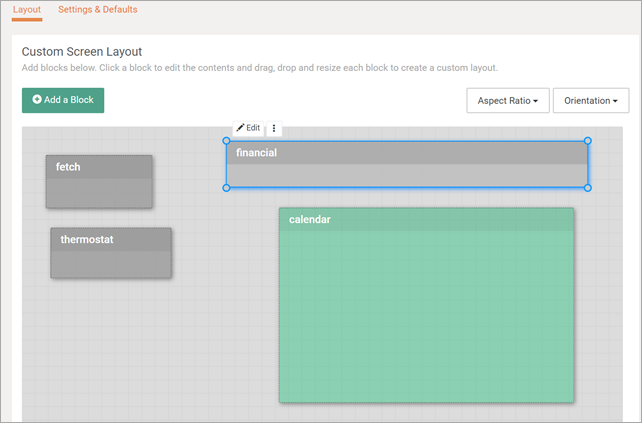
Editing screens on DakBoard

DakBoard has a free option that works great, or a Premium subscription that gives you even more control. Again, it depends on your web/art ability, and your patience. This is a fun new world that I'm excited to get involved with and my family is already stoked about this new display as we enter the holiday season.


Sponsor: Preview the latest JetBrains Rider with its Assembly Explorer, Git Submodules, SQL language injections, integrated performance profiler and more advanced Unity support.

About Scott

Scott Hanselman is a former professor, former Chief Architect in finance, now speaker, consultant, father, diabetic, and Microsoft employee. He is a failed stand-up comic, a cornrower, and a book author.

facebook bluesky subscribe
About   Newsletter
Hosting By
Hosted on Linux using .NET in an Azure App Service

Compiling C# to WASM with Mono and Blazor then Debugging .NET Source with Remote Debugging in Chrome DevTools

November 16, 2018 Comment on this post [14] Posted in DotNetCore | Open Source
Sponsored By

Blazor quietly marches on. In case you haven't heard (I've blogged about Blazor before) it's based on a deceptively simple idea - what if we could run .NET Standard code in the browsers? No, not Silverlight, Blazor requires no plugins and doesn't introduce new UI concepts. What if we took the AOT (Ahead of Time) compilation work pioneered by Mono and Xamarin that can compile C# to Web Assembly (WASM) and added a nice UI that embraced HTML and the DOM?

Sound bonkers to you? Are you a hater? Think this solution is dumb or not for you? To the left.

For those of you who want to be wacky and amazing, consider if you can do this and the command line:

$ cat hello.cs
class Hello {
static int Main(string[] args) {
System.Console.WriteLine("hello world!");
return 0;
}
}
$ mcs -nostdlib -noconfig -r:../../dist/lib/mscorlib.dll hello.cs -out:hello.exe
$ mono-wasm -i hello.exe -o output
$ ls output
hello.exe index.html index.js index.wasm mscorlib.dll

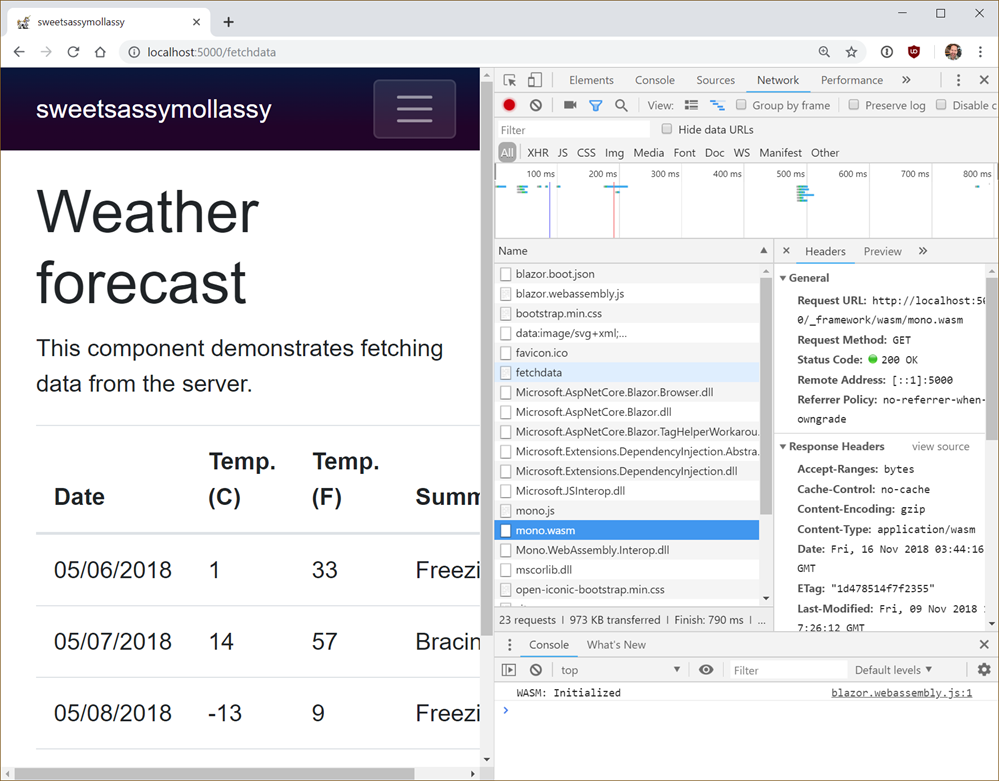
Then you could do this in the browser...look closely on the right side there.

You can see the Mono runtime compiled to WASM coming down. Note that Blazor IS NOT compiling your app into WASM. It's sending Mono (compiled as WASM) down to the client, then sending your .NET Standard application DLLs unchanged down to run within with the context of a client side runtime. All using Open Web tools. All Open Source.

Blazor uses Mono to run .NET in the browser

So Blazor allows you to make SPA (Single Page Apps) much like the Angular/Vue/React, etc apps out there today, except you're only writing C# and Razor(HTML).

Consider this basic example.

@page "/counter"

<h1>Counter</h1>
<p>Current count: @currentCount</p>
<button class="btn btn-primary" onclick="@IncrementCount">Click me</button>

@functions {
int currentCount = 0;
void IncrementCount() {
currentCount++;
}
}

You hit the button, it calls some C# that increments a variable. That variable is referenced higher up and automatically updated. This is trivial example. Check out the source for FlightFinder for a real Blazor application.

This is stupid, Scott. How do I debug this mess? I see you're using Chrome but seriously, you're compiling C# and running in the browser with Web Assembly (how prescient) but it's an undebuggable black box of a mess, right?

I say nay nay!

C:\Users\scott\Desktop\sweetsassymollassy> $Env:ASPNETCORE_ENVIRONMENT = "Development"
C:\Users\scott\Desktop\sweetsassymollassy> dotnet run --configuration Debug
Hosting environment: Development
Content root path: C:\Users\scott\Desktop\sweetsassymollassy
Now listening on: http://localhost:5000
Now listening on: https://localhost:5001
Application started. Press Ctrl+C to shut down.

Then Win+R and run this command (after shutting down all the Chrome instances)

%programfiles(x86)%\Google\Chrome\Application\chrome.exe --remote-debugging-port=9222 http://localhost:5000

Now with your Blazor app running, hit Shift+ALT+D (or Shift+SILLYMACKEY+D) and behold.

Feel free to click and zoom in. We're at a breakpoint in some C# within a Razor page...in Chrome DevTools.

HOLY CRAP IT IS DEBUGGING C# IN CHROME

What? How?

Blazor provides a debugging proxy that implements the Chrome DevTools Protocol and augments the protocol with .NET-specific information. When debugging keyboard shortcut is pressed, Blazor points the Chrome DevTools at the proxy. The proxy connects to the browser window you're seeking to debug (hence the need to enable remote debugging).

It's just getting started. It's limited, but it's awesome. Amazing work being done by lots of teams all coming together into a lovely new choice for the open source web.


Sponsor: Preview the latest JetBrains Rider with its Assembly Explorer, Git Submodules, SQL language injections, integrated performance profiler and more advanced Unity support.

About Scott

Scott Hanselman is a former professor, former Chief Architect in finance, now speaker, consultant, father, diabetic, and Microsoft employee. He is a failed stand-up comic, a cornrower, and a book author.

facebook bluesky subscribe
About   Newsletter
Hosting By
Hosted on Linux using .NET in an Azure App Service

Web Development and Advanced Techniques with Linux on Windows (WSL)

November 14, 2018 Comment on this post [7] Posted in Linux
Sponsored By

I've posted several times on the Windows Subsystem for Linux that allows you to run Linux on Windows 10 without a VM. Check out my YouTube on Editing code and files on Windows Subsystem for Linux on Windows 10. There's just one rule. You can mess with Windows files from Linux but you can't mess with Linux files from Windows. Otherwise, go crazy and enjoy. Here's some of my previous posts you should check out:

WSL is pretty fantastic although its disk access is slower than native Linux, I find myself using it every day. If you want to setup Linux on your Windows 10 machine, just turn it on, then head over to the Windows Store and search for "Linux."

You can turn on Linux on Windows 10 by typing "Windows Features" and checking "Windows Subsystem for Linux." Then get a Linux from the Windows Store.

If you prefer to use PowerShell and do it in one line, just do this from an Admin PowerShell prompt:

Enable-WindowsOptionalFeature -Online -FeatureName Microsoft-Windows-Subsystem-Linux

Then go get any one (or more!) of these from the Store:

When you're in a Windows shell like PowerShell or CMD you might want to run Linux and/or jump comfortably between shells. You can do that in a few ways. The best and recommended way is running "wsl.exe" as that will start up your default distro. You can also just type the name of the distro. So I can type "ubuntu" and get in there directly.

You can type "bash" but that's not recommended if you've changed shells. If you've set up zsh or fish and type bash, it's gonna still try to run bash.

Here I've typed wslconfig and you can see I've got both Ubuntu and Debian installed, with Ubuntu as the default when I type "wsl."

C:\Users\scott>wslconfig /list
Windows Subsystem for Linux Distributions:
Ubuntu-18.04 (Default)
Debian

Now that I know how to run wsl from anywhere I can even pipe stuff in and out it Linux from outside. For example here I am in cmd.exe but I'm calling commands in Linux, that come out, then back in, etc. You can mix and match however you'd like!

C:\dev>type hello.sh
echo Hello
C:\dev>wsl cat /mnt/c/dev/hello.sh | wsl fromdos | wsl /bin/sh
Hello

This means even when I'm in CMD or PowerShell I can use Linux commands that are convenient or familiar to me. For example, here I'm piping a Windows Update log file into a the Linux command sha1sum command. Note the use of - to accept standard input - even though that input is from Windows!

C:\Users\scott\Desktop>type WindowsUpdate.log | wsl sha1sum -
3b48adce8f6c9cb816e8845d824dacc0440ca1b8 -

Sweet. There's a number of nice advanced techniques if you want to make your WSL installations smarter AND automatically configured.  You can make a file in /etc/wsl.conf to affect your DNS, metadata and driving mounting.

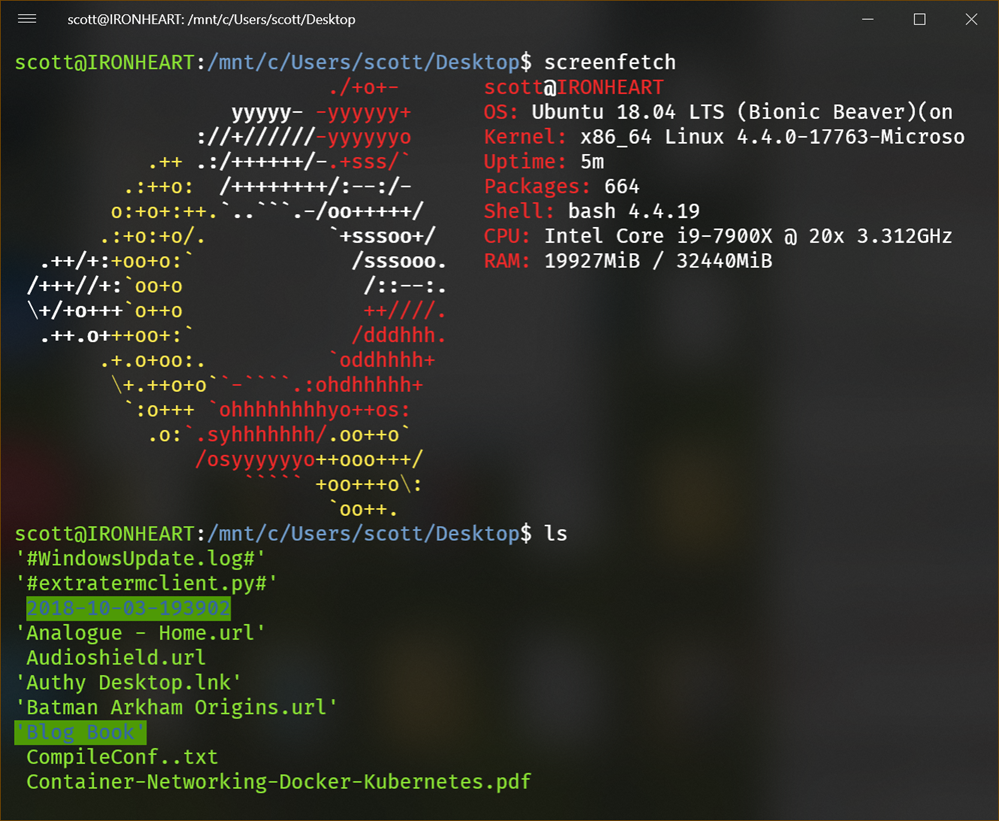
When you are in a WSL shell, your Windows drive (your main drive) is at /mnt/c. So here is my Windows desktop as viewed from WSL:

screenfetch in WSL

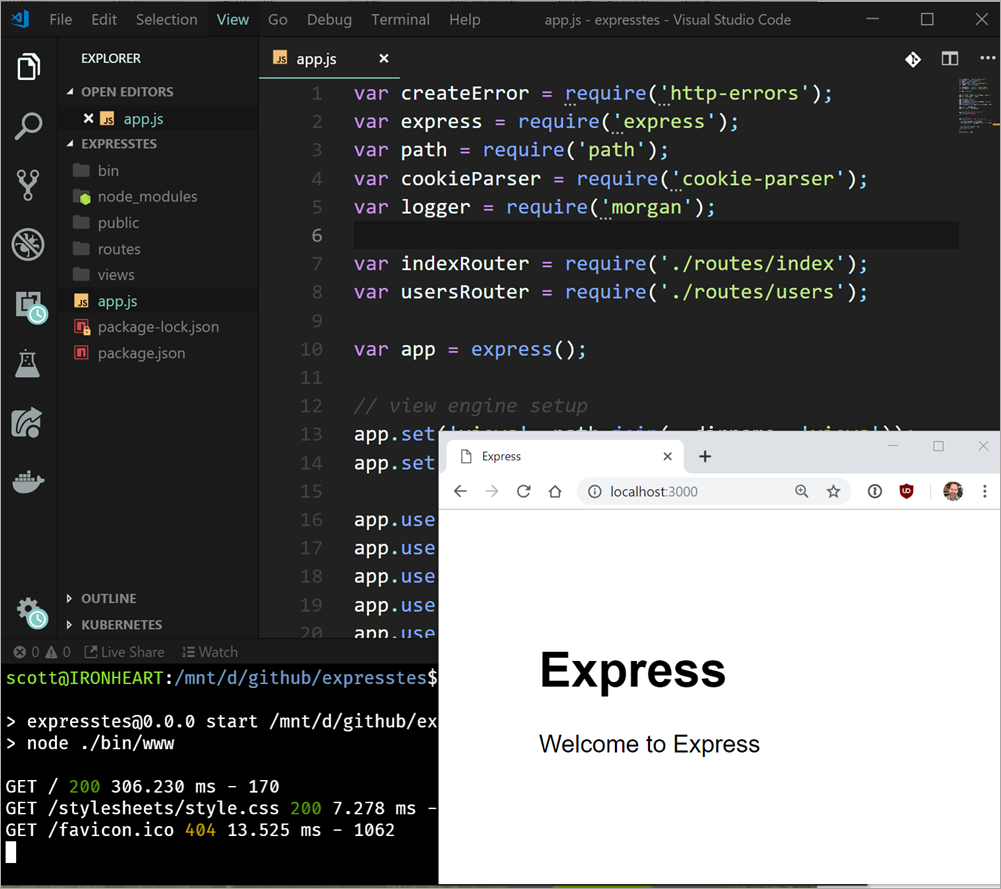
I most of my dev work in /mnt/d/github for example. That way I can use VS Code from Windows but run Node/Ruby/Go/Whatever from WSL.

I keep my files on my Windows drive, edit them in VS Code, but run things in WSL. Again, never use Windows utilities to reach into and/or edit files on the WSL/Linux subsystem. Also, always been conscious of your CR/LF situation, and be real conscious if you're going to run git in both Windows and WSL.

Here's VS Code at the top, WSL/Ubuntu running Node at the bottom, and the local node app running in Edge on Windows on the lower right. We are sharing file systems and network port space:

Cross platform Web Dev

You can even share environment variables between WSL and Windows with a special environment variable called WSLENV. This is pretty advanced but super powerful. Read this carefully. You make a environment variable that is a list of names of other variables that you want translated between environments.

That means you can do something like this. I'm in WSL and I have an environment variable that points to a location on the filesystem. I need it to be correct in both worlds.

scott@IRONHEART:/mnt/d$ export MYLINUXPATH=/mnt/d/github/expresstest
scott@IRONHEART:/mnt/d$ export WSLENV=MYLINUXPATH/p
scott@IRONHEART:/mnt/d$ cmd.exe
D:\>echo %MYLINUXPATH%
D:\github\expresstest

Read that carefully. It's awesome and it's very configurable.

There's lots of users of WSL and many have assembled great lists of resources like Awesome-WSL by Hayden.

It's also worth pointing out that WSL is just now one console you can choose from. There's PowerShell, CMD.exe, and a half dozen Linuxes. You can even make your own custom Linux Distro for your company if you like. And there's a whole world of 3rd party Consoles that sit on top of/replace conhost.exe so you can have consoles with tabs, cool fonts, ones based on web tech, whatever! You can even choose WSL/bash as your default shell in Visual Studio Code if you'd like with Ctrl+~.

Hope this gets you started with Linux on Windows. What did I miss? Sound off in the comments.


Sponsor: Preview the latest JetBrains Rider with its Assembly Explorer, Git Submodules, SQL language injections, integrated performance profiler and more advanced Unity support.

About Scott

Scott Hanselman is a former professor, former Chief Architect in finance, now speaker, consultant, father, diabetic, and Microsoft employee. He is a failed stand-up comic, a cornrower, and a book author.

facebook bluesky subscribe
About   Newsletter
Hosting By
Hosted on Linux using .NET in an Azure App Service

Terminus and FluentTerminal are the start of a world of 3rd party OSS console replacements for Windows

November 09, 2018 Comment on this post [8] Posted in Open Source | Tools
Sponsored By

Folks have been trying to fix supercharge the console/command line on Windows since Day One. There's a ton of open source projects over the year that try to take over or improve on "conhost.exe" (the thing that handles consoles like Bash/PowerShell/cmd on Windows). Most of these 3rd party consoles have weird or subtle issues. For example, I like Hyper as a terminal but it doesn't support Ctrl-C at the command line. I use that hotkey often enough that this small bug means I just won't use that console at all.

Per the CommandLine blog:

One of those weaknesses is that Windows tries to be "helpful" but gets in the way of alternative and 3rd party Console developers, service developers, etc. When building a Console or service, developers need to be able to access/supply the communication pipes through which their Terminal/service communicates with command-line applications. In the *NIX world, this isn't a problem because *NIX provides a "Pseudo Terminal" (PTY) infrastructure which makes it easy to build the communication plumbing for a Console or service, but Windows does not...until now!

Looks like the Windows Console team is working on making 3rd party consoles better by creating this new PTY mechanism:

We've heard from many, many developers, who've frequently requested a PTY-like mechanism in Windows - especially those who created and/or work on ConEmu/Cmder, Console2/ConsoleZ, Hyper, VSCode, Visual Studio, WSL, Docker, and OpenSSH.

Very cool! Until it's ready I'm going to continue to try out new consoles. A lot of people will tell you to use the cmder package that includes ConEmu. There's a whole world of 3rd party consoles to explore. Even more fun are the choices of color schemes and fonts to explore.

For a while I was really excited about Hyper. Hyper is - wait for it - an electron app that uses HTML/CSS for the rendering of the console. This is a pretty heavyweight solution to the rendering that means you're looking at 200+ megs of memory for a console rather than 5 megs or so for something native. However, it is a clever way to just punt and let a browser renderer handle all the complex font management. For web-folks it's also totally extensible and skinnable.

As much as I like Hyper and its look, the inability to support hitting "Ctrl-C" at the command line is just too annoying. It appears it's a very well-understood issue that will ultimately be solved by the ConPTY work as the underlying issue is a deficiency in the node-pty library. It's also a long-running issue in the VS Code console support. You can watch the good work that's starting in this node-pty PR that will fix a lot of issues for node-based consoles.

Until this all fixes itself, I'm personally excited (and using) these two terminals for Windows that you may not have heard of.

Terminus

Terminus is open source over at https://github.com/Eugeny/terminus and works on any OS. It's immediately gorgeous, and while it's in alpha, it's very polished. Be sure to explore the settings and adjust things like Blur/Fluent, Themes, opacity, and fonts. I'm using FiraCode Retina with Ligatures for my console and it's lovely. You'll have to turn ligature support on explicitly under Settings | Appearance.

Terminus is a lovely console replacement

Terminus also has some nice plugins. I've added Altair, Clickable-Links, and Shell-Selector to my loadout. The shell selector makes it easy on Windows 10 to have PowerShell, Cmd, and Ubuntu/Bash open all at the same time in multiple tabs.

I did do a little editing of the default config file to set up Ctrl-T for new tab and Ctrl-W for close-tab for my personal taste.

FluentTerminal

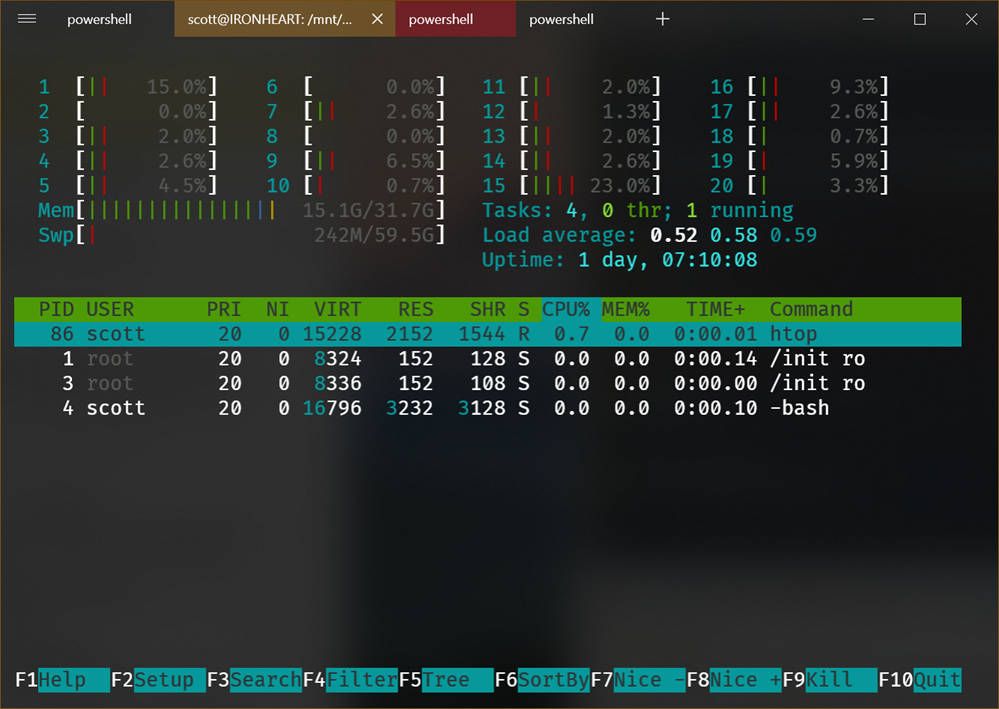
FluentTerminal is a Terminal Emulator based on UWP. Its memory usage on my machine is about 1/3 of Terminus and under 100 megs. As a Windows 10 UWP app it looks and feels very native. It supports ALT-ENTER Fullscreen, and tabs for as many consoles as you'd like. You can right-click and color specific tabs which was a nice surprise and turned out to be useful for on-the-fly categorization.

image

FluentTerminal has a nice themes setup and includes a half-dozen to start, plus supports imports.

It's not yet in the Windows Store (perhaps because it's in active development) but you can easily download a release and install it with a PowerShell install.ps1 script.

I have found the default Keybindings very intuitive with the usual Ctrl-T and Ctrl-W tab managers already set up, as well as Shift-Ctrl-T for opening a new tab for a specific shell profile (cmd, powershell, wsl, etc).

Both of these are great new entries in the 3rd party terminal space and I'd encourage you to try them both out and perhaps get involved on their respective GitHubs! It's a great time to be doing console work on Windows 10!


Sponsor: Check out the latest JetBrains Rider with built-in spell checking, enhanced debugger, Docker support, full C# 7.3 support, publishing to IIS and more advanced Unity support.

About Scott

Scott Hanselman is a former professor, former Chief Architect in finance, now speaker, consultant, father, diabetic, and Microsoft employee. He is a failed stand-up comic, a cornrower, and a book author.

facebook bluesky subscribe
About   Newsletter
Hosting By
Hosted on Linux using .NET in an Azure App Service

Disclaimer: The opinions expressed herein are my own personal opinions and do not represent my employer's view in any way.