Scott Hanselman

How to set up Kubernetes on Windows 10 with Docker for Windows and run ASP.NET Core

January 30, 2018 Comment on this post [9] Posted in DotNetCore | Kubernetes | Open Source
Sponsored By

Docker for Windows is really coming along nicely. They have both a Stable and Edge channel and the Edge (beta, experimental) one just included a lovely new feature - Kubernetes support. Per their docs, Kubernetes is only available in Docker for Windows 18.02 CE Edge. They set most everything up nicely and put Kubectl into your path and setup a context. If you use kubectl for other things - like your own Raspberry Pi Kubernetes Cluster, then you'll need to be aware of switching contexts. Same thing applies if you have one in the cloud, like the Kubernetes Cluster I made in Azure AKS.

Got Docker for Windows? If you have not yet installed Docker for Windows, see Install Docker for Windows for an explanation of stable and edge channels, system requirements, and download/install information.

It's easy to get started, just click "Enable Kubernetes" and Docker for Windows will download and start the images you need. I clicked "show system containers" because I like to see what's hidden from me, but you decide for yourself. Do be aware - there's a TON.
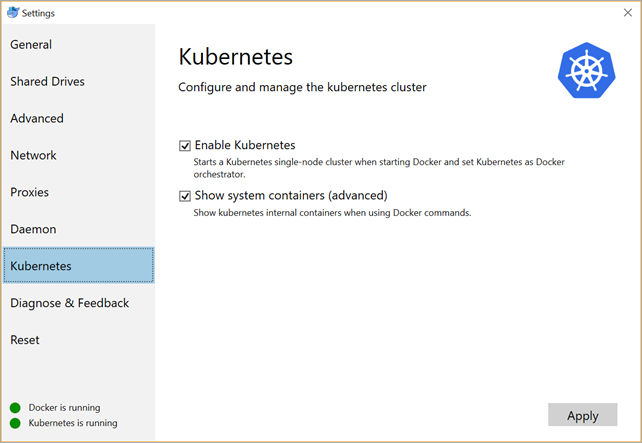
Enabling Kubernetes in Docker for Windows

By default, you won't get the Kubernetes Dashboard - of which I'm a fan - so you may want to install that. If you follow the default instructions (and you're a noob like me) then you'll likely end up with a Dashboard that is pretty locked down. It can be somewhat frustrating to get access to your own development dashboard, so I use the alternative (read: totally insecure) dashboard, like this:

C:\> kubectl apply -f https://raw.githubusercontent.com/kubernetes/dashboard/master/src/deploy/alternative/kubernetes-dashboard.yaml

I also like charts and graphs so I added these as well:

C:\> kubectl create -f https://raw.githubusercontent.com/kubernetes/heapster/master/deploy/kube-config/influxdb/influxdb.yaml
C:\> kubectl create -f https://raw.githubusercontent.com/kubernetes/heapster/master/deploy/kube-config/influxdb/heapster.yaml
C:\> kubectl create -f https://raw.githubusercontent.com/kubernetes/heapster/master/deploy/kube-config/influxdb/grafana.yaml

I can access the dashboard by default by running "kubectl proxy" then visiting this http://localhost:8001/ui and I'll get redirected to the dashboard:
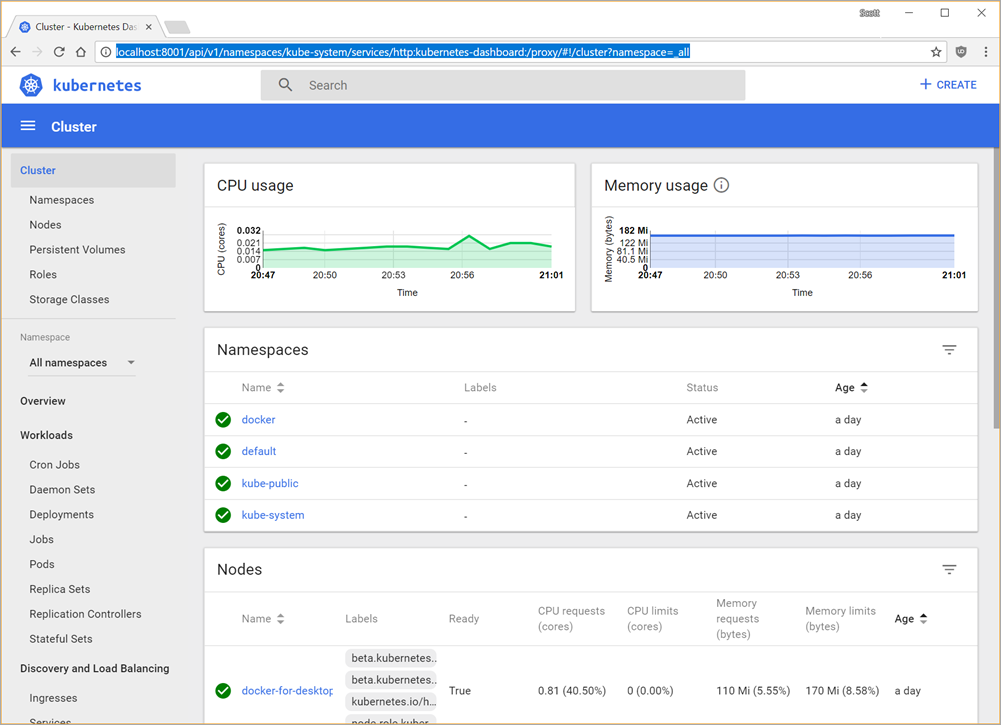
Kuberenetes Dashboard

Now I can run through all the cool Kubernetes tutorials like the Guestbook Kubernetes Sample Application from the convenience of my Windows 10 machine. (I'm running a SurfaceBook 2 on the current non-Beta Windows 10.)

There are a lot of nice samples on running .NET Core and ASP.NET Core apps with Docker up at https://github.com/dotnet/dotnet-docker-samples/

I made a quick ASP.NET Core app called kubeaspnetapp:

C:\Users\scott\Desktop>dotnet new razor -o kubeaspnetapp
The template "ASP.NET Core Web App" was created successfully.
...snip...
Restore succeeded.

Then added a two-stage build DockerFile that looks like this:

FROM microsoft/aspnetcore-build:2.0 AS build-env
WORKDIR /app

# copy csproj and restore as distinct layers
COPY *.csproj ./
RUN dotnet restore

# copy everything else and build
COPY . ./
RUN dotnet publish -c Release -o out

# build runtime image
FROM microsoft/aspnetcore:2.0
WORKDIR /app
COPY --from=build-env /app/out .
ENTRYPOINT ["dotnet", "kubeaspnetapp.dll"]

And built and tagged the image with:

C:\Users\scott\Desktop\kubeaspnetapp>docker build -t kubeaspnetapp:v1 .

Then I create a quick Deployment that manages a Pod that runs the Container:

C:\Users\scott\Desktop\kubeaspnetapp>kubectl run kubeaspnetapp --image=kubeaspnetapp:v1 --port=80
deployment "kubeaspnetapp" created

Now I'll expose it to the "outside." Again, this is usually done with .yaml files but it's a good learning exercise and it's all local.

C:\Users\scott\Desktop\kubeaspnetapp>kubectl get deployments
NAME            DESIRED   CURRENT   UP-TO-DATE   AVAILABLE   AGE
kubeaspnetapp   1         1         1            1           1m

C:\Users\scott\Desktop\kubeaspnetapp>kubectl get pods
NAME                             READY     STATUS    RESTARTS   AGE
kubeaspnetapp-778f6d49bd-rct59   1/1       Running   0          1m

C:\Users\scott\Desktop\kubeaspnetapp>
C:\Users\scott\Desktop\kubeaspnetapp>kubectl expose deployment kubeaspnetapp --type=NodePort
service "kubeaspnetapp" exposed

C:\Users\scott\Desktop\kubeaspnetapp>kubectl get services
NAME            TYPE           CLUSTER-IP     EXTERNAL-IP   PORT(S)          AGE
kubeaspnetapp   LoadBalancer   10.98.234.67   <pending>     80:31756/TCP     5s
kubernetes      ClusterIP      10.96.0.1      <none>        443/TCP          1d

Then I'll hit http://127.0.0.1:31756 in my browser...note how that port is brokering to the internal port 80 where the app listens...and there's my ASP.NET Core app running locally on Kubernetes, set up with Docker for Windows. Nice.
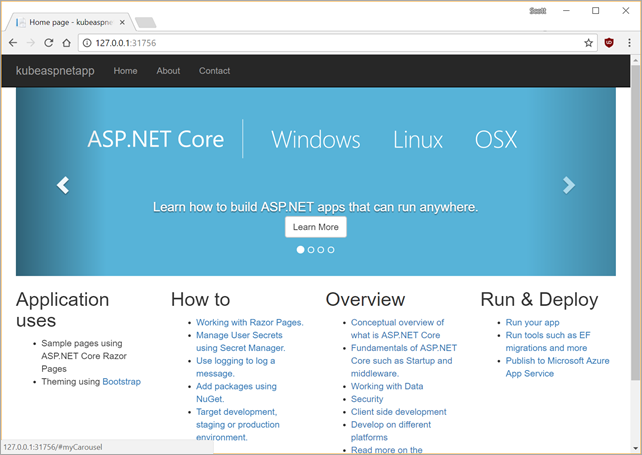
My ASP.NET Core app running in Kubernetes local on my Windows 10 machine

Here's me getting the startup logs from that pod:

C:\Users\scott\>kubectl get pods
NAME                             READY     STATUS    RESTARTS   AGE
kubeaspnetapp-7fd7f7ffb9-8gnzd   1/1       Running   0          6m

C:\Users\scott\Dropbox\k8s for pi\aspnetcoreapp>kubectl logs kubeaspnetapp-7fd7f7ffb9-8gnzd
Hosting environment: Production
Content root path: /app
Now listening on: http://[::]:80
Application started. Press Ctrl+C to shut down.

Pretty cool. As all the tooling and things across Windows, Docker, Kubernetes, Visual Studio (all flavors) continues to get better and better, I can only imagine this experience will get better and better. I look forward to a time when I can freely mix containers from different OSs and easily push them all en masse to Azure.


Sponsor: Get the latest JetBrains Rider for debugging third-party .NET code, Smart Step Into, more debugger improvements, C# Interactive, new project wizard, and formatting code in columns.

About Scott

Scott Hanselman is a former professor, former Chief Architect in finance, now speaker, consultant, father, diabetic, and Microsoft employee. He is a failed stand-up comic, a cornrower, and a book author.

facebook bluesky subscribe
About   Newsletter
Hosting By
Hosted on Linux using .NET in an Azure App Service

Building a Raspberry Pi Car Robot with WiFi and Video

January 29, 2018 Comment on this post [7] Posted in Hardware | Open Source
Sponsored By

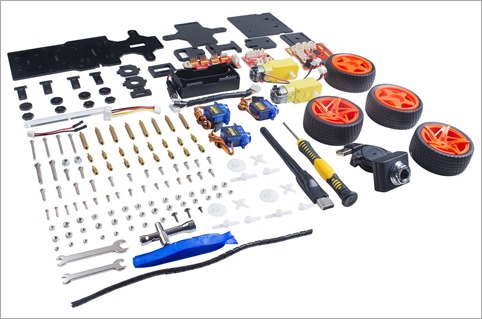
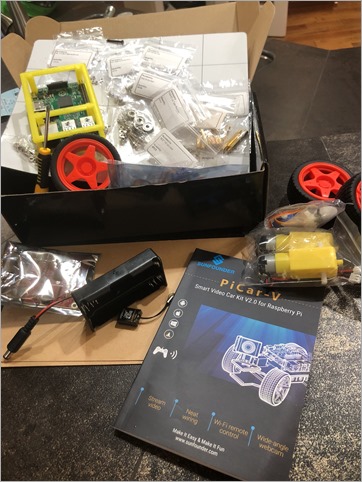
The SunFounder Raspberry Pi Car kit comes wtih everything you need except the 18650 batteries. You'll need to get those elsewhere.Last year I found a company called SunFounder that makes great Raspberry Pi-related kits and stuff. I got their Raspberry Pi 10" Touchscreen LCD and enjoyed it very much. This month I picked up the SunFounder PiCar 2.0 kit and built it with the kids. The kit includes everything you need except for the Raspberry Pi itself, a mini SD Card (the Pi uses that as  hard drive), and two 18650 rechargeable lithium batteries. Those batteries are enough to power both the Pi itself (so the car isn't tethered) as well as provide enough voltage to run the 3 servos AND motors to drive and steer the car around. You can also expand the car with other attachments like light sensors, line followers, and more.

The PiCar 2.0 includes the chassis, a nice USB WiFi adapter with antenna (one less thing to think about if you're using a Raspberry Pi  like me), a USB webcam for computer vision scenarios. It includes a TB6612 Motor Driver, PCA9685 PWM (Pulse Width Modulation) Servo Driver with 16 channels for future expansion. The kit also helpfully includes all the tools, screwdriver, wrenches, and bolts.

Preparing to build the SunFounder Raspberry Pi car

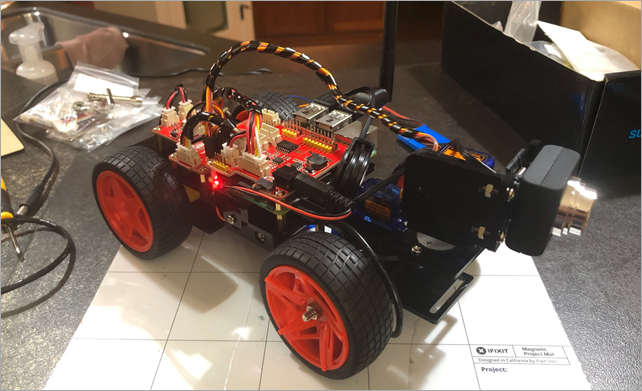
All the code for the SunFounder PiCar-V is on GitHub and while there can be a few hiccups with some of the English instructions, there are a bunch of YouTube videos and folks online doing the same thing so we had no trouble making the robot in a weekend.

Building a SunFounder Raspberry Pi Car

PRO TIP - Boot your new Raspberry Pi up with ssh enabled and already joined to your wifi

You'll need to use a tool like Etcher.io to burn a copy of the Raspbian operating system on to a mini SD card. I prefer to save time and avoid having to connect a new Raspberry Pi to HDMI and a mouse and keyboard, so I get the Pi onto my wifi network and enable SSH by copying these two files to the root of the file system of the freshly burned mini SD card. This will cause the Pi to automatically join your network when it boots up for the first time. Then I used Ubuntu on Windows 10 to ssh into the Pi and follow the instructions.

  • Make a 0 byte file called "ssh" and copy it to the root of the new PI disk
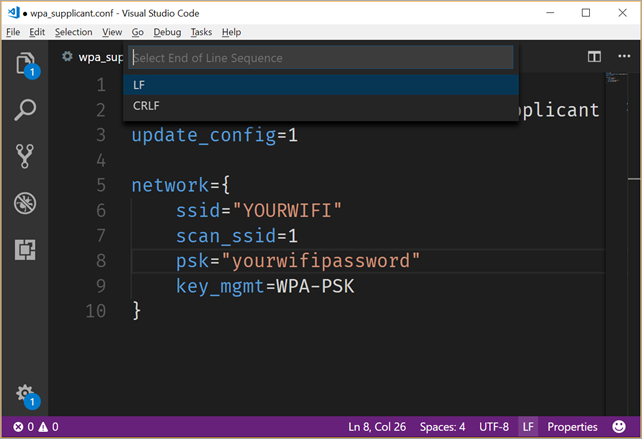
  • Make a file called "wpa_supplicant.conf" with just linefeeds at the end and make it look like this. Copy it to the root of the new PI disk.
country=US
ctrl_interface=DIR=/var/run/wpa_supplicant GROUP=netdev
update_config=1

network={
    ssid="YOURWIFI"
    scan_ssid=1
    psk="yourwifipassword"
    key_mgmt=WPA-PSK
}

I like to use Notepad2 or Visual Studio Code to change the line endings of a file. You can see the CRLF or the LF in the status car and click it. Unix/Raspbian/Raspberry Pi likes just an LF (line feed) for the lineending, while Windows defaults to using CRLF (Carriage Return/Line Feed, or 0x13 0x10) for text files.

Changing the line endings to Unix

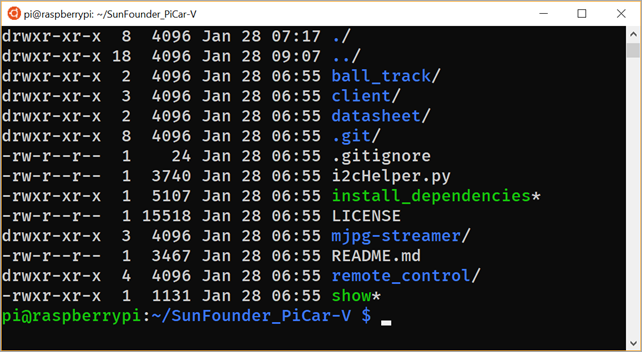
The default Raspberry username is pi and the default password is raspberry. You may want to change that. SunFounder has a decent "install_dependencies" script that you'll run on the Pi:

Installing the PiCar dependencies

Once you've built the PiCar you can ssh in and run their development server that gives you a little WebAPI to control the car. The SunFounder folks are pretty good at web development (less so with mobile apps) and have a nice Django app to control the PiCar.

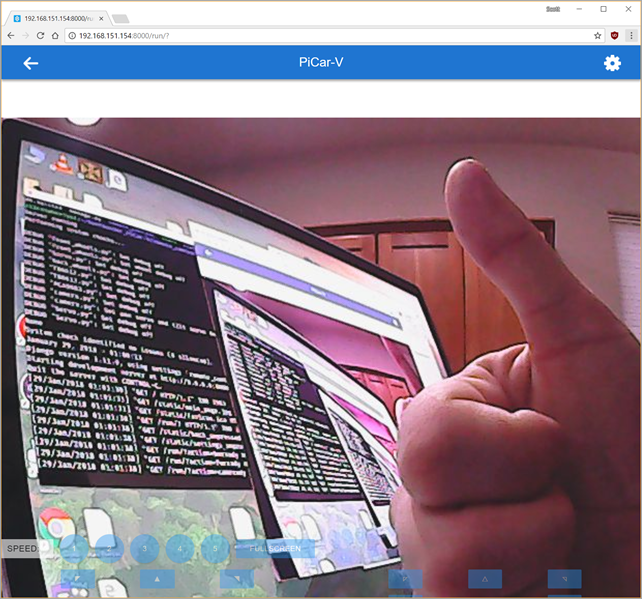
Here's the view from the front camera of the PiCar as viewed through local website on port 8000. It's looking at my computer looking at itself. ;)

Viewing the PiCar camera through the Django website

You're able to control the PiCar from this web interface with the keyboard. You can move the car and steer with WASD, as well as move the head/camera independently. You will need to enter the settings area (upper right corner) and calibrate the back wheels direction. By default, one wheel may go the opposite direction because they can't be sure how you mounted them, so you'll need to reverse one wheel to ensure they both go in the same direction.

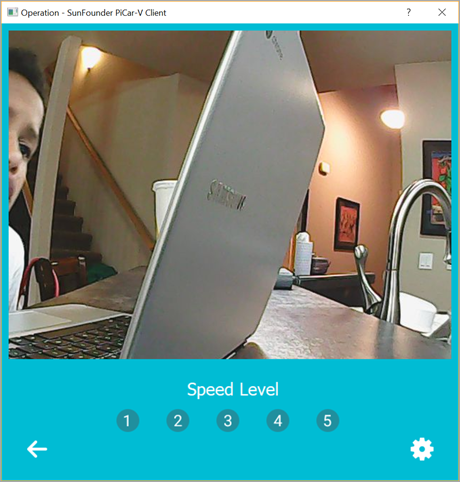
They also included a client application, also written in Python. On Windows you'll need to install Python, and when you run client.py you may get an error:

ImportError: No module named requests

You'll need to run "pip3 install requests" as that module isn't installed by default.

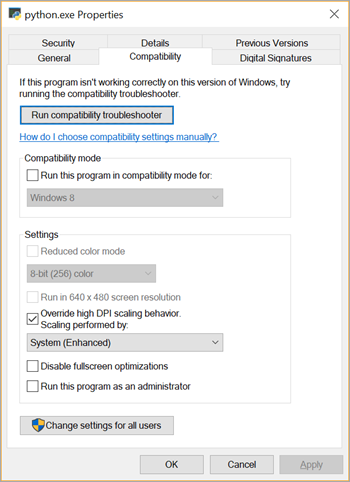
Additionally, Python apps aren't smart about High-DPI displays, so I went to C:\Users\scott\appdata\local\Programs\Python\Python36 and right click'ed the Python.exe and set the DPI setting to "System (Enhanced)" like this.

Overridding DPI settings to System (Enhanced)

The client app is best for "Zeroing out" the camera and wheels, in case they are favoring one side or the other.

image

All in all, building the SunFounder "Raspberry Pi Video Car Kit 2.0" with the kids was a great experience. The next step is to see what else we can do with it!

  • Add a speaker so it talks?
  • Add Alexa support so you can talk to it?
  • Make the car drive around and take pictures, then use Azure cognitive services to announce what it sees?
  • Or, as my little boys say, "add weapons and make another bot for it to fight!"

What do you think?

* I use Amazon affiliate links and appreciate it when you use them! It supports this blog and sometimes gives me enough money to buy gadgets like this!


Sponsor: Unleash a faster Python! Supercharge your applications performance on future forward Intel® platforms with The Intel® Distribution for Python. Available for Windows, Linux, and macOS. Get the Intel® Distribution for Python Now!

About Scott

Scott Hanselman is a former professor, former Chief Architect in finance, now speaker, consultant, father, diabetic, and Microsoft employee. He is a failed stand-up comic, a cornrower, and a book author.

facebook bluesky subscribe
About   Newsletter
Hosting By
Hosted on Linux using .NET in an Azure App Service

You got this! You know the fundamentals. You are a learner. Plus The Imposter's Handbook

January 27, 2018 Comment on this post [8] Posted in Musings
Sponsored By

Sometimes we all get overwhelmed. There's a million (no irony there) reasons to be overwhelmed today, to be sure. I got an email from a community member who was feeling like they hadn't kept up on the latest tech. Of course, anything you learn today will be obsolete tomorrow, right? I'm overwhelmed thinking of it!

I wrote a little thread about this on Twitter and I wanted to expand on it here.

Maybe you're a dev who's been keeping up and fresh on the latest since jump, or maybe you've been using the same reliable framework for your whole career.

It can be totally overwhelming when you "wake up" and look around and notice that you don't know NOUN.js or ASPNET 10 or the like. You feel like it's over, and you've missed the boat. I want to encourage you. You're a developer! You have a good base to build on!

You may not know today's JavaScript/Java/C# but you DO know JavaScript/Java/C#. Yes, the Internet moved your cheese while you were sleeping, but you DID grow. When talking to employers, emphasize the base of knowledge you bring. Frameworks come and go. Fundamentals remain.

I really recommend Rob Conery's "The Imposter's Handbook" as a great way to reinforce those fundamentals and core concepts.Rob has been programming for years but without a CS degree. This book is about all the things he learned and all the gaps that got filled in while he was overwhelmed.

Yes this is a squishy blog post, but sometimes that's what's needed. You are smart, you are capable. Look at the replies to the twitter thread and you'll see you are not alone. Your job as a programmer is to be the figure-outer.


Sponsor: Unleash a faster Python! Supercharge your applications performance on future forward Intel® platforms with The Intel® Distribution for Python. Available for Windows, Linux, and macOS. Get the Intel® Distribution for Python Now!

About Scott

Scott Hanselman is a former professor, former Chief Architect in finance, now speaker, consultant, father, diabetic, and Microsoft employee. He is a failed stand-up comic, a cornrower, and a book author.

facebook bluesky subscribe
About   Newsletter
Hosting By
Hosted on Linux using .NET in an Azure App Service

Running BBS Door Games on Windows 10 with GameSrv, DOSBox, plus telnet fun with WSL

January 20, 2018 Comment on this post [14] Posted in Open Source
Sponsored By

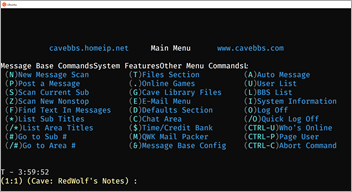
Example of a BBS home screenI continue to enjoy seeing what can be done with WSL (Windows Subsystem for Linux) but even more fun is combining CMD.exe (the Windows console), Ubuntu on Windows (WSL), and DOSBox (an x86 emulator that lets you run OLD programs in original DOS that no longer run natively on Windows). What kind of cool stuff can I do today?

I did a lightning talk this week at NDC London where I started with a text file that included a CR/LF, Git autocrlf, then talked about typewriters, what a Carriage really is, then the Teletype Model 33, the Altair 8800, the ASCII chart, then ANSI art, and finally moved on to BBS's and BBS Door Games. I'll do a more extensive post later and I'm going to turn this into a full conference talk, but for the demo I ran a few BBS Door Games under Windows 10. Why? Because it's awesome and history is lovely.

You can try setting up what I'm going to describe in this post, or you can try telnet'ing to a BBS like the CaveBBS here: telnet://cavebbs.homeip.net. You might also want to telnet://towel.blinkenlights.nl for ASCII-based Star Wars! Originally we would call (like literally dial-up one to one) a BBS but ubiquitous internet added telnet as a nice option that persists today. Door Games were ASCII/ANSI games that the BBS would shell out to, passing the connection over. When the game extended, the BBS picked up the phone and kept the connection. TradeWars is/was the most well-known Door Game and we'd play it for months. TradeWars was the Elite Dangerous of the BBS set. ;)

So the question is, could we play DOS-based 16-bit Door Games today? Yes.

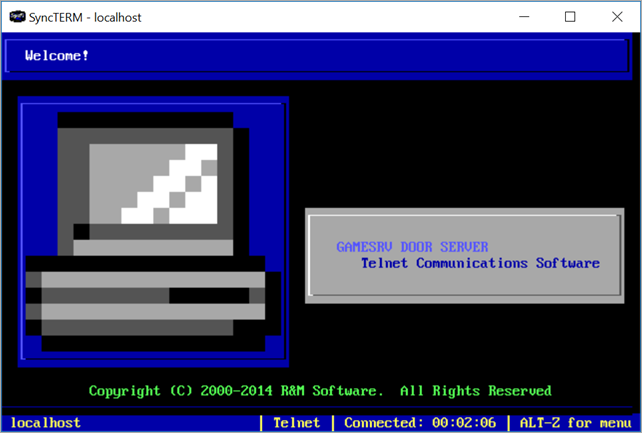
GameSrv can be used to bring your old DOS based BBS server into the new millennium. It'll act as a front-end and accept telnet connections before passing them off to the DOS BBS software.

Rick Parrish has a BBS door game server for Windows and Linux that he's written in open source C# called GameSrv. You may know Rick from his fTelnet browser based app. fTelnet lets you connect to Bulletin Board Systems from the comfort of your browser. A locally-run cross-platform option for connecting to BBS's is SyncTERM.

Go get SyncTerm, Rick's GameSrv Full, as well as DOSBox 0.73. You'll be able to telnet into your BBS with Ubuntu's (Bash on Windows/WSL) built in Telnet but you may run into issues with local echo (you'll want to Ctrl-] then type "mode char") as well as some missing extended ASCII characters that BBS's loved to draw menus with. While WSL's ANSI support is good, these missing characters cause hiccups. SyncTerm is totally custom with a whole host of Bitmapped fonts and a lot of custom work around extended control sequences. You should also try out EtherTerm, Qodem and NetRunner as other cool BBS-friendly terminal options.

NOTE: One of the major challenges of the conhost (console host - the thing that paints the console window and hosts and paints text and handles keyboard input for bash/cmd/powershell) is that while there's lots of great console fonts, those fonts don't often include some of the obscure extended ASCII DOS characters that BBS's used to draw their menus. In order to find and render those glyphs, consoles will use "font fallback" and follow a tree of fonts, looking for the best glyph. As I understand it (I could be wrong) the current conhost - lovely as it is - doesn't yet support this. I think it should in order to be a complete and effective solution for telnet/ssh/etc.

Run GameSrvConsole and it will listen on localhost by default. You could setup a VM in Azure and run it there to make your BBS and Door Games available to the public if you'd like! Then, either "telnet localhost" or run "syncterm localhost" to access your BBS. You can "ALT-ENTER" to put Sync Term full screen, which is awesome.

Your new BBS

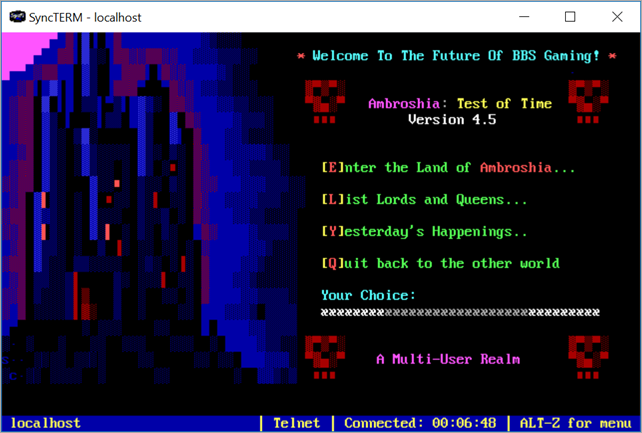
Once you sign up for your BBS with a new account, you can try out the Door Games menu. Selecting a Door Game will cause GameSrc to launch DOSBox and run the Door, while brokering the output back to your telnet client.

Running a Door Game - Ambroshia Test of Time

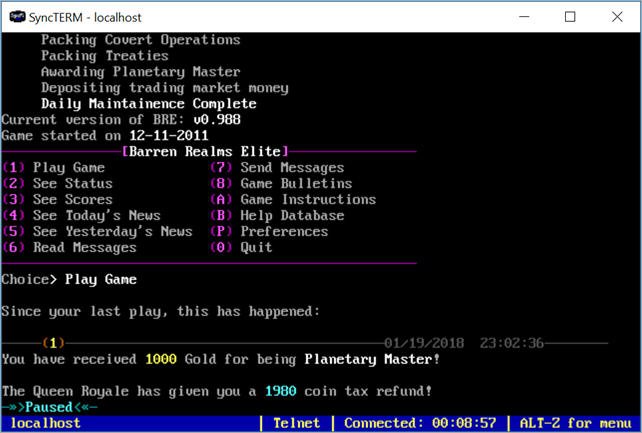
I'm heartened to see 20 year old BBS Door Games come to live on Windows 10. I'm going to see if my 10 and 12 year olds get a kick out of some of these adventure games.

An adventure door game

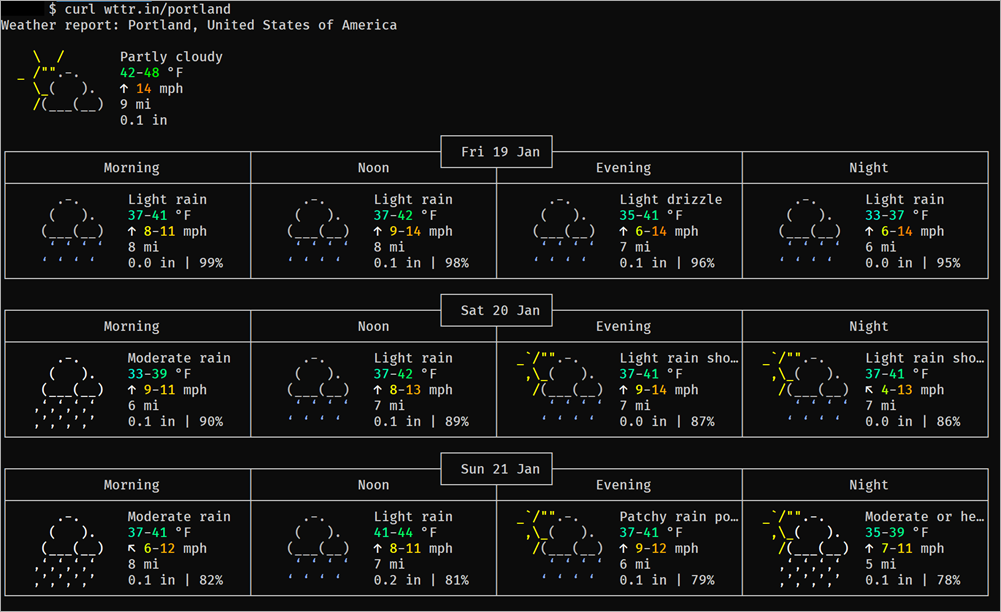
Finally, and slightly related, try "curl wttr.in/portland" in a large WSL (Linux) console. Lovely. I love stuff like this. Perhaps I'm easily impressed, or I just miss ASCII art.

image

Head over to https://github.com/rickparrish/GameSrv and STAR his GitHub Repository and if you like GameSrv and appreciate the work involved, you can donate to Rick as well. I have!


Sponsor: Get the latest JetBrains Rider for debugging third-party .NET code, Smart Step Into, more debugger improvements, C# Interactive, new project wizard, and formatting code in columns.

About Scott

Scott Hanselman is a former professor, former Chief Architect in finance, now speaker, consultant, father, diabetic, and Microsoft employee. He is a failed stand-up comic, a cornrower, and a book author.

facebook bluesky subscribe
About   Newsletter
Hosting By
Hosted on Linux using .NET in an Azure App Service

Building 0verkill on Windows 10 Subsystem for Linux - 2D ASCII art deathmatch game

January 12, 2018 Comment on this post [4] Posted in Linux | Win10
Sponsored By

I'm a big fan of the Windows Subsystem for Linux. It's real Linux that runs real user-mode ELF binaries but it's all on Windows 10. It's not running in a Virtual Machine. I talk about it and some of the things you should be aware of when sharing files between files systems in this YouTube video.

WHAT IS ALL THIS LINUX ON WINDOWS STUFF? Here's a FAQ on the Bash/Windows Subsystem for Linux/Ubuntu on Windows/Snowball in Hell and some detailed Release Notes. Yes, it's real, and it's spectacular. Can't read that much text? Here's a video I did on Ubuntu on Windows 10.

You can now install not only Ubuntu from the Windows Store (make sure you run this first from a Windows PowerShell admin prompt) - "Enable-WindowsOptionalFeature -Online -FeatureName Microsoft-Windows-Subsystem-Linux"

I have set up a very shiny Linux environment on Windows 10 with lovely things like tmux and Midnight Commander. The bash/Ubuntu/WSL shell shares the same "console host" (conhost) as PowerShell and CMD.exe, so as the type adds new support for fonts, colors, ANSI, etc, every terminal gets that new feature.

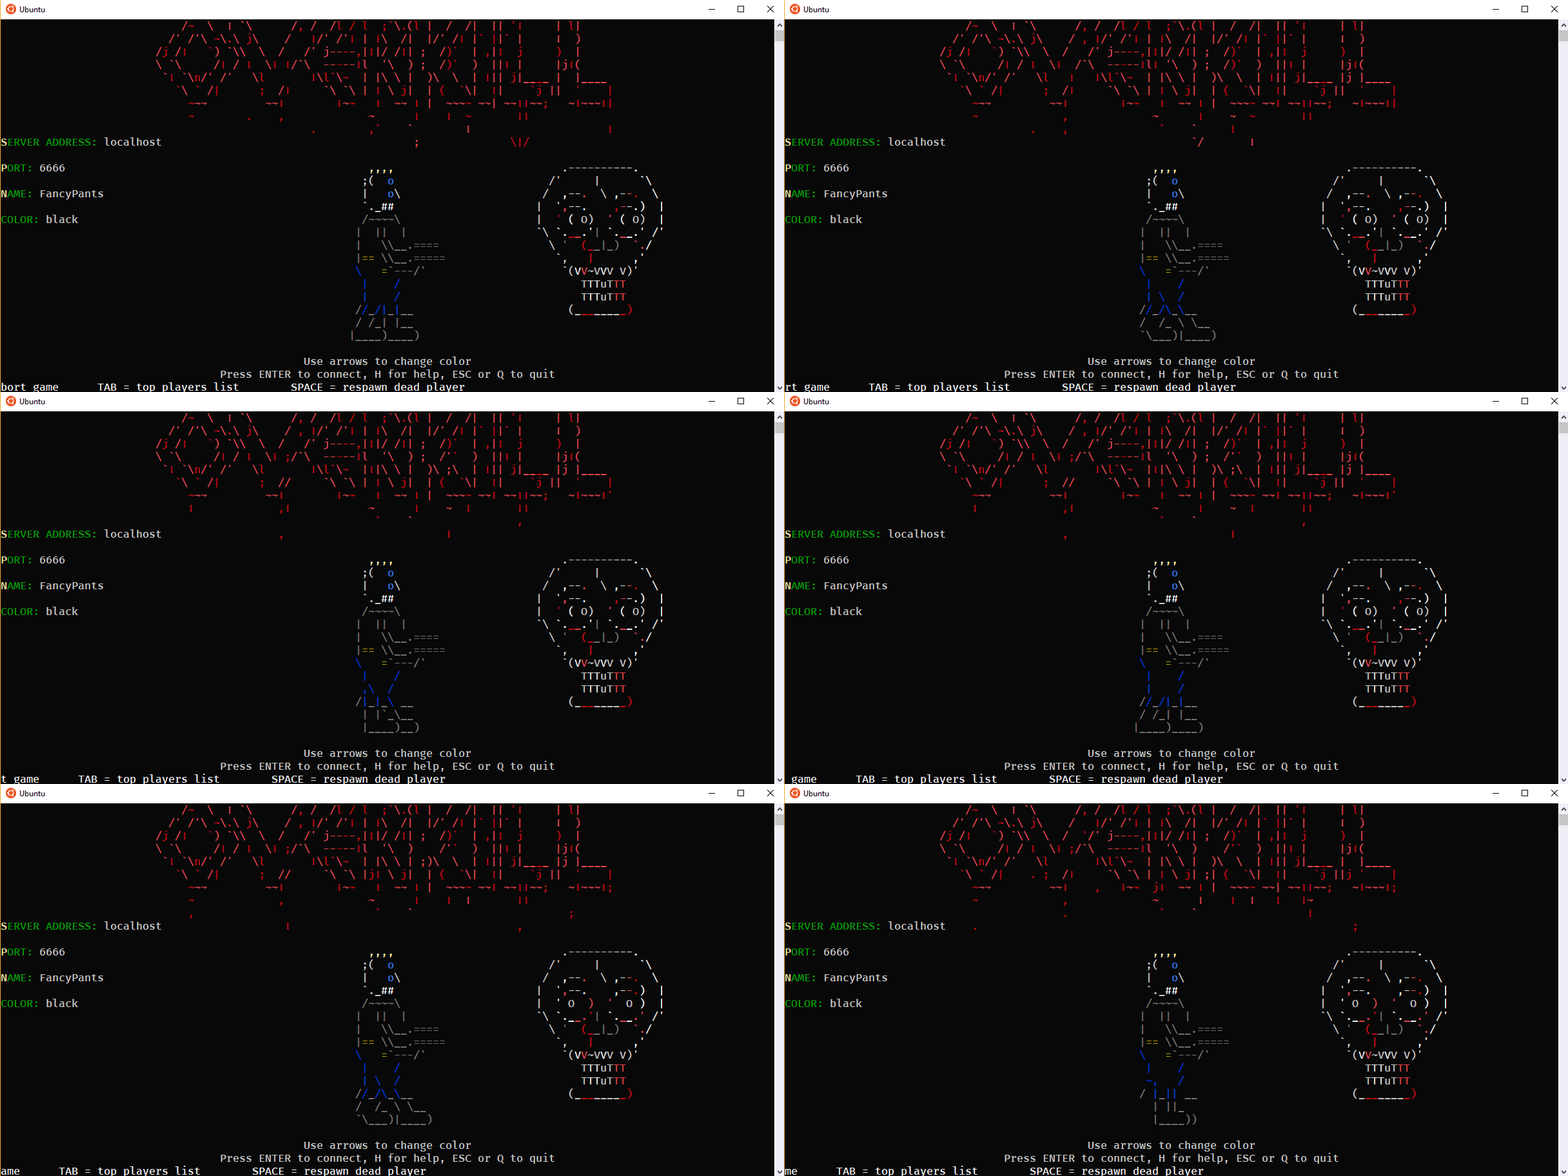
I wanted to see how far this went. How Linuxy is Linux on Windows? How good is the ANSI/ASCII support in the console on Windows 10? Clearly the only real way to check this out would be to try to build 0verkill. 0verkill is a client-server 2D deathmatch-like game in ASCII art. It has both client and server and lots of cool features. Plus building it would exercise the system pretty well. It's also nearly 20 years old which is fun.

PRO TIP: Did you know that you can easily change your command prompt colors globally with the new free open source ColorTool? You can easily switch to solarized or even color-blind schemes for deuteranopia.

There's a fork of the 0verkill code at https://github.com/hackndev/0verkill so I started there. I saw that there was a ./rebuild script that uses aclocal, autoconf, configure, and make, so I needed to apt in some stuff.

sudo apt-get install build-essential autotools-dev automake
sudo apt-get install libx11-dev
sudo apt-get install libxpm-dev

Then I built it with ./rebuild and got a TON of warnings. Looks like this rather old code does some (now, in the modern world) questionable things with fprintf. While I can ignore the warnings, I decided to add -Wno-format-security to the CFLAGS in Makefile.in in order to focus on any larger errors I might run into.

Changing CFLAGS in Makefile.in

I then rebuild again, and get a few warnings, but nothing major. Nice.

Building 0verkill

I run the server locally with ./server. This allows you to connect multiple clients, although I'll just be connecting locally, it's nice that the networking works.

$ ./server
11. 1.2018 14:01:42  Running 0verkill server version 0.16
11. 1.2018 14:01:42  Initialization.
11. 1.2018 14:01:42  Loading sprites.
11. 1.2018 14:01:42  Loading level "level1"....
11. 1.2018 14:01:42  Loading level graphics.
11. 1.2018 14:01:42  Loading level map.
11. 1.2018 14:01:42  Loading level objects.
11. 1.2018 14:01:42  Initializing socket.
11. 1.2018 14:01:42  Installing signal handlers.
11. 1.2018 14:01:42  Game started.
11. 1.2018 14:01:42  Sleep

Next, run the client in another bash/Ubuntu console window (or a tmux pane) with ./0verkill.

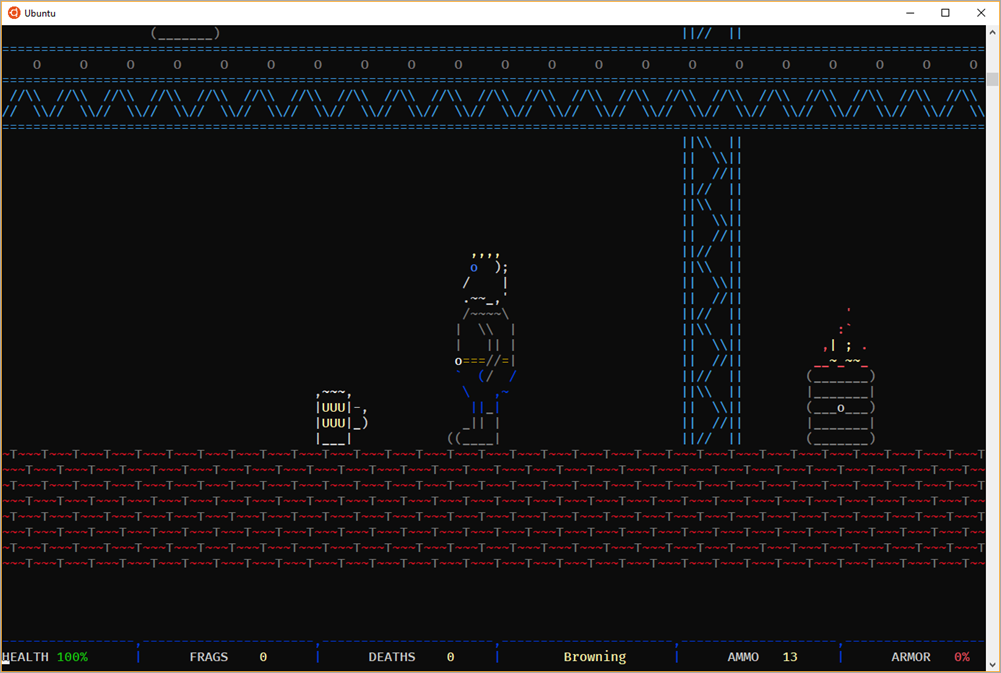
Awesome. Works great, scales with the window size, ASCII and color looks great.

Alone in 0verkill

Now I just need to find someone to play with me...


Sponsor: Get the latest JetBrains Rider for debugging third-party .NET code, Smart Step Into, more debugger improvements, C# Interactive, new project wizard, and formatting code in columns.

About Scott

Scott Hanselman is a former professor, former Chief Architect in finance, now speaker, consultant, father, diabetic, and Microsoft employee. He is a failed stand-up comic, a cornrower, and a book author.

facebook bluesky subscribe
About   Newsletter
Hosting By
Hosted on Linux using .NET in an Azure App Service

Disclaimer: The opinions expressed herein are my own personal opinions and do not represent my employer's view in any way.