Scott Hanselman

Exploring the Azure IoT Arduino Cloud DevKit

January 09, 2018 Comment on this post [0] Posted in Azure | Hardware
Sponsored By

Someone gave me an Azure IoT DevKit, and it was lovely timing as I'm continuing to learn about IoT. As you may know, I've done a number of Arduino and Raspberry Pi projects, and plugged them into various and sundry clouds, including AWS, Azure, as well as higher-level hobbyist systems like AdaFruit IO (which is super fun, BTW. Love them.)

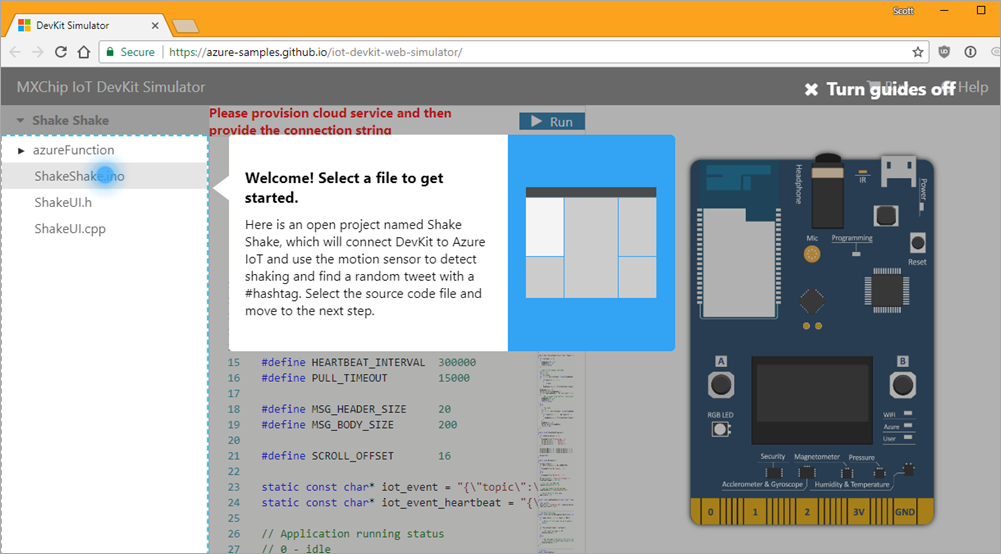
The Azure IoT DevKit is brilliant for a number of reasons, but one of the coolest things is that you don't need a physical one...they have an online simulator! Which is very Inception. You can try out the simulator at https://aka.ms/iot-devkit-simulator. You can literally edit your .ino Arduino files in the browser, connect them to your Azure account, and then deploy them to a virtual DevKit (seen on the right). All the code and how-tos are on GitHub as well.

When you hit Deploy it'll create a Free Azure IoT Hub. Be aware that if you already have a free one you may want to delete it (as you can only have a certain number) or change the template as appropriate. When you're done playing, just delete the entire Resource Group and everything within it will go away.

The Azure IoT DevKit in the browser is amazing

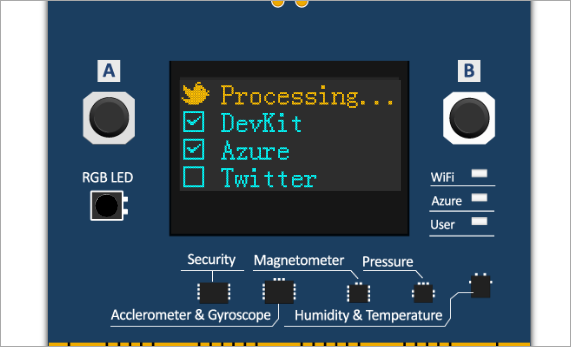
Right off the bat you'll have the code to connect to Azure, get tweets from Twitter, and display them on the tiny screen! (Did I mention there's a tiny screen?) You can also "shake" the virtual IoT kit, and exercise the various sensors. It wouldn't be IoT if it didn't have sensors!

It's a tiny Arduino device with a screen!

This is just the simulator, but it's exactly like the real MXChip IoT DevKit. (Get one here) They are less than US$50 and include WiFi, Humidity & Temperature, Gyroscope & Accelerometer, Air Pressure, Magnetometer, Microphone, and IrDA, which is ton for a small dev board. It's also got a tiny 128x64 OLED color screen! Finally, the board also can go into AP mode which lets you easily put it online in minutes.

I love these well-designed elegant little devices. It also shows up as an attached disk and it's easy to upgrade the firmware.

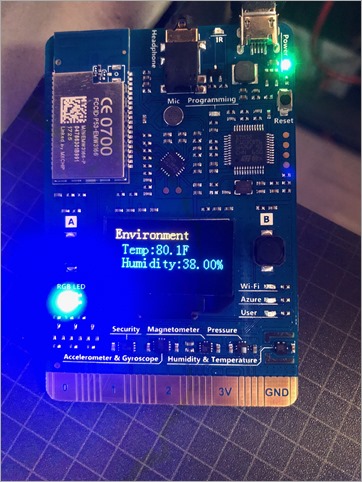
Temp and Humidity on the Azure IoT DevKit

You can then dev against the real device with free VS Code if you like. You'll need:

  • Node.js and Yarn: Runtime for the setup script and automated tasks.
  • Azure CLI 2.0 MSI - Cross-platform command-line experience for managing Azure resources. The MSI contains dependent Python and pip.
  • Visual Studio Code (VS Code): Lightweight code editor for DevKit development.
  • Visual Studio Code extension for Arduino: Extension that enables Arduino development in Visual Studio Code.
  • Arduino IDE: The extension for Arduino relies on this tool.
  • DevKit Board Package: Tool chains, libraries, and projects for the DevKit
  • ST-Link Utility: Essential tools and drivers.

But this Zip file sets it all up for you on Windows, and head over here for Homebrew/Mac instructions and more details.

I was very impressed with the Arduino extension for VS Code. No disrespect to the Arduino IDE but you'll likely outgrow it quickly. This free add on to VS Code gives you intellisense and integration Arduino Debugging.

Once you have the basics done, you can graduate to the larger list of projects at https://microsoft.github.io/azure-iot-developer-kit/docs/projects/ that include lots of cool stuff to try out like a cloud based Translator, Door Monitor, and Air Traffic Control Simulator.

All in all, I was super impressed with the polish of it all. There's a LOT to learn, to be clear, but this was a very enjoyable weekend of play.


Sponsor: Get the latest JetBrains Rider for debugging third-party .NET code, Smart Step Into, more debugger improvements, C# Interactive, new project wizard, and formatting code in columns.

About Scott

Scott Hanselman is a former professor, former Chief Architect in finance, now speaker, consultant, father, diabetic, and Microsoft employee. He is a failed stand-up comic, a cornrower, and a book author.

facebook bluesky subscribe
About   Newsletter
Hosting By
Hosted on Linux using .NET in an Azure App Service

ASP.NET Single Page Applications Angular Release Candidate

January 08, 2018 Comment on this post [22] Posted in DotNetCore | Javascript
Sponsored By

I was doing some Angular then remembered that the ASP.NET "Angular Project Template" has a release candidate and is scheduled to release sometime soon in 2018.

Starting with just a .NET Core 2.0 install plus Node v6 or later, I installed the updated angular template. Note that this isn't the angular/react/redux templates that came with .NET Core's base install.

I'll start by adding the updated SPA (single page application) template:

dotnet new --install Microsoft.DotNet.Web.Spa.ProjectTemplates::2.0.0-rc1-final

Then from a new directory, just

dotnet new angular

Then I can open it in either VSCode or Visual Studio Community (free for Open Source). If you're interested in the internals, open up the .csproj project file and note the checks for ensuring node is install, running npm, and running WebPack.

If you've got the Angular "ng" command line tool installed you can do the usual ng related stuff, but you don't need to run "ng serve" because ASP.NET Core will run it automatically for you.

I set development mode with "SET ASPNETCORE_Environment=Development" then do a "dotnet build." It will also restore your npm dependencies as part of the build. The client side app lives in ./ClientApp.

C:\Users\scott\Desktop\my-new-app> dotnet build
Microsoft (R) Build Engine version 15.5 for .NET Core
Copyright (C) Microsoft Corporation. All rights reserved.

Restore completed in 73.16 ms for C:\Users\scott\Desktop\my-new-app\my-new-app.csproj.
Restore completed in 99.72 ms for C:\Users\scott\Desktop\my-new-app\my-new-app.csproj.
my-new-app -> C:\Users\scott\Desktop\my-new-app\bin\Debug\netcoreapp2.0\my-new-app.dll
v8.9.4
Restoring dependencies using 'npm'. This may take several minutes...

"dotnet run" then starts the ng development server and ASP.NET all at once.

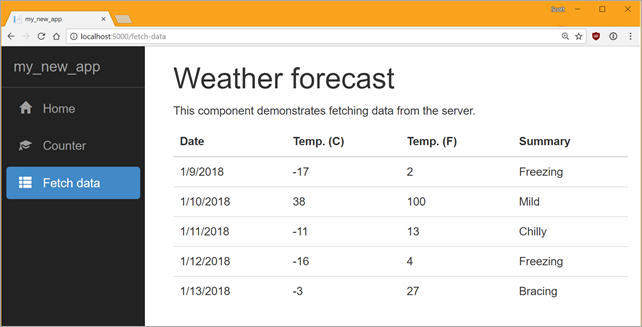
My ASP.NET Angular Application

If we look at the "Fetch Data" menu item, you can see and example of how Angular and open source ASP.NET Core work together. Here's the Weather Forecast *client-side* template:

<p *ngIf="!forecasts"><em>Loading...</em></p>

<table class='table' *ngIf="forecasts">
<thead>
<tr>
<th>Date</th>
<th>Temp. (C)</th>
<th>Temp. (F)</th>
<th>Summary</th>
</tr>
</thead>
<tbody>
<tr *ngFor="let forecast of forecasts">
<td>{{ forecast.dateFormatted }}</td>
<td>{{ forecast.temperatureC }}</td>
<td>{{ forecast.temperatureF }}</td>
<td>{{ forecast.summary }}</td>
</tr>
</tbody>
</table>

And the TypeScript:

import { Component, Inject } from '@angular/core';
import { HttpClient } from '@angular/common/http';

@Component({
selector: 'app-fetch-data',
templateUrl: './fetch-data.component.html'
})
export class FetchDataComponent {
public forecasts: WeatherForecast[];

constructor(http: HttpClient, @Inject('BASE_URL') baseUrl: string) {
http.get<WeatherForecast[]>(baseUrl + 'api/SampleData/WeatherForecasts').subscribe(result => {
this.forecasts = result;
}, error => console.error(error));
}
}

interface WeatherForecast {
dateFormatted: string;
temperatureC: number;
temperatureF: number;
summary: string;
}

Note the URL. Here's the back-end. The request is serviced by ASP.NET Core. Note the interface as well as the TemperatureF server-side conversion.

[Route("api/[controller]")]
public class SampleDataController : Controller
{
private static string[] Summaries = new[]
{
"Freezing", "Bracing", "Chilly", "Cool", "Mild", "Warm", "Balmy", "Hot", "Sweltering", "Scorching"
};

[HttpGet("[action]")]
public IEnumerable<WeatherForecast> WeatherForecasts()
{
var rng = new Random();
return Enumerable.Range(1, 5).Select(index => new WeatherForecast
{
DateFormatted = DateTime.Now.AddDays(index).ToString("d"),
TemperatureC = rng.Next(-20, 55),
Summary = Summaries[rng.Next(Summaries.Length)]
});
}

public class WeatherForecast
{
public string DateFormatted { get; set; }
public int TemperatureC { get; set; }
public string Summary { get; set; }

public int TemperatureF
{
get
{
return 32 + (int)(TemperatureC / 0.5556);
}
}
}
}

Pretty clean and straightforward. Not sure about the Date.Now, but for the most part I understand this and can see how to extend this. Check out the docs on this release candidate and also note that this included updated React and Redux templates as well!


Sponsor: Scale your Python for big data & big science with Intel® Distribution for Python. Near-native code speed. Use with NumPy, SciPy & scikit-learn. Get it Today!

About Scott

Scott Hanselman is a former professor, former Chief Architect in finance, now speaker, consultant, father, diabetic, and Microsoft employee. He is a failed stand-up comic, a cornrower, and a book author.

facebook bluesky subscribe
About   Newsletter
Hosting By
Hosted on Linux using .NET in an Azure App Service

How to set up a 10" Touchscreen LCD for Raspberry Pi

December 21, 2017 Comment on this post [4] Posted in Reviews
Sponsored By

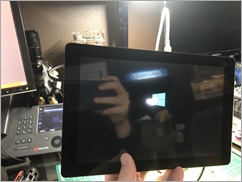
HDMI TouchScreenI'm a big fan of the SunFounder tech kits (https://www.sunfounder.com), and my kids and I have built several Raspberry Pi projects with their module/sensor kits. This holiday vacation we have two project we're doing, that coincidentally use SunFounder parts. The first is the Model Car Kit that uses a Raspberry Pi to control DC motors AND (love this part) a USB camera. So it's not just a "drive the car around" project, it also can include computer vision. My son wants to teach it to search the house for LEGO bricks and alert an adult so they'll not step on it. We were thinking to have the car call out to Azure Cognitive Services, as their free tier has more than enough power for what we need.

For this afternoon, we are taking a 10.1" Touchscreen display and adding it to a Raspberry Pi. I like this screen because it works on pretty much anything that has HDMI, but it's got mounting holes on the back for any Raspberry Pi or a LattePanda or Beagle Bone. You can also use it for basically anything that can output HDMI, so it can be a small portable monitor/display for Android or iOS. It has 10 finger multitouch which is fab. The instructions aren't linked to from their product page, but I found them on their Wiki.

There are a lot of small LCDs you can get for a Pi project, from little 5" screens (for about $35) all the way up to this 10" one I'm using here. If you're going to mount your project on a wall or 3D print a box, a screen adds a lot. It's also a good way to teach kids about embedded systems. When my 10 year old saw the 5" screen and what it could do, he realized that the thermostat on the wall and/or the microwave ovens were embedded systems. Now he assumes every appliance is powered by a Raspberry Pi!

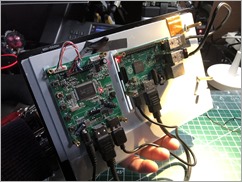
Sunfounder Controller board AND Raspberry Pi Mounted to the 10.1" Touchscreen Booting Windows 10 on a Raspberry Pi for no reason

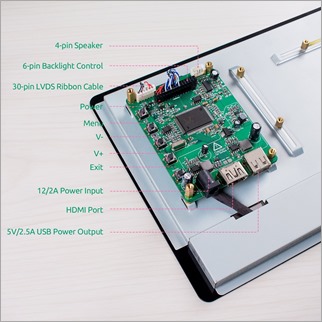
Take a look at the pic at the top right of this post. That's not a Raspberry Pi, that's

the included controller board that interfaces with your tiny computer. It's include with the LCD package. That controller board also has an included power adapter that points out 12V at 1500Ma which allows it to also power the Pi itself. That means you can power the whole thing with a single power adapter.

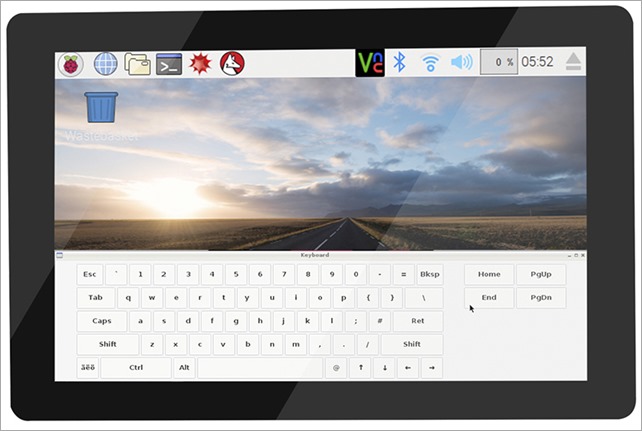
There's also an optional touchscreen "matchbox" keyboard package you can install to get an on-screen visual keyboard. However, when I'm initially setting up a Raspberry Pi or I'm taking a few Pis on the road for demos and working in hotels, I through this little $11 keyboard/mouse combo in my bag. It's great for quick initial setup of a Raspberry Pi that isn't yet on the network.

Matchbox Touchscreen Keyboard

Once you've installed matchbox-keyboard you'll find it under MainMenu, Accessories, Keyboard. Works great!

* This post includes some referral links to Amazon.com. When you use these links, you not only support my blog, but you send a few cents/dollars my way that I use to pay for hosting and buy more gadgets like these! Thanks! Also, I have no relationship with SunFounder but I really like their stuff. Check out their site.


Sponsor: Scale your Python for big data & big science with Intel® Distribution for Python. Near-native code speed. Use with NumPy, SciPy & scikit-learn. Get it Today!

About Scott

Scott Hanselman is a former professor, former Chief Architect in finance, now speaker, consultant, father, diabetic, and Microsoft employee. He is a failed stand-up comic, a cornrower, and a book author.

facebook bluesky subscribe
About   Newsletter
Hosting By
Hosted on Linux using .NET in an Azure App Service

Visualizing your real-time blood sugar values AND a Git Prompt on Windows PowerShell and Linux Bash

December 17, 2017 Comment on this post [4] Posted in Diabetes
Sponsored By

imageMy buddy Nate become a Type 1 Diabetic a few weeks back. It sucks...I've been one for 25 years. Nate is like me - an engineer - and the one constant with all engineers that become diabetic, we try to engineer our ways out of it. ;) I use an open source artificial pancreas system with an insulin pump and continuous glucose system. At the heart of that system is some server-side software called Nightscout that has APIs for managing my current and historical blood sugar. It's updated every 5 minutes, 24 hours a day.

I told Nate to get NightScout set up ASAP and start playing with the API. Yesterday Nate added his blood sugar to his terminal prompt!

I love this. He uses Linux, but I use Linux (Ubuntu) on Windows 10, so I wanted to see if I could run his little node up from Windows (I'll make it a Windows service).

Yes, you can run cron jobs under Windows 10's Ubuntu, but only when there is an instance of bash running (the Linux subsystem shuts down when it's not used) and upstart doesn't work yet. I could run it from the .bashrc or use various hacks/workarounds to keep WSL (Windows Subsystem for Linux) running, but the benefit of running this as a Windows Service is that I can see my blood sugar in all prompts on Windows, like Powershell as well!

You can install with

npm install -g nightscout-ps1

And then run with

nightscout-ps1 -n "my-nightscout-url.com" -c ~/.nightscout-ps1.env

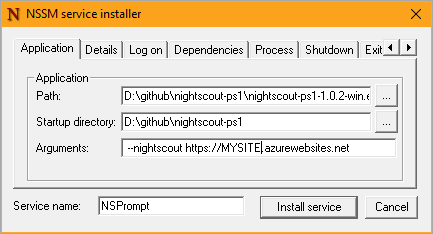
I'll use the "non-sucking service manager (NSSM)" to run Nate's non-Windows-service node app as a Windows service. I ran "nssm install nsprompt" and get this GUI. Then I add the --nightscout parameter and pass in my Nightscout blood sugar website. You'll get an error immediately when the service runs if this is wrong.

NSSM Service Installer

From the Log on tab, make sure the service is logged on as you. I login with my MSA (Microsoft Account) so I used my email address. This is to ensure that with the app writes to ~ on Windows, it's putting your sugars in c:\users\LOGGEDINUSER\.

Next, run the service with "sc start NSPrompt" or from the Services GUI.

My sugar updater runs in a Windows Service

Nate's node app gets blood sugar from Nightscout and puts it in ~/.bgl-cache. However, to be clear since I'm running it from the Windows side while changing the Bash/Ubuntu on Windows prompt from Linux, it's important to note that from WIndows ~/ is really c:\users\LOGGEDINUSER\ so I changed the Bash .profile to load the values from the Windows mnt'ed drives like this:

eval "$(cat /mnt/c/Users/scott/nightscout-ps1.env)"

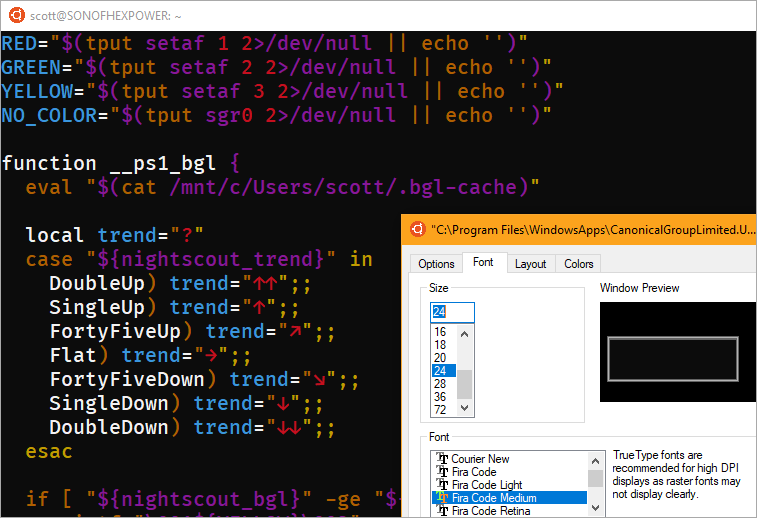
Also, you need to make sure that you're using a Unicode font in your console. For example, I like using Fira Code Light, but it doesn't have a single character ⇈ double-up arrow (U+21C8), so I replaced it with two singles. You get the idea. You need a font that has the glyphs you want and you need those glyphs displaying properly in your .profile text file.

You'll need a Unicode Font

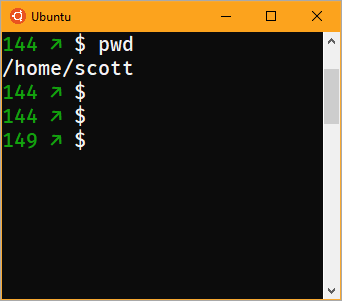
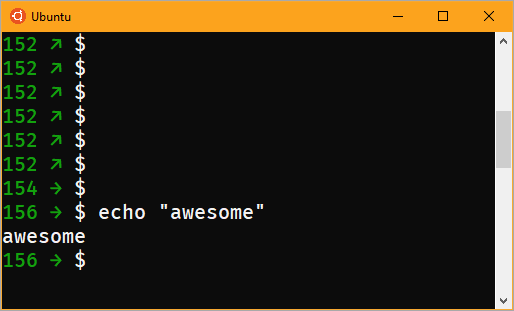
And boom. It's glorious. My current blood sugar and trends in my prompt. Thanks Nate!

My sugars!

So what about PowerShell as well? I want to update that totally different prompt/world/environment/planet from the same file that's updated by the service. Also, I already have a custom prompt with Git details since I use Posh-Git from Keith Dahlby (as should you).

I can edit $profile.CurrentUserAllHosts with "powershell_ise $profile.CurrentUserAllHosts" and add a prompt function before "import-module posh-git."

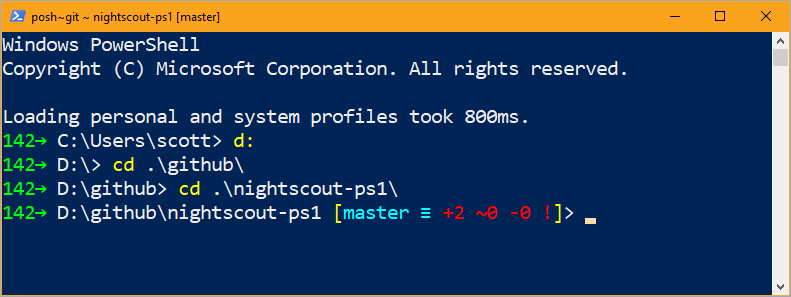
Here's Nate's same prompt file, translated into a PowerShell prompt() method, chained with PoshGit. So I can now see my Git Status AND my Blood Sugar. My two main priorities!

NOTE: If you don't use posh-git, you can remove the "WriteVcsStatus" line and the "Import-Module posh-git" and you should be set!

function prompt {
Get-Content $ENV:USERPROFILE\.nightscout-ps1.env | %{$bgh = @{}} {if ($_ -match "(.*)=""(.*)""") {$bgh[$matches[1]]=$matches[2].Trim();}}
$trend = "?"

switch ($bgh.latest_entry_direction)
{
"DoubleUp" {$trend="↑↑"}
"SingleUp" {$trend="↑"}
"FortyFiveUp" {$trend="↗"}
"Flat" {$trend="→"}
"FortyFiveDown" {$trend="↘"}
"SingleDown" {$trend="↓"}
"DoubleDown" {$trend="↓↓"}
}

$bgcolor = [Console]::ForegroundColor.ToString()
if ([int]$bgh.latest_entry_mgdl -ge [int]$bgh.settings_thresholds_bg_target_top) {
$bgcolor = "Yellow"
} ElseIf ([int]$bgh.latest_entry_mgdl -le [int]$bgh.settings_thresholds_bg_target_bottom) {
$bgcolor = "Red"
} Else {
$bgcolor = "Green"
}

Write-Host $bgh.latest_entry_mgdl -NoNewline -ForegroundColor $bgcolor
Write-Host $trend" " -NoNewline -ForegroundColor $bgcolor
[Console]::ResetColor()

$origLastExitCode = $LASTEXITCODE
Write-Host $ExecutionContext.SessionState.Path.CurrentLocation -NoNewline
Write-VcsStatus
$LASTEXITCODE = $origLastExitCode
"$('>' * ($nestedPromptLevel + 1)) "
}
Import-Module posh-git

Very cool stuff.

Blood Sugar and Git in PowerShell!

This concept, of course, could be expanded to include your heart rate, FitBit steps, or any health related metrics you'd like! Thanks Nate for the push to get this working on Windows!


Sponsor: Check out JetBrains Rider: a new cross-platform .NET IDE. Edit, refactor, test and debug ASP.NET, .NET Framework, .NET Core, Xamarin or Unity applications. Learn more and download a 30-day trial!

About Scott

Scott Hanselman is a former professor, former Chief Architect in finance, now speaker, consultant, father, diabetic, and Microsoft employee. He is a failed stand-up comic, a cornrower, and a book author.

facebook bluesky subscribe
About   Newsletter
Hosting By
Hosted on Linux using .NET in an Azure App Service

Setting up a managed container cluster with AKS and Kubernetes in the Azure Cloud running .NET Core in minutes

December 14, 2017 Comment on this post [11] Posted in Azure
Sponsored By

After building a Raspberry Pi Kubernetes Cluster, I wanted to see how quickly I could get up to speed on Kubernetes in Azure.

  • I installed the Azure CLI (Command Line Interface) in a few minutes - works on Windows, Mac or Linux.
    • I also remembered that I don't really need to install anything locally. I could just use the Azure Cloud Shell directly from within VS Code. I'd get a bash shell, Azure CLI, and automatically logged in without doing anything manual.
    • Anyway, while needlessly installing the Azure CLI locally, I read up on the Azure Container Service (AKS) here. There's walkthrough for creating an AKS Cluster here. You can actually run through the whole tutorial in the browser with an in-browser shell.
  • After logging in with "az login" I made a new resource group to hold everything with "az group create -l centralus -n aks-hanselman." It's in the centralus and it's named aks-hanselman.
  • Then I created a managed container service like this:
    C:\Users\scott\Source>az aks create -g aks-hanselman -n hanselkube --generate-ssh-keys
    / Running ...
  • This runs for a few minutes while creating, then when it's done, I can get ahold of the credentials I need with
    C:\Users\scott\Source>az aks get-credentials --resource-group aks-hanselman --name hanselkube
    Merged "hanselkube" as current context in C:\Users\scott\.kube\config
  • I can install Kubenetes CLI "kubectl" easily with "az aks install-cli"
    Then list out the nodes that are ready to go!
    C:\Users\scott\Source>kubectl get nodes
    NAME                       STATUS    ROLES     AGE       VERSION
    aks-nodepool1-13823488-0   Ready     agent     1m        v1.7.7
    aks-nodepool1-13823488-1   Ready     agent     1m        v1.7.7
    aks-nodepool1-13823488-2   Ready     agent     1m        v1.7.7

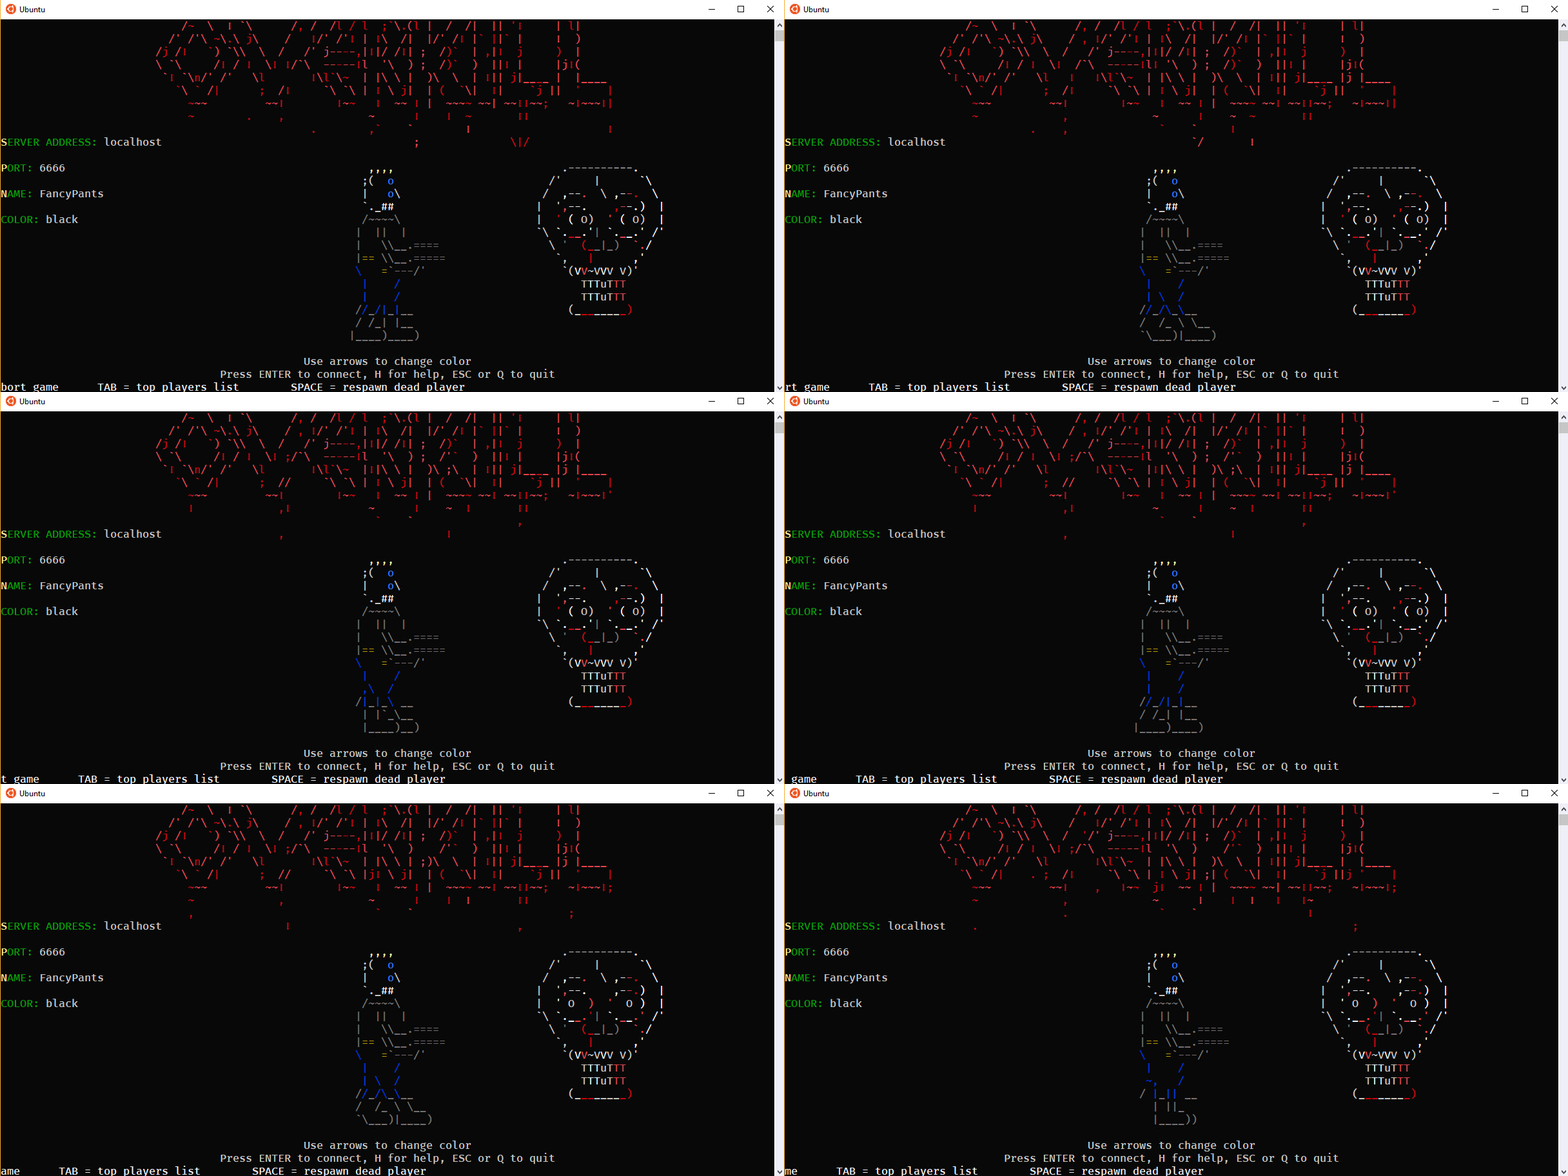
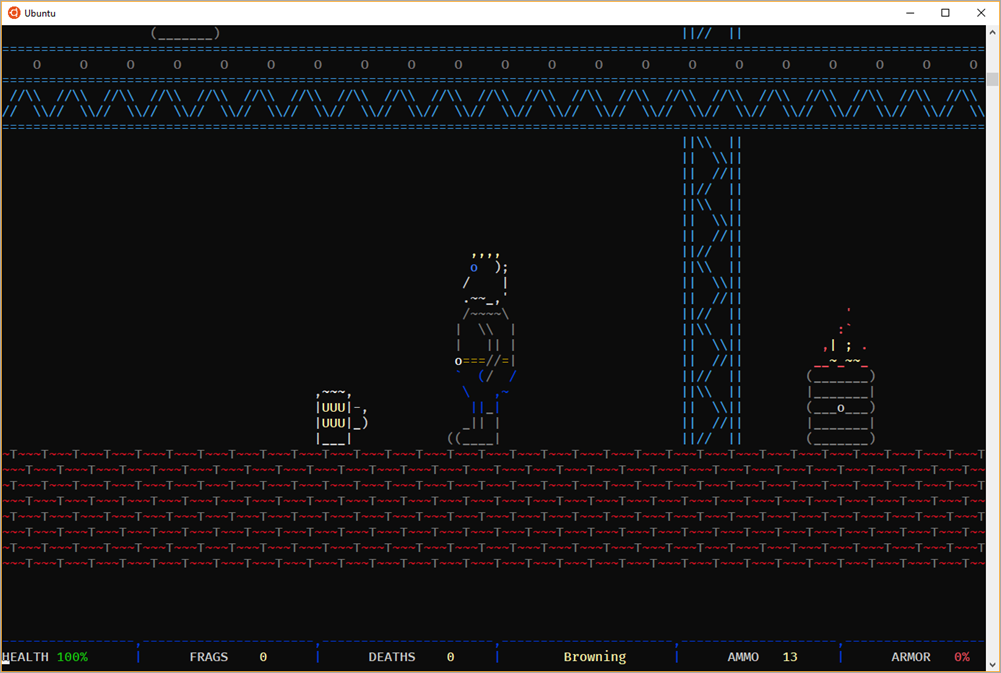
A year ago, Glenn Condron and I made a silly web app while recording a Microsoft Virtual Academy. We use it for demos and to show how even old (now over a year) containers can still be easily and reliably deployed. It's up at https://hub.docker.com/r/glennc/fancypants/.

I'll deploy it to my new Kubernetes Cluster up in Azure by making this yaml file:

apiVersion: apps/v1beta1
kind: Deployment
metadata:
name: fancypants
spec:
replicas: 1
template:
metadata:
labels:
app: fancypants
spec:
containers:
- name: fancypants
image: glennc/fancypants:latest
ports:
- containerPort: 80
---
apiVersion: v1
kind: Service
metadata:
name: fancypants
spec:
type: LoadBalancer
ports:
- port: 80
selector:
app: fancypants

I saved it as fancypants.yml, then run kubectl create -f fancypants.yml.

I can run kubectl proxy and then hit http://localhost:8001/api/v1/namespaces/kube-system/services/http:kubernetes-dashboard:/proxy/#!/overview?namespace=default to look at the Kubernetes Dashboard, proxyed locally, but all running in Azure.

image

When fancypants is created and deployed, then I can find out its external IP with:

C:\Users\scott\Sources>kubectl get service
NAME TYPE CLUSTER-IP EXTERNAL-IP PORT(S) AGE
fancypants LoadBalancer 10.0.116.145 52.165.232.77 80:31040/TCP 7m
kubernetes ClusterIP 10.0.0.1 <none> 443/TCP 18m

There's my IP, I hit it and boom, I've got fancypants in the managed cloud. I only have to pay for the VMs I'm using, and not for the VM that manages Kubernetes. That means the "kube-system" namespace is free, I pay for other namespaces like my "default" one.

image

Best part? When I'm done, I can just delete the resource group and take it all away. Per minute billing.

C:\Users\scott\Sources>az group delete -n aks-hanselman --yes

Super fun and just took about 30 min to install, read about, try it out, write this blog post, then delete. Try it yourself!


Sponsor: Check out JetBrains Rider: a new cross-platform .NET IDE. Edit, refactor, test and debug ASP.NET, .NET Framework, .NET Core, Xamarin or Unity applications. Learn more and download a 30-day trial!

About Scott

Scott Hanselman is a former professor, former Chief Architect in finance, now speaker, consultant, father, diabetic, and Microsoft employee. He is a failed stand-up comic, a cornrower, and a book author.

facebook bluesky subscribe
About   Newsletter
Hosting By
Hosted on Linux using .NET in an Azure App Service

Disclaimer: The opinions expressed herein are my own personal opinions and do not represent my employer's view in any way.