Retrogaming by modding original consoles to remove moving parts and add USB or SD-Card support
I'm a documented big fan of Retrogaming (playing older games and introducing my kids to those older games).
For example, we enjoy the Hyperkin Retron 5 in that it lets us play NES, Famicom, SNES, Super Famicom, Genesis, Mega Drive, Game Boy, Game Boy Color, & Game Boy over 5 category ports. with one additional adapter, it adds Game Gear, Master System, and Master System Cards. It uses emulators at its heart, but it requires the use of the original game cartridges. However, the Hyperkin supports all the original controllers - many of which we've found at our local thrift store - which strikes a nice balance between the old and the new. Best of all, it uses HDMI as its output plug which makes it super easy to hook up to our TV.
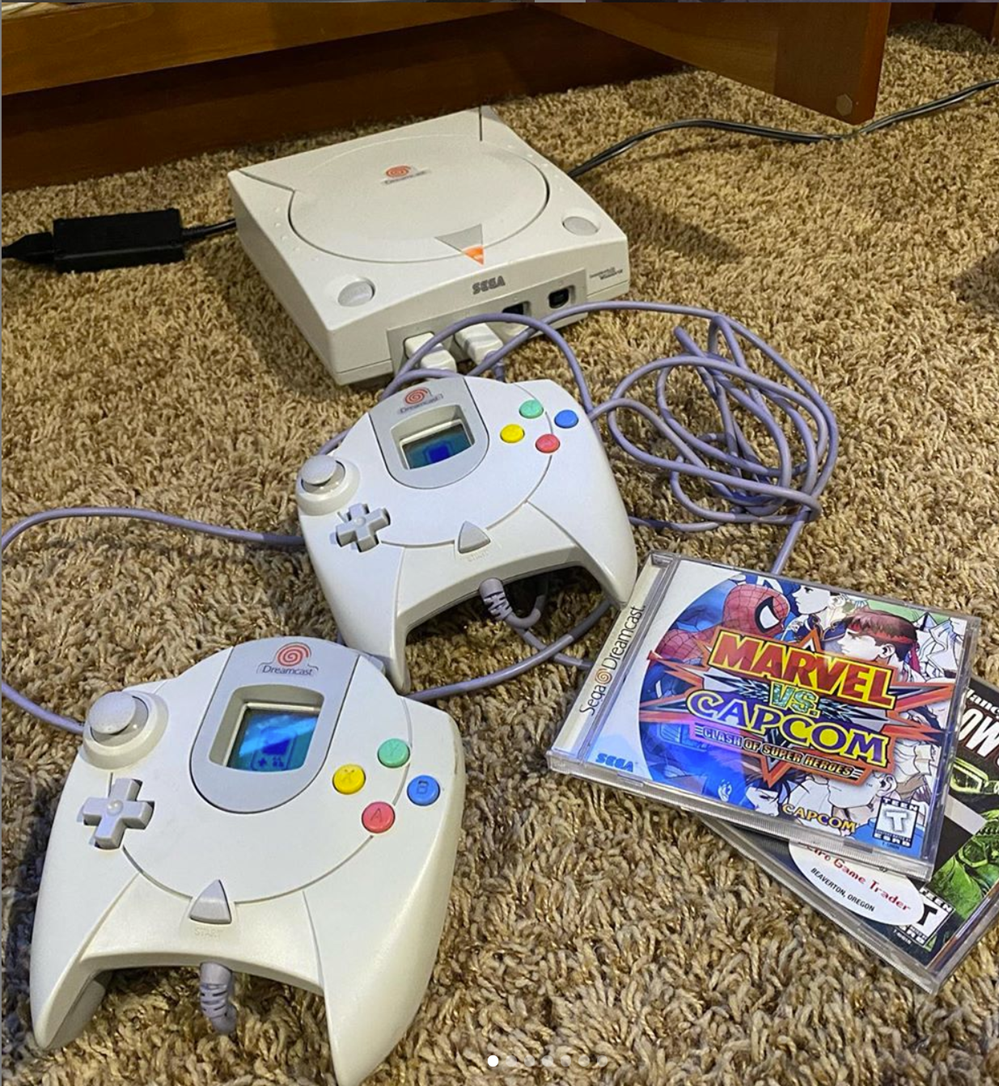
I've also blogged about modding/updating existing older consoles to support HDMI. On my Sega Dreamcast I've been very happy with this Dreamcast to HDMI adapter (that's really internally Dreamcast->VGA->HDMI).
When retrogaming there's a few schools of thought:
- Download ROMs and use emulators - I try not to do this as I want to support small businesses (like used game stores, etc) as well as (in a way) the original artists.
- For example, I bought Blade Runner on GOG to support the SCUMMVM open source project.
- Use original consoles with original cartridges
- This is my preferred method, although I often mod the consoles for HDMI output.
- Use original consoles with backup images through an I/O mod.
- I've been doing this more and more as many of my original consoles' CD-ROMs and other moving parts have started to fail.
It's the failure of those moving parts that is the focus of THIS post.
For example, the CD-ROM on my Panasonic 3DO Console was starting to throw errors and have trouble spinning up so I was able to mod it to load the CD-ROMs (for my owned discs) off of USB.
This last week my Dreamcast's GD-ROM finally started to get out of alignment.
Fixing Dreamcast Disc Errors
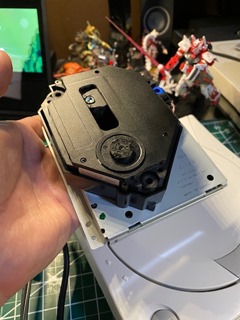
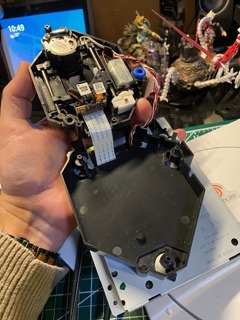
You can can align a Dreamcast GD-ROM by opening it up by removing the four screws on the bottom. Lift up the entire GD-ROM unit without pulling too hard on the ribbon cable. You may have to push the whole laser (don't touch the lens) back in order to flip the unit over.
Then, via trial and error, turn the screw shown below to the right about 5 degrees (very small turn) and test, then do it again, until your drive spins up reliably. It took me 4 tries and about 20 degrees. Your mileage may vary.
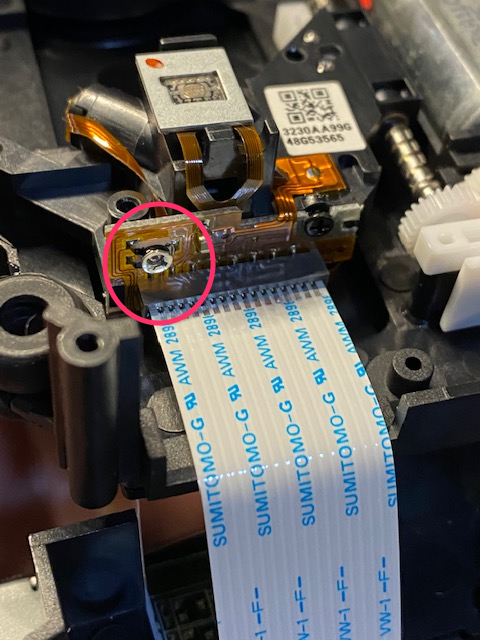
This fix worked for a while but it was becoming clear that I was going to eventually have to replace the whole thing. These are moving parts and moving parts wear out.
Adding solid state (SD-Card) storage to a Dreamcast
Assuming you, like me, have a VA1 Dreamcast (which is most of them) there are a few options to "fake" the GD-ROM. My favorite is the GDEMU mod which requires no soldering and can be done in just a few minutes. You can get them directly or on eBay. I ordered a version 5.5 and it works fantastically.
You can follow the GDEMU instructions to lay out a FAT32 formatted SD Card as it wants it, or you can use this little obscure .NET app called GDEMU SD Card Maker.
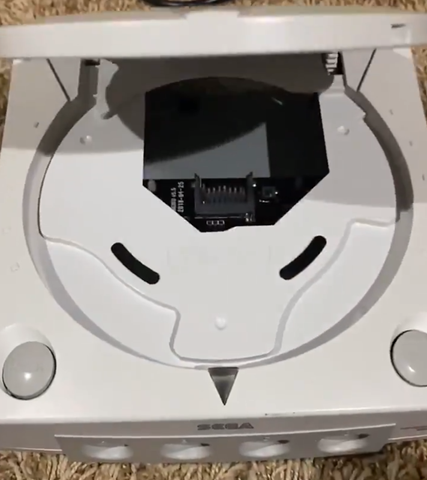
The resulting Dreamcast now has an SD Card inside, under where the GD-ROM used to be. It works well, it's quiet, it's faster than the GD-ROM and it allows me to play my backups without concern of breaking any moving parts.
Other small Dreamcast updates
As a moving part, the fan can sometimes fail so I replaced fan my using a guide from iFixit. In fact, a 3-pin 5V Noctua silent fan works great. You can purchase that fan plus a mod kit with a 3d printed adapter that includes a fan duct and conversion gable with 10k resistor, or you can certainly 3D print your own.
If you like this kind of content, go follow me on Instagram!
Sponsor: When you use my Amazon.com affiliate links to buy small things it allows me to also buy small things. Thanks!
About Scott
Scott Hanselman is a former professor, former Chief Architect in finance, now speaker, consultant, father, diabetic, and Microsoft employee. He is a failed stand-up comic, a cornrower, and a book author.
About Newsletter
nice work. I did a similar modification on my Sega Dreamcast, but additionally to the GDEMU it is recommended that you replace the original PSU with e.g. a PicoPSU, otherwise the original PSU could overheat (12V line is not used for the CD-Drive anymore).
If you have a 3D printer, you can also find some nice SD-card trays for the GDEMU. I built this one: Sega Dreamcast GD-EMU SD Card Tray.
Another cool modification is the DreamPi. You use a Raspberry Pi with a modem to get your Dreamcast connected to the internet again. You can then play old games like "Phantasy Star Online" again.
So, you say you're a fan of retrogamming? Cool. I'd like to know your opinion on something. How would you make a Flash game playable on modern PCs? The ideal would be to make a standalone game with an executable file as the entry point and stores the saved games (Flash cookies) in the same container.
Comments are closed.
