Setting up Azure DevOps CI/CD for a .NET Core 3.1 Web App hosted in Azure App Service for Linux
Following up on my post last week on moving from App Service on Windows to App Service on Linux, I wanted to make sure I had a clean CI/CD (Continuous Integration/Continuous Deployment) pipeline for all my sites. I'm using Azure DevOps because it's basically free. You get 1800 build minutes a month FREE and I'm not even close to using it with three occasionally-updated sites building on it.
Last Post: I updated one of my websites from ASP.NET Core 2.2 to the latest LTS (Long Term Support) version of ASP.NET Core 3.1 this week. I want to do the same with my podcast site AND move it to Linux at the same time. Azure App Service for Linux has some very good pricing and allowed me to move over to a Premium v2 plan from Standard which gives me double the memory at 35% off.
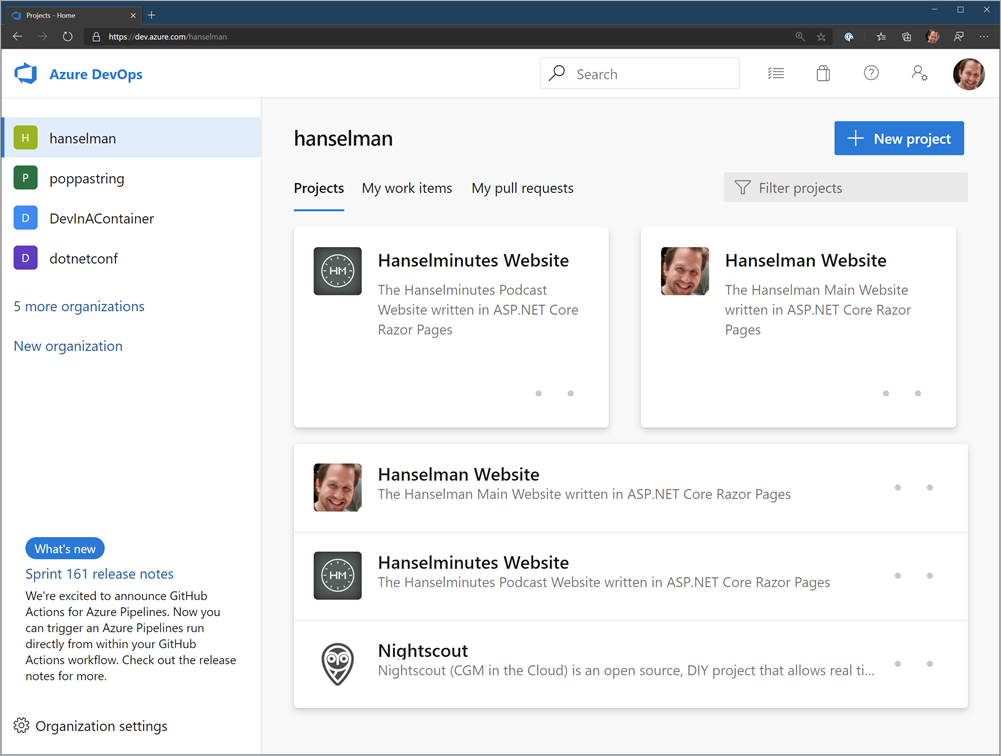
Setting up on Azure DevOps is easy and just like signing up for Azure you'll use your Microsoft ID. Mine is my gmail/gsuite, in fact. You can also login with GitHub creds. It's also nice if your project makes NuGet packages as there's an integrated NuGet Server that others can consume libraries from downstream before (if) you publish them publicly.
I set up one of my sites with Azure DevOps a while back in about an hour using their visual drag and drop Pipeline system which looked like this:
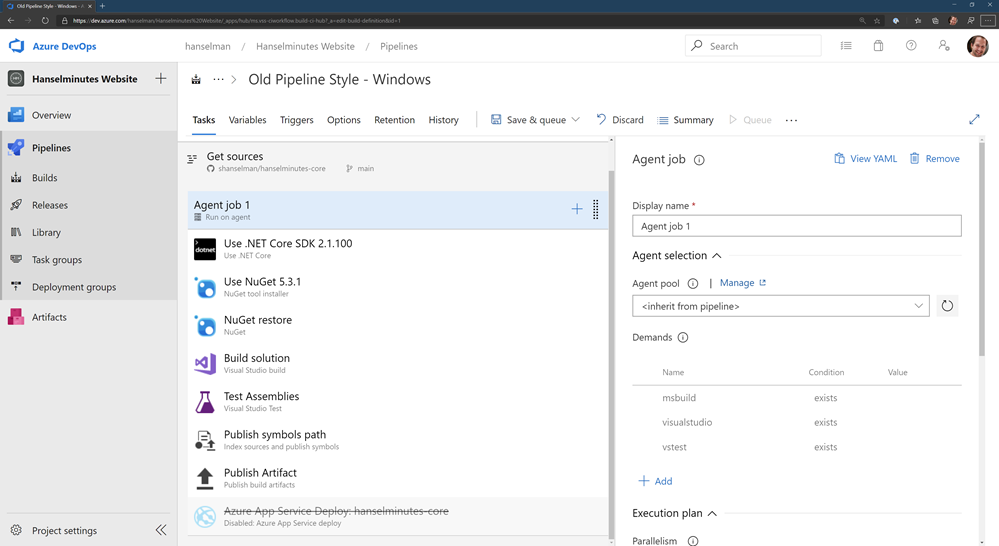
There's some controversy as some folks REALLY like the "classic" pipeline while others like the YAML (Yet Another Markup Language, IMHO) style. YAML doesn't have all the features of the original pipeline yet, but it's close. It's primary advantage is that the pipeline definition exists as a single .YAML file and can be checked-in with your source code. That way someone (you, whomever) could import your GitHub or DevOps Git repository and it includes everything it needs to build and optionally deploy the app.
The Azure DevOps team is one of the most organized and transparent teams with a published roadmap that's super detailed and they announce their sprint numbers in the app itself as it's updated which is pretty cool.
When YAML includes a nice visual interface on top of it, it'll be time for everyone to jump but regardless I wanted to make my sites more self-contained. I may try using GitHub Actions at some point and comparing them as well.
Migrating from Classic Pipelines to YAML Pipelines
If you have one, you can go to an existing pipeline in DevOps and click View YAML and get some YAML that will get you most of the way there but often includes some missing context or variables. The resulting YAML in my opinion isn't going to be as clean as what you can do from scratch, but it's worth looking at.
In decided to disable/pause my original pipeline and make a new one in parallel. Then I opened them side by side and recreated it. This let me learn more and the result ended up cleaner than I'd expected.
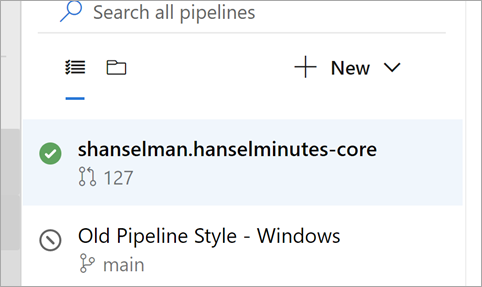
The YAML editor has a half-assed (sorry) visual designer on the right that basically has Tasks that will write a little chunk of YAML for you, but:
- Once it's placed you're on your own
- You can't edit it or modify it visually. It's text now.
- If your cursor has the insert point in the wrong place it'll mess up your YAML
- It's not smart
But it does provide a catalog of options and it does jumpstart things. Here's my YAML to build and publish a zip file (artifact) of my podcast site. Note that my podcast site is three projects, the site, a utility library, and some tests. I found these docs useful for building ASP.NET Core apps.
- You'll see it triggers builds on the main branch. "Main" is the name of my primary GitHub branch. Yours likely differs.
- It uses Ubuntu to do the build and it builds in Release mode. II
- I install the .NET 3.1.x SDK for building my app, and I build it, then run the tests based on a globbing *tests pattern.
- I do a self-contained publish using -r linux-x64 because I know my target App Service is Linux (it's cheaper) and it goes to the ArtifactStagingDirectory and I name it "hanselminutes." At this point it's a zip file in a folder in the sky.
Here it is:
trigger:
- main

pool:
  vmImage: 'ubuntu-latest'

variables:
  buildConfiguration: 'Release'

steps:

    - task: UseDotNet@2
      displayName: ".NET Core 3.1.x"
      inputs:
        version: '3.1.x'
        packageType: sdk
    - script: dotnet build --configuration $(buildConfiguration)
      displayName: 'dotnet build $(buildConfiguration)'

    - task: DotNetCoreCLI@2
      displayName: "Test"
      inputs:
        command: test
        projects: '**/*tests/*.csproj'
        arguments: '--configuration $(buildConfiguration)'

    - task: DotNetCoreCLI@2
      displayName: "Publish"
      inputs:
        command: 'publish'
        publishWebProjects: true
        arguments: '-r linux-x64 --configuration $(BuildConfiguration) --output $(Build.ArtifactStagingDirectory)'
        zipAfterPublish: true

    - task: PublishBuildArtifacts@1
      displayName: "Upload Artifacts"
      inputs:
        pathtoPublish: '$(Build.ArtifactStagingDirectory)'
        artifactName: 'hanselminutes'
Next I move to the release pipeline. Now, you can also do the actual Azure Publish to a Web App/App Service from a YAML Build Pipeline. I suppose that's fine if your site/project is simple. I wanted to have dev/test/staging so I have a separate Release Pipeline.
The Release Pipelines system in Azure DevOps can pull an "Artifact" from anywhere - GitHub, DevOps itself natch, Jenkins, Docker Hub, whatever. I set mine up with a Continuous Deployment Trigger that makes a new release every time a build is available. I could also do Releases manually, with specific tags, scheduled, or gated if I'd liked.
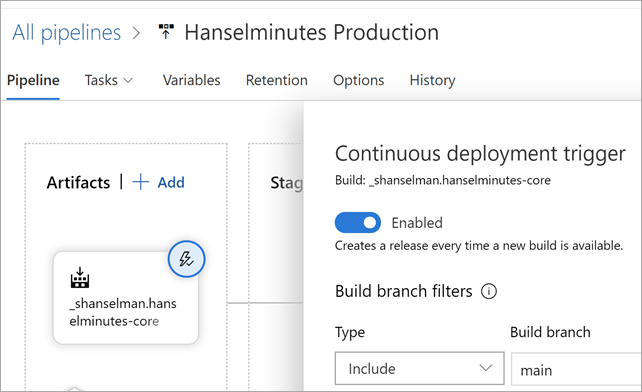
Mine is super easy since it's just a website. It's got a single task in the Release Pipeline that does an Azure App Service Deploy. I can also deploy to a slot like Staging, then check it out, and then swap to Production later.
There's nice integration between Azure DevOps and the Azure Portal so I can see within Azure in the Deployment Center of my App Service that my deployments are working:
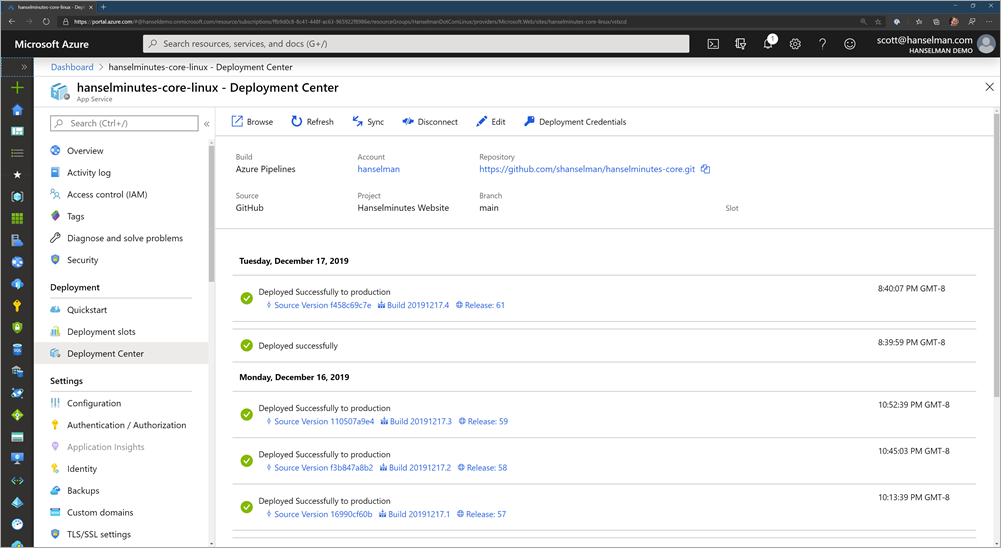
I've found this all to be a good use of my staycation and even though I'm just a one-person company I've been able to get a very nice automated build system set up at very low cost (GitHub free account for a private repo, 1800 free Azure DevOps minutes, and an App Service for Linux plan) A basic starts at $13 with 1.75Gb of RAM but I'm planning on moving all my sites over to a single big P1v2 with 3.5G of RAM and an SSD for around $80 a month. That should get all of my ~20 sites under one roof for a price/perf I can handle.
Sponsor: Like C#? We do too! That’s why we've developed a fast, smart, cross-platform .NET IDE which gives you even more coding power. Clever code analysis, rich code completion, instant search and navigation, an advanced debugger... With JetBrains Rider, everything you need is at your fingertips. Code C# at the speed of thought on Linux, Mac, or Windows. Try JetBrains Rider today!
About Scott
Scott Hanselman is a former professor, former Chief Architect in finance, now speaker, consultant, father, diabetic, and Microsoft employee. He is a failed stand-up comic, a cornrower, and a book author.
About Newsletter
- task: UseDotNet@2
displayName: ".NET Core 3.1.x"
inputs:
version: '3.1.x'
packageType: sdk
- task: UseDotNet@2
inputs:
version: '3.1.x'
Szasz - thanks, fixed!
You are right it is a very nice experience using CI/CD when targeting an Azure App Service web site. However the CD part of this is less than straigtforward when dealing with a web site hosted elsewhere, namely PLESK. I have struggled too long to deploy my web from the CD pipeline using all manner of File Extract / Copy Files / FTP Upload tasks to no avail.
Why can I just not use my Visual Studio Publish Profile as the basis for the CD deployment which just works seemelessly keeping a nice simple directory structure? Am I missing something?
Merry Xmas and thanks for your teachings during the year.
Mark
Not sure if I understand correctly, but when you say you did a separate release pipeline because you want to have different stages, I'm pretty sure it is possible to do it with YAML.
It could even be a separate YAML file and a second pipeline with all the stages triggered by the build artifact.
Those are my first steps with azure, and this is really helpful.
1) html
2) css
3) javascript
4) typescript
5) Angular / react / ASP.NET MVC
6) Bootstrap
7) C#
8) .NET Core 3.1
9) Entity Framework
10) SQL
12) WebAPI client side
13) WebAPI server side
14) Web security authentication
15) Docker
16) Azure configuration
17) Azure containers
18) Azure event monitoring
19) Azure deployments
20) Linux
21) Windows
22) Dependency injection in Angular, .NET Core
23) MVC
24) Web security
25) Web design
26) UX
27) Responsive Web Design
28) Single Page Apps
29) Git
30) GitHub
31) Visual Studio Code
32) Visual Studio 2019
33) Configuration files
34) Angular
35) Typescript
36) Visual Studio Code
37) OWASP top 10
38) TSLint
39) JSLint
40) JavaScript patterns
41) C# patterns
42) CI/CD tools, TFS, Jenkins, Octopus
43) JavaScript unit testing tools
44) C# unit testing tools
45) Mocking libraries
46) TDD/BDD/Cucumber, Gherkin, Fit, Fitnesse
47) Agile, Scrum
48) TFS, Azure DevOps agile taskboard, sprint planning tools
49) Database design
50) Document databases
51) Message bus
52) Yaml, Dockerfile syntax, Docker image internals
53) Requirements gathering
54) User story creation
55) DevOps, ITIL, monitoring systems - splunk
56) Sarbanes Oxley, basics of financials, end of period closing
58) Industry specific knowledge for your project
59) Database design, database basic security
60) Web server setup, configuration and security
61) Parallel environments for dev, QA, stage and prod
62) Two factor authorization
63) GPDR + PII
Feel free to add the many ones missed in the list.
Expecting a full stack developer to know most or all of these is bad
They are several persons entire career worth of knowledge
Like expert fluency in three major complex languages (C#, JavaScript, Typescript)
And of course, expecting the full-stack developer to have expert knowledge of the new and upcoming web frameworks also.
Does this process replace the one documented by Microsoft here:
https://docs.microsoft.com/en-us/azure/devops/pipelines/ecosystems/dotnet-core?view=azure-devops&WT.mc_id=-blog-scottha
If so that removes the need for VSTS, correct?
Comments are closed.

Just a quick comment:
You can in fact modify a task using the visual designer after it's placed. Above each task of your YAML file, there is a "Settings" button that you can click and that will open again the visual designer of this task filled with your current settings for this task and let you modify this task.