Right click publish quickly to Azure App Services with VS Code extensions and zipdeploy
I wanted to see what was the fastest way to get an ASP.NET Core web site up (for free) on Azure. First, I could use Visual Studio Community (which is free), and just right click Publish, sign into Azure, and make a free Web App and I'm cool. But I also wanted to see what it was like on Visual Studio Code (which would work on Linux, etc)
I downloaded these things. This is 10-15 min tops for download AND install. Likely less on a fast connection.
- VS Code https://code.visualstudio.com
- .NET Core https://dotnet.microsoft.com
- Azure App Service extension for VS Code
- C# extension for VS Code (NOTE: this will get automatically recommended to you anywhere when you open a .cs file for the first time.
This also assumes you have a free Azure account https://azure.microsoft.com/free/
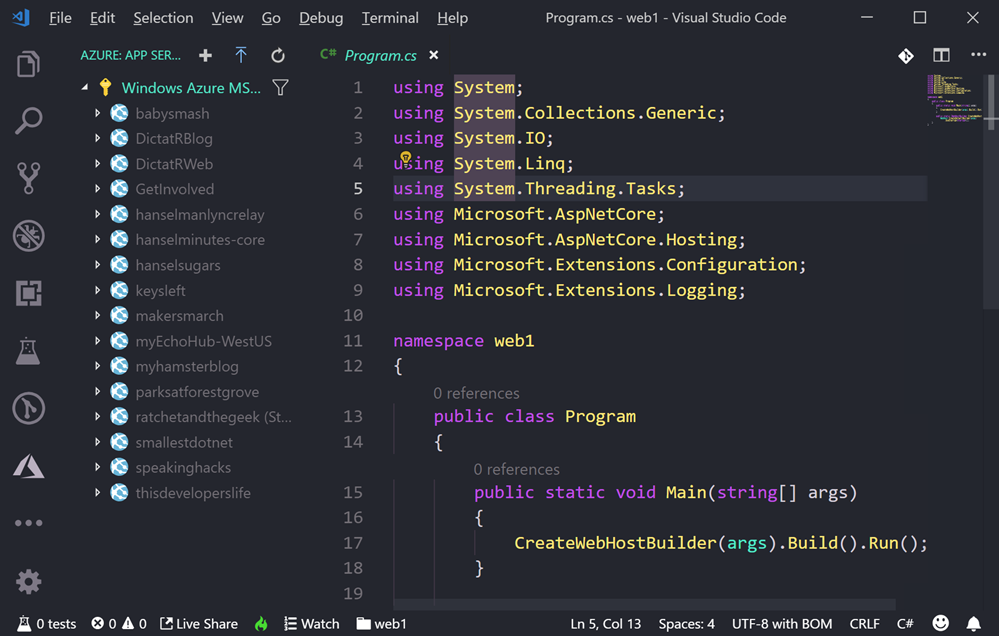
I made a new ASP.NET web site with "dotnet new razor" at the command line. The Azure App Service extension makes a new Azure icon appear on the left of VS Code. I can see my subscription(s) and any sites I've made before. I can right-click the top of the tree or just click the + plus sign.
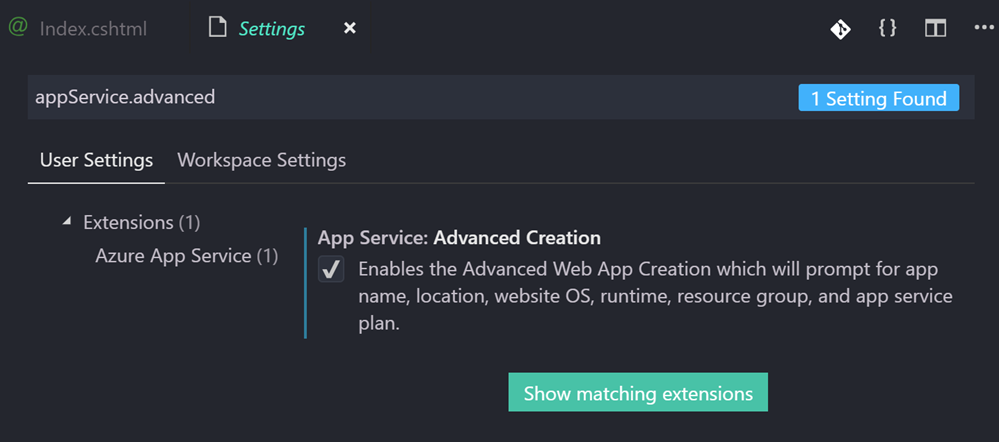
TRICK: The default mode of the Azure App Service extension is "basic" mode. This is fine for messing around, but it will assume a bunch of things. You don't have control over the location (it'll pick a nearby one) or really anything. Again, it's fine. However, if you DO want explicit prompts for name, location, OS, runtime, etc you can turn on "appService.advanced" in File | Preferences | Settings (or Ctrl+,). Don't feel you need to, but know it's possible.
Now, in my opinion, deploying apps (.NET Core, Node, or otherwise) directly from source can be a little confusing, and it doesn't really scale for anything other than proofs of concept. There's usually a "build" step, and ideally you'll have a CI/CD (Continuous Integration/Continuous Deployment) pipeline for anything of any real size. It's easier than you think - you can likely get a basic DevOps pipeline up in a hour or so. I commit to GitHub and it just deploys to Azure.
That said, a quickie deploy has value so I wanted to do it. You can do a "git deploy" to Azure where Azure is a git remote and you just "git push azure master" but...you're pushing source and Azure "builds" it in Azure App Service using a thing called Kudu. That means it'll run npm install, dotnet restore, etc, it'll take some time. You could deploy a container to Azure and just push it to a Container Registry, then spin up the container.
However, Azure also has a little known but rather clever "zipdeploy" feature. Once you've configured your Azure App Service for zipdeployment as a source, you can just POST a new ZIP deployment with Curl!
curl -X POST -u <deployment_user> --data-binary @"<zip_file_path>" https://<app_name>.scm.azurewebsites.net/api/zipdeploy
You might find that weird, or you might find it elegant. If it's the latter, use it. If it's the former, don't. You can even do it with minimal or no downtime by deploying to a staging slot and use Auto Swap.
I'm going to use the Azure App Service extension in VS Code and it's going to hide all of this and it'll just publish in one click.
Here's the important part if you want it to just work and work easily. You'll want to deploy from a folder that represents your published app. That means your app in a state that it's ready to go.
With .NET Core, the easiest way is to dotnet publish. Then I'm right clicking on that publish folder as seen in this screenshot. Given that the extension is zipping up the target folder and deploying it, I want publish the publish folder, not the root of my source folder.
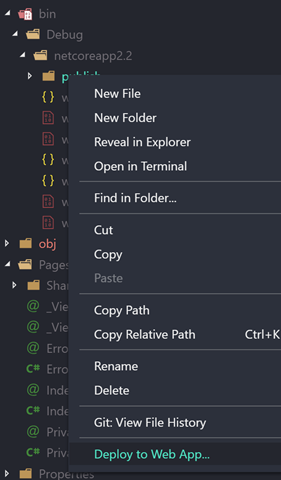
That will actually make a file .vscode/settings.json that will tell VS Code's Azure App Service extension what folder to deploy from in the future, thereby simplifying things.
{
    "appService.defaultWebAppToDeploy": "/subscriptions/GUID/resourceGroups/appsvc_rg_Windows_CentralUS/providers/Microsoft.Web/sites/fancyweb1",
    "appService.deploySubpath": "bin\\Debug\\netcoreapp2.2\\publish"
}
Below you can see the dialog that pops up "Always deploy the workspace ___ to ___" if you click Yes that will create the setting above specific to your application.
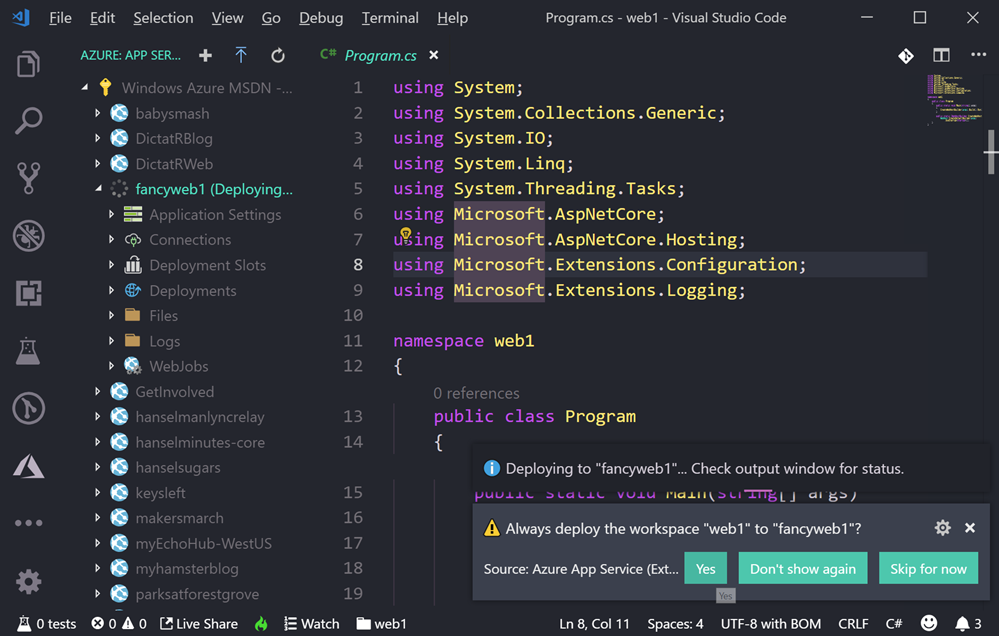
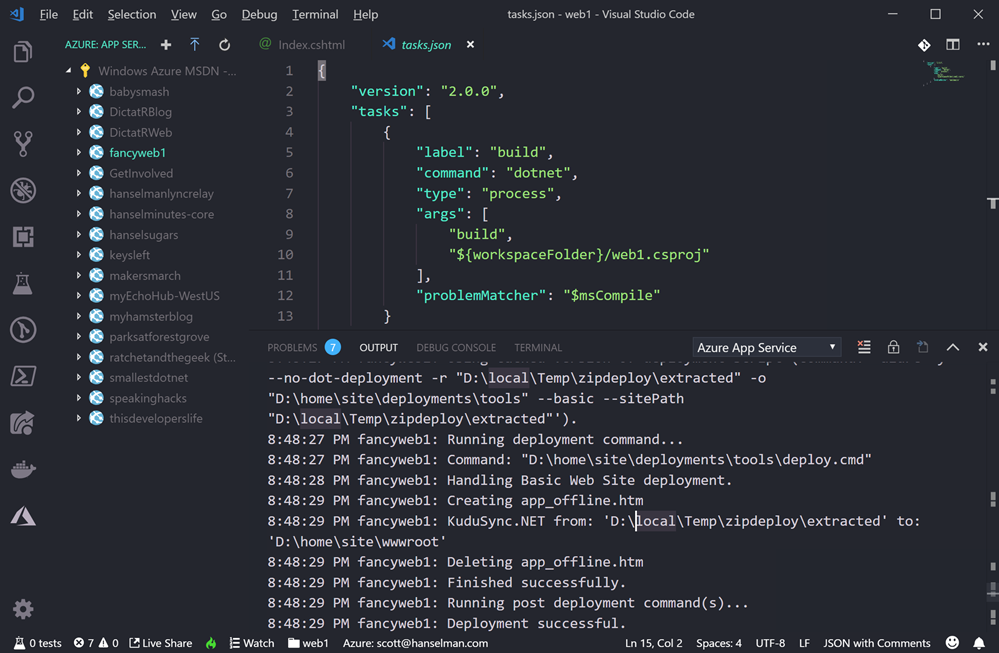
Now when I deploy, I can right click from anywhere and it will zipdeploy right to my site. Note the log below.
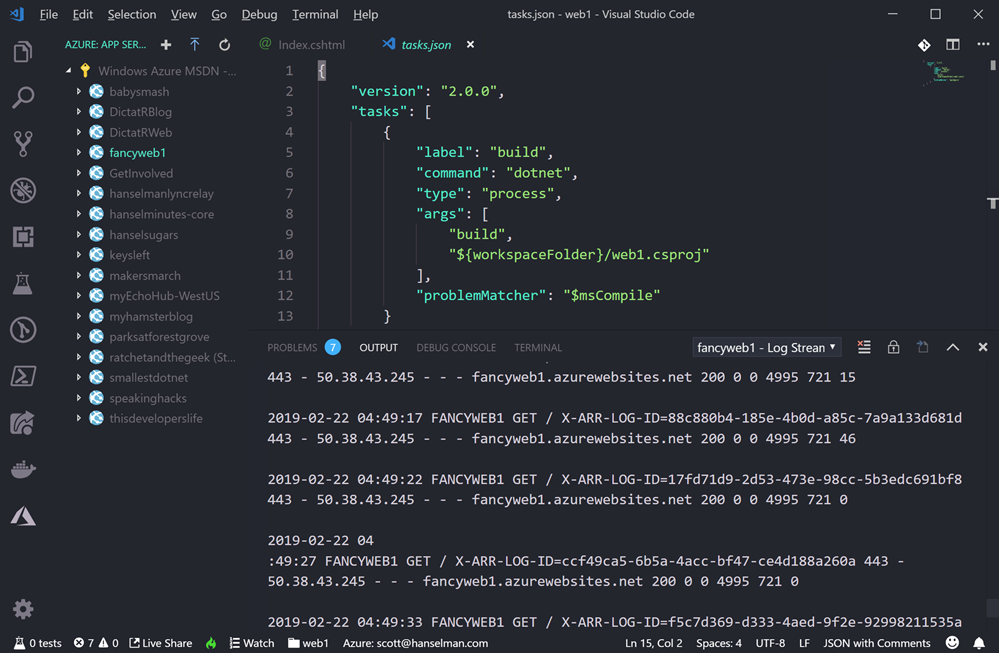
With this extension I can even right click and "Start Streaming Logs" and get output of the logs of your Azure App Service as it runs, right in the output pane of VS Code.
This will make things pretty easy for my simplest sites and proofs of concept. Give it a try!
Sponsor: Get the latest JetBrains Rider for remote debugging via SSH, SQL injections, a new Search Everywhere popup, and improved Unity support.
About Scott
Scott Hanselman is a former professor, former Chief Architect in finance, now speaker, consultant, father, diabetic, and Microsoft employee. He is a failed stand-up comic, a cornrower, and a book author.


About Newsletter
Better design company image, greater they usually cost the dog pros.
Comments are closed.
