The Basics of 3D Printing in 2015 - from someone with 16 WHOLE HOURS' experience
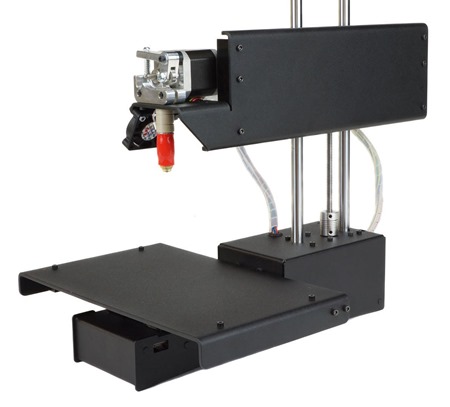 I bought a 3D printer on Friday, specifically a Printrbot Simple Metal from Amazon for US$599. I did a few days of research, looking at all the consumer models under $1000. Some were enclosed, others not. Some made of wood, some of plastic.
I selected the Printrbot Simple Metal because the reviews consistently said it was physically well made, rock solid, didn't require me to buy filament from the printer manufacturer, and Printrbot offers a number of updates like a heated bed and other attachments. I have the sense that this printer is basic, but flexible and expandable.
I've been using this printer now for basically 16 total hours over a few days, so we'll call it two days. I went through a number of emotions over this last two days an learned a TON, some about the Printrbot Simple Metal specifically, but also about 3D Printing in general.
Here's my 16 hours laid out for you, Dear Reader, so that you might save this time that was stolen from me. ;)
Disclaimer: I know jack squat about 3D Printing. If you're reading this, it's more likely than not that you know little as well. Any mistakes here are my own, but I hope my learning process helps you in your 3D printing journey.
Each hours includes an emotion and a lesson.
Hour 1 - Anticipation
Lesson 1: 3D Printers do not just work out of the box.
It's a hobby, not an appliance. Yet. There's a LOT of art to it, in addition to all this science. There's a million acronyms to remember. Here's the ones I've found useful.
- PLA Filament - "Polylactic acid (PLA) is a bio-degradable polymer that can be produced from lactic acid, which can be fermented from crops such as maize." It's the basic starter plastic you'll use. It's harder than ABS and melts above 180C.
- ABS - "Acrylonitrile Butadiene Styrene (ABS) is a commonly used thermoplastic as it is lightweight and can both be injection molded and extruded." It melts over 200C and should be used in a ventilated area.
- JsCad and OpenJSCAD - It's JavaScript for CAD! Lets you design stuff procedurally like a programmer.
- STL - Standard Tessellation Language. It's the most common format you'll find as you look around for models of things to print.
- G-Code - RS-274, a numerical control (NC) programming language. It's the "Assembly Code" for your printer. It is ASCII and uses control codes to tell your printer what to do. You'll take STL which is generic 3D and combine it with your specific settings and preferences to create G-Code that is the instructions that will be sent to your 3D printer.
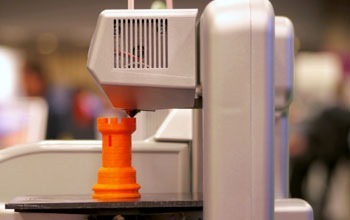
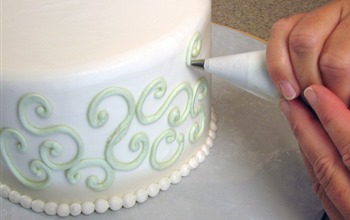
3D Printers are like those cake decorator pipings. The 3D Printer pushes hot, molten plastic through a tiny tube in layers to make a real object just like a cake decorator pushes hot sugar through a piping tube to write Happy Birthday.
Hour 2 - Annoyance
Lesson 2: 3D Printers really need to be calibrated.
The most important thing I've found is the "Z-Stop." Basically, you need to make sure that when your Printer's Head is at X0 Y0 Z0 that you can just barely fit a piece of paper between your extruder nozzle and bed.
The most important part of any print is the first few layers. If you build a good solid base for your 3D print then it will at least have a chance. If something goes wrong in the first few minutes it's not going to get better. Cancel the print before you waste more time.
I also found this list of tips useful: 10 Rules for top notch prints with your Printrbot Simple.
Hour 3 - Frustration
Lesson 3: 3D Printers are persnickety.
They are easily affected by the environment/temperature/your mood/Mercury in Retrograde. Cold garages aren't a great place for 3D printing as cold plastic is hard plastic and that breaks easily.
Temperature control : each filament has an optimum temperature for its extrusion. If you do not know, a value between 190 and 210° Celsius (374°-410° Fahrenheit). Start at 190° C and adjust the temperature according to the behavior of the filament: Shiny, too hot, Dull, not hot enough. Find balance.
Early on, expect only 1 in 4 or 1 in 5 prints to be useful. Fail fast, fail often. When you do have a failed 3D Print, write down your settings and compare it to previous prints.
Have a clear, solid table, find your place to print, and get organized.

Hour 4 - Resentment
Lesson 4: This freaking piece of crap is incapable of producing anything other than a molten pile of crap.
Learn about how there's different kinds of support mechanisms to sit under and support your model. There's Rafts, Skirts, and Brims and they all have different uses.
When in doubt, check your 3D Printer's Skirt.
Hour 5 - Disgruntlement
Lesson 5: Documentation for 3D printers is spotty because the tech changes every few months.
Collect links and compare notes. Start small. Don't print something massive (as I tried to, which made me more angry), print something tiny. 10 minutes max, then try again, change a setting. See what happens. There's a "calibration cube" file you can use.
The docs for your printer are useful, but you'll find even better information on Reddit but most of all on YouTube. There's a million great videos showing different techniques. Start by subscribing to Tom's YouTube Channel and go from there.
Hour 6 - Unfulfillment
Lesson 6: The first half-dozen things you print will be parts and improvements to the printer.
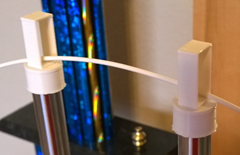
You'll wonder why it didn't come with all these things. There's no filament spool, no feet for the printer, no where to mount extra stuff. Fortunately for every problem I've had, there's someone on the Thingiverse 3D website that has had the SAME problem AND designed a part for me to print out.
My first "fix" was to print this small filament guide. A tiny victory, but still unfulfilling.
Hour 7 - Vexed
Lesson 7: Getting the filament to stick to the base will be your primary challenge without a heated bed. Ideas 'solutions' abound.
Whenever you have a problem with your 3D printer you will go and Google with Bing and find others with your problem. The 3D Printing community (in my 16 whole hours in it) is super nice. Everyone wants to help and share.
ASIDE: I LOVE ThingiVerse, it's like Wikipedia for stuff, and it's all Creative Commons. Share and Share Alike. I'm here.
However, when you search for your problem there are one of two things that will happen.
- You find someone just like you with the same software and same printer and they SOLVED IT AND THEY HAVE THE SOLUTION THERE FOR YOU TO USE.
or
- You find someone just like you with the same software and same printer and they NEVER FOUND THE ANSWER AND THIS QUESTON WAS ASKED IN 2009AND YOU WILL ALWAYS BE ALONE.
So. Ya. Be ready.
Hour 8 - Chagrin
Lesson 8: 3D Printing can take HOURS. Like, hours. Many hours. And then halfway through you'll bump it and start over.
But, while you're waiting for things to print, there are some amazing websites to explore, like OpenJSCAD.org. You can write JavaScript (you know JavaScript!) to describe the things you want to build.
Here's a cool example. Sometimes you'll find JsCad files and you'll want to turn them into STL files, then eventually GCode files to be sent to your printer.
function main() {
   return union(
      difference(
         cube({size: 3, center: true}),
         sphere({r:2, center: true})
      ),
      intersection(
          sphere({r: 1.3, center: true}),
          cube({size: 2.1, center: true})
      )
   ).translate([0,0,1.5]).scale(10);
}
Go and explore the relationship between STL and G-Code. Get the basics of G-Code in your brain. Remember typing "ATA" to answer your modem manually? No? Well, you had to do this back in the day, young lady, and it was magic. G-Code is just like typing ATA or ATDT to your modem, except it's instructions for your 3D Printer.
For example, my Printrbot was locking up at the same place during a print. I had no idea why. Rather than accepting the system is a "load a file, print, and pray," I looked at the G-Code and saw it was turning on a Heated Bed. I don't have a Heated Bed. I commented that part out and my print finished. Stuff like that will save you hours.
Hour 9 - Triumph
Lesson 9: Think about your printing area. Consider how your filament will feed into your printer and make a filament holder.
The Printrbot SImple Metal doesn't come with any formal way to feed the filament spool into the printer. I ended up having to move it every few minutes. After a while I used a broomstick and put the spool on it horizontally. Then I got sick of it and printed a Filament Spooler from Thingiverse to put on top of the printer. This was EPIC. This was my "I can do it" moment.
It was rough, and it broke off with just a few layers left, but it WORKED. It fixed a problem I had. Boom. I think this is going to be OK.

Hour 10 - Bitterness
Lesson 10: I didn't notice that all the printing and shaking was literally causing the printer to shake slowly off the desk.
In my last print the piece shook itself off the print bed. 4 hours almost wasted. I was able to use some sandpaper and fix it, but for a few minutes there I was pretty upset. Watch for things like shaking and look for solutions. I printed a set of feet and put rubber bases on them.
Hour 11 - Rage
Lesson 11: Remember what I said about heated beds and stuff sticking to the base?
It hurts even worse when it breaks off and is thrown across the room and you're left with a pile of hot plastic spaghetti. I've decided I want to upgrade to a Heated Bed at this point. This $99 attachment will keep the bottom of the model warmish and pliable so it doesn't warp as it cools. It also helps keep it stuck to the base.
Before this Heated Bed shows up, here's some things you can try to help prevent peeling of your 3D print:
- Glue Sticks - Get the Purples ones that dry clear. 99 cents.
- Blue Painters Tape - Required. Don't print directly on the bed. I put my tape lengthwise and I'm sure NOT to over lay them. Make it FLAT.
- Nail Polish Remover - Smear this over the tape with a cloth. I dunno if it works, and it stinks, but folks swear by it. I'm still testing it myself. Seems to do SOMETHING.
Also consider how thin/thick you're printing. I found that 0.2mm was my default, but for my current setup was hard to keep flat on the non-heated bed. I am having more success with 0.4mm, although the quality is less. There IS a setting that will work for your setup.
Avoid being near a vent or the AC. Cool air being blown inconsistently in a room can affect a print. I like to keep it toasty. Gotta get that Heated Bed soon. Damn these expensive hobbies that make you buy stuff after you just bought stuff.
Hour 12 - Heartened
Lesson 12: Use OctoPrint. It's amazing, it's brilliant, it's everything.
I started using the Repetier software that Printrbot recommends to load up STL files. These 3D models are then "sliced" with your choice of slicer software. The slicer is the thing that takes the 3D concept and makes it a series of G-Code instructions that will be fed to your printer. However my Printrbot would freeze up and I'd have to manually press OK in the Repetier software. I found lots of people with this problem, some fixed it with new USB cables, some never did. For me it came down to deciding NOT to use my Laptop as a print serve for 3 hour prints. If my 3D printer isn't wireless, well, darnit, I'm gonna make it wireless. So...
Hour 13 - Satisfaction
Lesson 13: Hook up a camera to OctoPrint so you can safely leave a print going while you go about your business.
As I read and absorbed, I found lots of references to OctoPrint as something I should explore. However, my Printrbot recommended software called Repetier and I didn't feel like setting up more software to get this thing to print, so I wasted a few hours NOT installing OctoPrint. This was foolish of me. Let me save you some time now. If you're not using OctoPrint you're in for a treat. Take the time.
Turns out since I had a Raspberry Pi and a spare Webcam lying around, this setup only took me 30 minutes. The basic idea is that rather than using your computer as a Print Server, you use a small embedded system. This can make your 3D Printer wireless!
What you do is this:
- Get a Raspberry Pi B+ or newer and a fast Class 10 SD Card.
- Optional: A cheap wireless USB dongle. I got this Edimax and it works great. Got two actually just in case.
- A 1A or greater micro USB power supply. I used a Samsung phone power supply.
- A USB keyboard (not wireless) temporarily.
- A Logitech or Microsoft USB Camera.
- Use Win32DiskImager and install OctoPi to the SD Card. Boot off the Pi, expand the partition to fill, optionally setup the WiFi on the PI, and you're set.
This little Raspberry Pi is now running my 3D Printer. Watch this wonderful YouTube by Tom who explains setting up OctoPrint on a Raspberry Pi better than I.
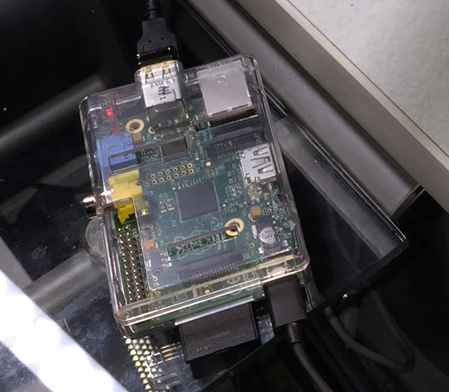
I hit http://octoprint.local and BEHOLD. I've got a nice bootstrapped website where I can see and control all aspects of my 3D Printer AND see the print via either my USB Webcam or a Raspberry Pi Camera.
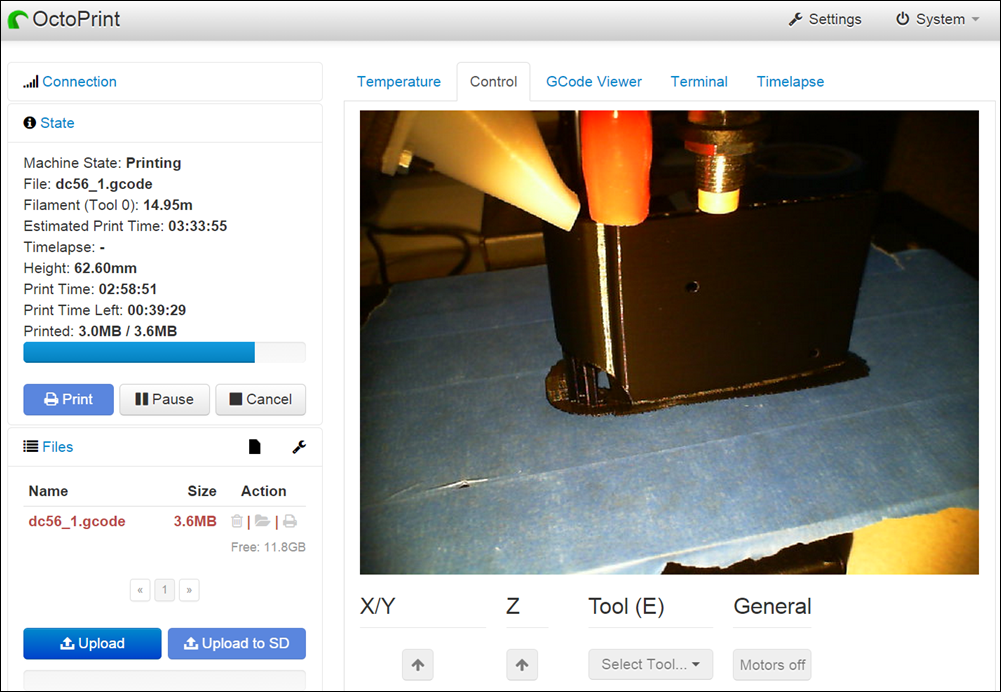
Now I can use my iPhone or Tablet to watch my print and shut it down if something goes around. No more babysitting!
Even better, you can setup OctoPrint to create cool Time-lapse videos of your 3D prints.
Hour 14 - Reassurance
Lesson 14: Maybe it will be OK. Why was I so angry early on?
I need to chill and 3D print some stuff. After a while things are starting to make sense. I'm still an unranked amateur but I'm one who can write this giant blog post, so I musta learned something.
I also learned that Ii t turns out that Windows 8.1 has support for 3D Printers built in. I didn't have to install any drivers, one was already on my machine. There's also a 3D Builder app in the Windows Store.
Here's the apps I've been trying and using:
- 3D Builder - Can model, slice, and print.
- Autodesk 123D Design - Free and for Windows, Mac, and iPad. Stores your designs in their cloud. NOTE: This has been deprecated but there are copies archived online.
- TinkerCad - A great online service from Autodesk that lets you do design in your browser!
- Repetier - Loads STL files and can launch a Slicer to make G-Code, then send the instructions to your printer.
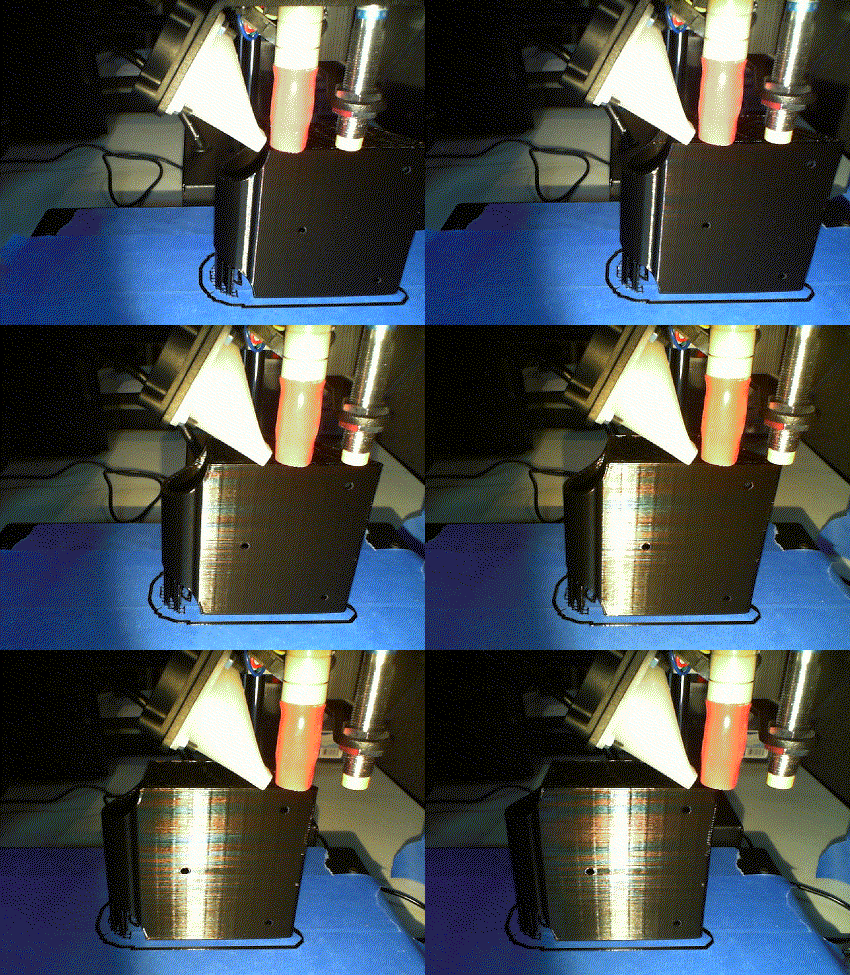
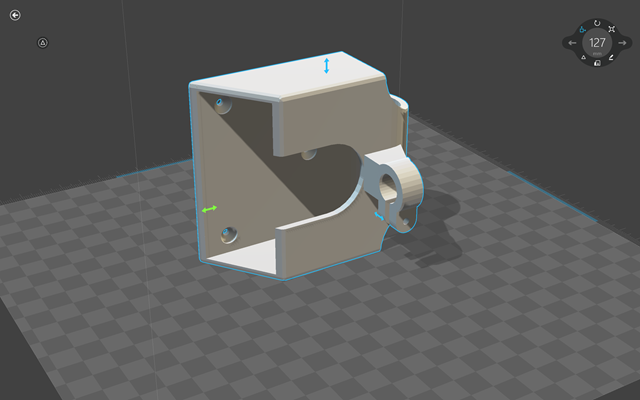
- Cura - A very well-thought-of slicer. You should explorer different slicers as you gain experience. These slicers have different algorithms, and some are smarter with different kinds of shapes. Some are focused on reducing "travel" (how far the print head moves) or minimizing your use of filament. Others are great at setting up "supports" for when you have a piece floating in mid-air, as I do in the pic below. That side bit will need a small temporary support to hold it up. I'll remove it later.
- OctoPrint - YES. DO IT. It's the best app to manage your G-Code and your printer. Model with whatever you want, but print with OctoPrint.
- Tinkercad - Do your 3D modeling all in the browser. Great for kids.
Also check out Jon Gallant's blog as he's on a quest for the perfect 3D Model Software. Here's his list so far:
- Part 1: SketchUp and 123D Design
- Part 2: Tinkercad
- Part 3: Blender
- Part 4: FreeCad
- Part 5: DesignSpark Mechanical
- Part 6: 3dtin.com
- Part 7: Autodesk Fusion 360
Here I'm working on a holster for my Dyson Handheld Vacuum. I have a DC56 though, and this is a DC34. It's close...but, not quite.
Hour 15 - Encouragement
Lesson 15: In which I take a JsCad into a STL then into G-Code and successfully 3D print.
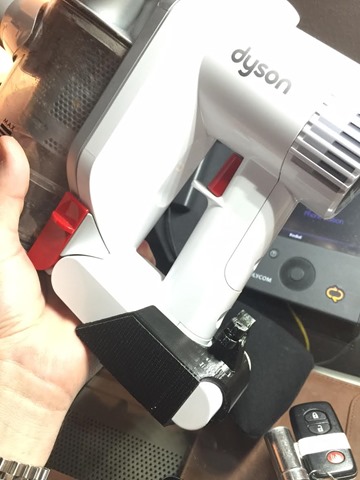 I want a holster for my Dyson Vacuum so I found this DC34 Wall Charger holster/holder. In this comments of this other model on Thingiverse, I saw someone modify the JsCad for the design to add a little room for the DC56 over the DC34. However, it was in this JsCad format.
- It took me a second but I realized I just needed to take the original JsCad file (remember this is JavaScript that expresses a 3D design), open it in Notepad, and change the parameters with the new measurements.
- Then I ran my new file through the OpenJsCad parser online.
- I took the resulting STL file and loaded it into Repetier and sliced it with Cura. This made a G-Code file that's MY custom instructions with my preferences.
- I then loaded the G-Code into OctoPrint and printed.
- PROFIT. Well, no, but FEEL ACCOMPLISHMENT.
Here it is. Now I'll mount it to the wall and check that off my Bucket List. What should I print next?
Hour 16 - Power
Lesson 16: You can do this. I can do this.
It will take days, perhaps weeks, but you'll have a satisfying new hobby that will make you more powerful than before.
OK, so I can't just print all the free LEGO I want whenever I want. (I would never do that, I respect the LEGO Group too much.) I mean, I can't just make stuff on-demand. Yet. But I can solve some small problems and I am learning. I'm getting better. Each print teaches me something. I'm MAKING physical stuff with Software. This must be what Woodworkers and proper Handypeople feel like.
Conclusion
- Is 3D Printing ready like Inkjet and Laser Printers are ready? Nope.
- Is 3D Printing ready like Microwaves are ready? Nope.
- Is this Plug and Print? You'll need a few hours, days, weeks. Hopefully I've saved you some time or at least helped you decide if you want in.
But I bet in 3 to 5 years I'll be able to buy a solid enclosed reliable prosumer 3D printer for $599 from Office Depot, bring it home and have it just work. I'm stoked and I am happy with my Printrbot Simple Metal even if I don't get any further than I have after these last 16 hours.
What do YOU think?
* These are Amazon referral links. I use the few bucks I get if you buy stuff from Amazon to buy 3D Printer Filament! ;) Click click!
Sponsor: Big thanks to Amyuni for sponsoring the feed this week! Amyuni PDF Converter and Creator for .NET enables you to integrate powerful PDF functionality with just a few lines of code. Generate and process optimized PDFs with industry proven technology. Switch Now!
About Scott
Scott Hanselman is a former professor, former Chief Architect in finance, now speaker, consultant, father, diabetic, and Microsoft employee. He is a failed stand-up comic, a cornrower, and a book author.
About Newsletter
Very interesting, and something else that I need to add to my wishlist.
However, the commercial printers are a lot better already. I gave my brother an Up!Mini and it really was plug and play - draw it in tinkercad, send it to the printer. None of the issues you mentioned, or which I experienced and still do experience from time to time. Still, if you are savvy enough to assemble an open source printer, do it, the experience is golden!
That said, I think the page has a number of links that need correcting (some go to a blank page, others seem to go somewhere other than where you probably intended).
Just a heads up :)
The MakerBot 2 has an open top and sides. The newer models have plastic windows and a cover on the top that keep airflow to a minimum. We ended up improvising with some plexiglass we had lying around the office.
Since you've got a webcam setup already you might consider setting up some walls around the printer or maybe completely boxing it in. There are overheating concerns so a couple of vent holes might not go amiss.
Nobody ever says this about making an outfeed table for your tablesaw, using your tablesaw. Weird.
Things that are worth pointing out:
- Make sure the inductive probe is securely plugged into its extension wire so that it can't come out! One of my more unpleasant experiences was having the hot end crash hard into the bed on Z homing and try to keep going because it never detected the bed. Turned out the probe had worked itself unplugged. Heat shrink tubing or even zip ties are good for this.
- You'll think you've got your settings dialed in for the 'bot because you got a nearly perfect print out of it. You don't. You have your settings dialed in for that model in that filament on the 'bot. The same settings very well might product spaghetti with another model or different filament (even a different color).
- The heated bed might not help as much as you're expecting. It is an improvement, but you'll still see warping. And you'll need to figure out what kind of tape/surface to use. I've had reasonably good luck with BuildTak, but others report less success. Also, make sure you have an ATX power supply to go with the heated bed! The laptop supply that comes with the 'bot can't run it.
- Once you start to get the hands of the various settings in Slic3r and Cura, you might want to take a look at Simplify3D. It's expensive ($140), but it produces some of the best toolpath code (GCode) of any slicer, and nothing can touch it in terms of support material generation (and customization).
- As you've already found, the Printrbot community (and 3D printing community in general) is awesome, and Brook Drumm is pretty responsive on Twitter.
I very much hope you continue to enjoy it! Don't be afraid to step away for a few hours/days when it gets particularly frustrating.
One question, I know you did a podcast on 3D printers some time ago (6 months?)... Why now? Why did you decide it was finally time to buy a 3D printer?
We use the blue painters tape on our unheated print bed as well and it typically works very well. About the only time we have slippage problems is on small isolated pieces and so we put rafts under those builds. As you said, understanding the different support times is important.
We've enclosed the sides (but not the top) and that helps as well in regulating temperature in the build area. Although we still see curling of the corners of larger rectangular pieces (>4-5 inches).
I found it interesting that you mentioned OpenJSCAD which I had never heard of. I use OpenSCAD, which it seems to be based on, for many of my models (I'm mostly making sci-fi spacecraft miniatures at the moment). I'll have to check out the JavaScript version and see how things translate.
As a recreational TOY, I'm sure they're fun to play with. But we are light years away from 3D printers becoming a commonplace consumer item -- mostly because there's no real, generalized need for them.
Kudos for your patience and persistence -- I would have boxed the whole thing up and sent it back to Amazon at about hour 4 or 5...
As a consumer item, you're probably mostly right. Although as a positive example, I sat down with someone and in about 30 minutes reproduced a plastic part that had broken in a fairly expensive gadget (I can't remember what it was now). It took about 10 minutes to print and everything was working again. Scott's vacuum piece is another good example. It's definitely geared at DIY types right now but as Thingiverse expands there were be more and more that you can just download and print as needed.
However, as an engineering and research tool they are wonderful. We had a student who is doing research on rocket engine design and he was able to quickly and cheaply print prototypes of engines to work out the details of fluid and air flow until he had a good design before 3D printing the final actual engine in metal as a single solid piece instead of multiple parts. He could print his prototypes for pennies on the dollar compared to what it cost to print the final one (I think his prototypes were costing about $2-3 and the final metal one cost $80) and could iterate quickly. He was typically printing new versions ever other day as he made adjustments to the design.
- Ford motors is making full scale auto part prototypes for use in test vehicles which cuts down casting a new metal part from 10 weeks to about 1 week. http://www.computerworld.com/article/2490192/emerging-technology-inside-ford-s-3d-printing-lab-where-thousands-of-parts-are-made.html
- Jay Leno is 3d scanning classic car parts, cleaning the 3d models and making a plastic copy of the part. The plastic copy is sent out to make a mold from which the final metal part is to be cast. This allows parts unavailable to the rarity and age of a classic car to be made. http://www.popularmechanics.com/cars/jay-leno/technology/4320759
That's a new one to me. I've made a few birthday cakes for my kids over the years and I've piped icing onto the cakes, but it isn't hot. Just icing sugar mixed with a bit of water (and maybe some butter).
You can pipe melted chocolate, which would need to be hot - messy but yummy.
-dave
http://blog.scoutingmagazine.org/2015/01/28/3-d-printed-hands-aka-the-coolest-service-project-ever
I've been through the same thing, only I tried to use it for business. Multiple printers. A couple months of nightmares that was.
All that to say - don't assume that all 3D printing is like this. After spending $20K-ish for a pro machine, it's really nice to just hit 'print' with software that works exactly as you expect, and a printer that doesn't need help calibrating and produces perfect parts every time. Don't let the $500 machines make you write off the technology altogether after reading this.
"This whole thing about using your 3D printer to make new parts for your 3D printer is soooo
Skynet, it's almost scary."
Nobody ever says this about making an outfeed table for your tablesaw, using your tablesaw. Weird."
Ok, no need to get Kranky - was kind of joking ;)
Some bits to add to Scott's post -
Go for enclosed (will help with temp control) and square frame (makes calibration easier and less affected by bumps). Heated bed highly recommended (for reasons Scott lists above).
Specific printer I can recommend from first hand experience: Solidoodle. These are very similar to the Makerbot models, but cost a little less without skimping on parts. I can also state they are very helpful if you have issues or questions. We got ours up and printing in under and hour and just followed the guide on initial calibration.
If you are looking to get a 3D printer, find your local Makerspace and take a visit. These people will not only be able to talk in detail but also have several printers on hand they can show. They also know all the horror stories because they have lived them.
A good place to get more info is the RepRap forums but know first these folk are interested in printers that make printers first and ease of use second. They also have a tendency to not recommend commercial options even if it the best for your needs when an open hardware option is available.
- Blue painters tape, isopropyl alcohol. Blue painters tape has a thin wax layer on it to keep paint from sticking to and absorbing through the tape. Nail polish remover is mainly acetone, and although this is a solvent, isopropyl alcohol is better for removing this layer of wax. Let the alcohol completely dry before printing. This is fast with a heated bed. Note: Acetone will however melt ABS. The Blue Painters Tape (3M 2090, you can find 3 inch wide rolls) has always worked for me, better with a heat bed, sometimes too well.
- Pallet tape, for silk screen printing comes in 6,8,12,18,24, and 36 inch widths. It is designed to be heated for curing printing inks. It also works very well, more often than not too well. I cut rolls down to fit my print bed as one piece of continuous tape. Again, usually works so well it is extremely difficult to get the print off the print bed.
- Curling, notice that most prints that curl start at a sharp corner. While designing, put a single layer circle on these corners that can be broken off later. This is especially useful if you don't have a heated print bed. The circular pad holds your part securely and easily breaks off after printing. A little sand paper can smooth out any rough edges.
-Heated bed, so worth investing in. Prints come out flat, and stick well to the bed. I use Repetier Host Mac, it allows me to set a first layer temperature for both the filament and heat bed, which can then change for subsequent layers. I like a toasty first layer(55 C), but then cool down to 40-45 C for the rest. An ATX power supply is needed, but this also lets you power other peripherals. I run my RPi off the same ATX PSU as well as LEDS to light the print bed for my PiCam for OctoPrint.
-OctoPrint, I also love this convenience. I have a Model B, it was glitchy at first, but with the newest Simple Metal firmware seems to play nice now. I also load all my files to the on board SD card on my Printrboard. Running off the SD card yields the smoothes prints for my printer. Feeding my printer from the RPi produced lots of pauses and print deformations. This was eliminated by loading files directly to the SD card. I am excited to get a RPi2 and try that new little beast as an OctoPi.
-ATX PSU, it is not formally documented as it is not produced by Printrbot. Use with caution, heating both the extruder and heat bed simultaneously can create a degrading cycle and fires. As current is pushed through wires it creates heat, which reduces the current capacity of the wires, which creates heat, which reduces the current capacity of the wires, which creates heat... you see where this is going. On the Simple Metal, the Printrboard is directly below the heat bed, so a lot of heat is already there reducing the current capacity of the wires. I have moved my Printrboard outside my Simple Metal frame and enclosed it in a printed case with my RPi which are both cooled by an 80mm fan powered by my ATX PSU. Increasing wire gauge as well as using silicone insulated wire will reduce the risk of fires. Be careful, leaving your Bot alone is risky. Fire happens. This is a reality for all 3D Printers.
- 3D printing is fun, useful, yes useful, and I actually think chicks dig it. At least my wife does.
Have fun, and print on. Cheers-
Matt
Also, you may soon realize not all designs on thingiverse can be printed without a good deal of fussing. They may not slice since they are non-manifold, etc., though slicers are better at handling that now. They may not be rotated or scaled properly. The may require the judicious placement of supports. Some designs are indeed wicked cool just not all that appropriate for filament based FDM.
Regarding the simple metal bed prep. I do see you have the blue tape and the purple glue stick. The voodoo ritual I use to prep the bed is to apply new tape, scuff it with fine sand paper to remove the sheen, wipe it with paint store alcohol (the good stuff, stove fuel quality) and apply the glue stick to the bed lightly which adds back a sheen but a sticky one this time. This process requires me to have to use a decent amount of finessed physical force to remove prints from the bed. As for nail polish remover (acetone) it applies more for ABS (slurry glue, smoothing), also best to get it from a paint store in a quart or gallon and decant it to small containers instead of raiding someone else's cosmetics stash.
OpenJSCAD is pretty cool, seems faster to render on the web than OpenSCAD on the desktop. Even thingiverse customizer can be a real dog. Tip: do not overlap anything that does not absolutely need to be overlapped.
How about you develop some C# kind of constructive solid geometry fluent-ish thingy? Then I could use LINQPad or power shell even to create models. Though OpenSCAD feels more F#-ey to me, I don't want to go there;) Or should I just stop fighting the trend and wait for OpenJSCAD to be converted to typescript (aka C# light).
A quick bingle search shows there may be some basis for this out there already on top of unity. Hmm.
https://gist.github.com/foofoodog/590cff62be6cc54f34e1
Also have some C# wrappers around the REST API (gets only), in case you want to query the printer from, say, LINQPad.
https://gist.github.com/foofoodog/a8be6e453513949fa884
More info: https://www.reddit.com/r/3Dprinting/comments/2b9snt/pei_sheets_as_a_printing_surface_best_thing_ever/
Caligari/Microsoft trueSpace. That one you have to go and hunt for. Microsoft bought Caligari in 2008, intending to use trueSpace as a free tool for people to populate their competitor to Google Earth with 3D stuff.
That lasted until 2009, when Microsoft discontinued trueSpace. The version you want is the last release of the full version of 7.6 with both "model side" and "workspace side". Model side is essentially trueSpace 6.6. Workspace side is the completely overhauled version of trueSpace that includes many new features. There's also an unofficial beta update. IIRC released in two versions, one for the model/workspace version and one for the workspace only version.
I've used trueSpace since its early Windows versions, 2.1a. Somewhere along the line it gained the ability to export to STL and I've had some things 3D printed directly from its STL output without problems.
trueSpace started out as an Amiga program, then was ported to Windows, thus its "unconventional" interface, which is no weirder than Lightwave, which also got its start on Amiga. trueSpace 6.something acquired a native rendering engine also available as a very expensive addon for Lightwave, while selling for less than the cost of buying that rendering engine addon for Lightwave.
Hour 20: You start buying plastic like crazy, you've just GOT to try out new materials you've heard about and of course that model you just HAVE to print from Thingiverse would look good ONLY in that purple color you don't have yet.
Hour 40: You realize that you've probably put as much money into your plastic collection as you did for the printer.
Hour 200: You decide that since you've got single extruders mostly working well to go for a dual extruder upgrade.
Hour 220: You realize that the difference in difficulty from 1 to 2 extruders is WAY more than the difficulty from 0 to 1 extruders. The slicing software which claims to support dual models really is just beginning to maybe understand what it will have to add to actually work someday.
Hour 300: Suddenly everything that used to work fine seems to have stopped. Your favorite tricks to get the print to stick well to the bed aren't working. The first few layers are coming out messy. You aren't sure yet if this means your bed went out of alignment, the voodoo wore out, the planets are out of alignment, or your previous successes were something you imagined. All seem equally possible.
What do you think about formlabs.com printing technology ? (Stereo litography, taking apart the pricing :( )
Regards from Chile,
René
Good tips. A layer of hairspray also works to keep it stuck to the bed, although personally I find kapton tape on a heated bed to be enough.
Some might say that these unrecognizable blobs of molten matter have some flaws, but I choose to ignore them because these blobs are my children. They are my children and I will love them forever. I held you while you grew for 5 hours and you are mine and perfect.
Comments are closed.


The enclosed models are that much better. We have a couple of Makerbots and get about the same numbers 1/5 for new items. Even when we get a model we know has printed correctly, it might fail the next time. Something as little as the air coming in from a vent can wreck the print.
Even with the trouble, it's still a lot fun. The technology will only get better and cheaper.